WiseCleaner Think Tank
Encounter difficult computer problems?
All about maintenance and optimization of your Windows System.
Jun 9, 2025
If you are experiencing incorrect network configuration issues on your Windows 11 PC, such as slow or unstable connection, “Unidentified Network” message, or no internet access despite being connected to Wi-Fi, a Network Reset might usually solve these problems. Follow this step-by-step guide to use the built-in option to perform a network reset on your Windows 11.
This process will remove and reinstall all your network adapters and reset networking components to the default state, including your saved Wi-Fi networks, Bluetooth pairings, and any custom DNS or IP settings, etc.
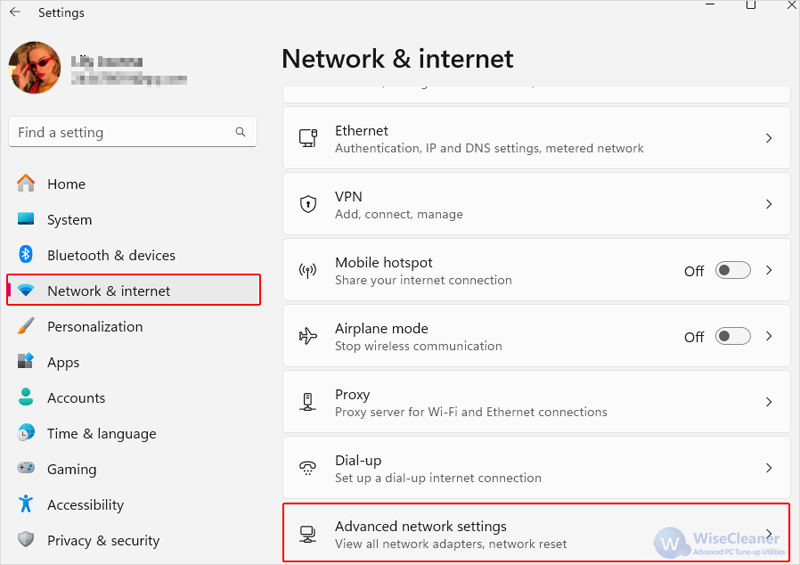
Directly open the Windows Settings app by pressing Win + I on your keyboard.
From the left sidebar, click the Network & internet tab and then select Advanced network settings from the right.
Under the More settings section, click Network reset.

Click Reset now, then when the prompt appears, select Yes to confirm and start the process.

After resetting, your PC will be automatically restarted within 5 minutes, then reinstall and reconfigure your networking devices and software manually.
A network reset is a helpful and easy-to-use tool when you are facing persistent connectivity problems. You may also interested in how to reset your iPhone network settings.
Additional Related Articles
wisecleaner uses cookies to improve content and ensure you get the best experience on our website. Continue to browse our website agreeing to our privacy policy.
I Accept


