Watermarks are a sign of brand communication and video ownership. Creators must be careful to add a watermark while editing their videos as it makes it easier for viewers to remember the brand and attract potential customers. More importantly, you must know where to add one. But do you know, besides brand exposure, watermarks also let you protect your intellectual property rights and prevent others from maliciously tampering and stealing your video?
This article deals with three efficient ways to add a watermark to your video and safeguard your work from copyright infringements. Stay tuned with us for a knowledgeable read.
What Is a Watermark: Need and Benefits
Video watermarks are essential for creators to prevent unwarranted access, use, and redistribution of video content. It is an embedded overlay, constituting a logo or text on a video or a copyright disclaimer to identify the content and discourage unauthorized users from accessing it. Check why you must use it and how it can protect you from copyright infringement.
- Video watermarking helps protect copyrights
- Video watermarking aids as a branding tactic
- Prevents web scraping
- Restricts editing and cropping
Compelling video content security helps content creators and owners in the following ways:
- Safeguards the video content throughout the release windows
- Ensure that the video content is secured through diverse media and automated file formats
- Communicates possession of the copyrights and rights to the content usage
- Protects the content without interfering with the entertainment experiences of the viewers
- It protects the content against possible threats like copying, camcorder recording, peer-to-peer sharing, encoding, format conversion, etc.
Different Ways to Add Watermark to Videos
Here is a list of three special software programs that let you add watermarks to your videos and protect yourself against copyright infringement. Have a quick look.
- Add a Watermark to The Video Using Wise Video Converter
- Add Watermarks to Video with Windows Movie Maker
- Add Watermarks to Video Using Online Tool Veed.IO
Method 1 - Add a Watermark to The Video Using Wise Video Converter
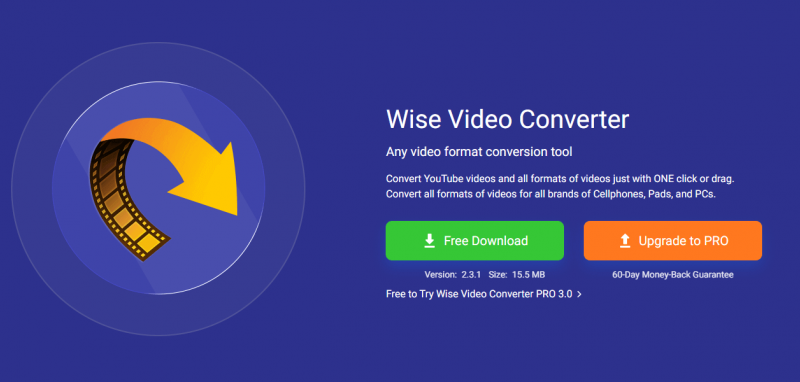
Wise Video Converter is a reliable, professional video converter tool to convert any video format to be playable and work seamlessly for all brands of cell phones, tablets, and computers. It is a fast, powerful, and easy software that lets you add watermarks to the video to protect it from copyright. It allows you to make your switch between devices more flexible. With a clean and user-friendly interface, the conversion process of the software is easy and quick.
Step 1: Launch Wise Video Converter.
If you have not installed it, please click the link below to download and install the Wise Video Converter from the official website.
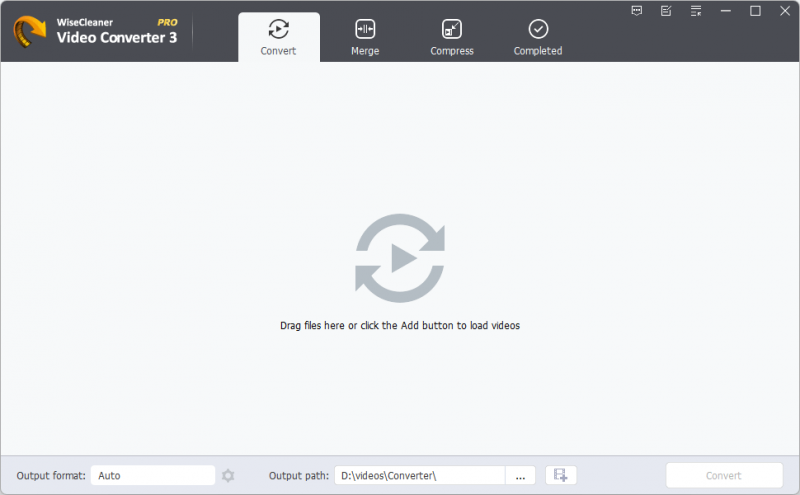
Step 2: Add a Video
Click the Add button at the bottom of the window to upload the video to be watermarked.
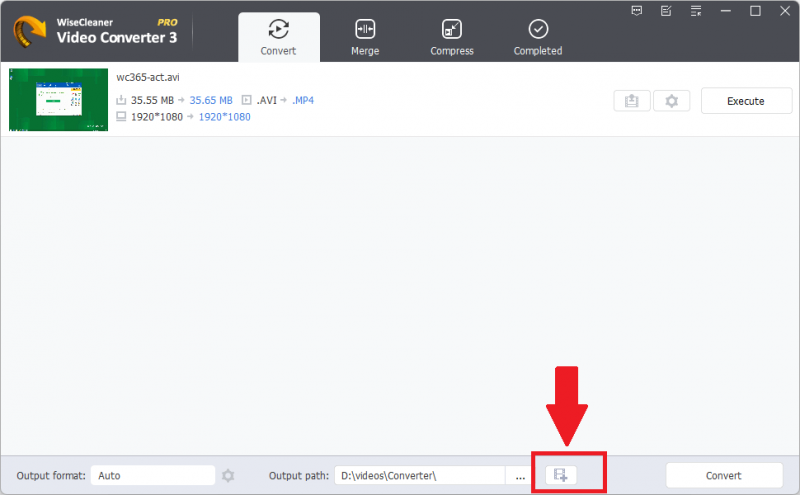
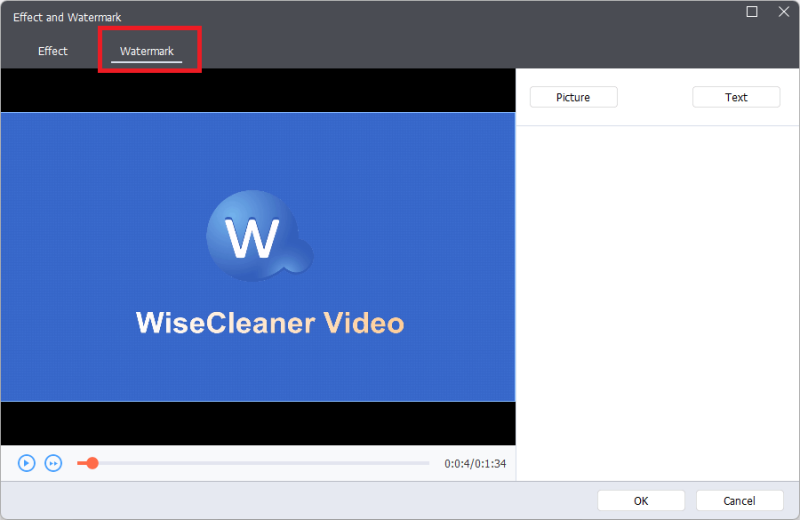
Step 3: Open the Watermark window
Once the video is successfully uploaded, two icons will appear next to the video, one for adding a watermark and the other gear-shaped icon for conversion settings. Tap the Watermark & Effect button.
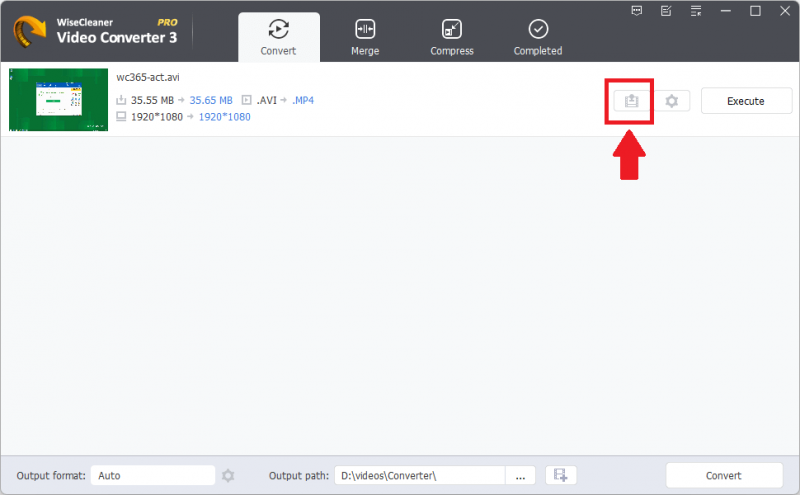
Then switch to the Watermark tab.
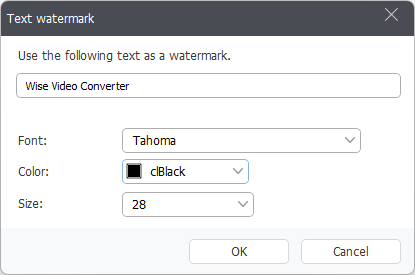
Step 4: Add a watermark
Wise Video Converter supports image files and text as watermarks. Click the Text button, type the words, and set up Font, Color, Size.
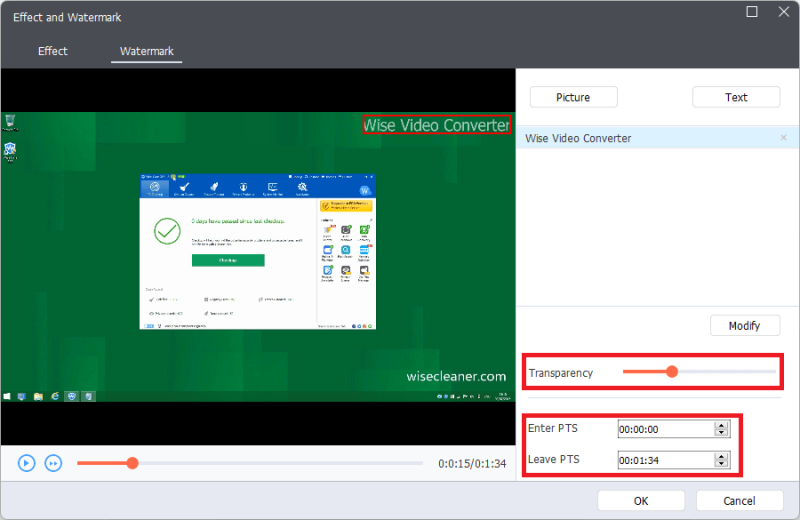
Then adjust the text watermark position, transparency, and appearance time.
Step 5: Convert videos
Then click the Execute button behind the video or the Convert button in the lower right corner to start converting the video.
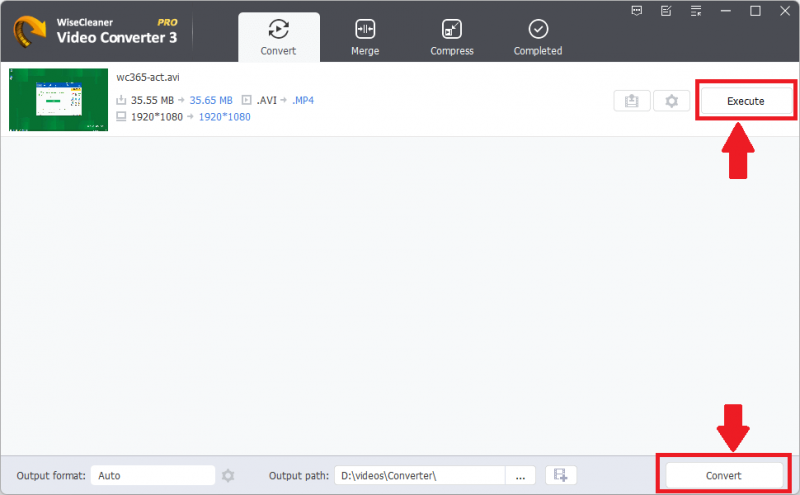
Note: If your video is in MP4 format, it'll still be converted to MP4 by default without selecting it. However, to convert your video to other file formats, click the Conversion settings and choose the appropriate form.
Once the video conversion is complete, click Completed in the top menu bar and right-click the converted video. Select Open to view it.
Method 2 - Add Watermarks to Video with Windows Movie Maker
Windows Movie Maker is a multimedia app developed for Windows PCs, best for adding animated and handwritten text watermarks to videos. It benefited Windows users to create and enhance videos, especially for non-professionals, beginners, and casual editors.
However, it is now discontinued (since 2017) and replaced by the Movies & TV application in Windows 10 and 11, with editing features relocated to the Photos App. Users can draw or input text to the video starting at a particular time.
Key Features of Windows Movie Maker
- Clean, freeware, and easy-to-use interface
- Offers various editing options to enhance videos
- It helps adjust the audio levels of the clip
- Multi-line text overlay
- It lets users add text to their videos
- Time-lapse quick tool
- It does not leave a watermark when used
- Apply and auto-preview of effects
- Voiceovers and other audio features
Step by Step Guide
Step 1: Find the video you want to add a watermark in the folder.
Step 2: Right-click your chosen video and open it with the Photos app.
Step 3: Select the Edit & Create dropdown menu button and choose Draw or Add animated text option.
Note: When you select Draw, you can use a ballpoint pen, pencil, or calligraphy pen to handwrite an image, logo, or text starting from the time you seek appropriate.
The drawing feature lets you handwrite certain lines with the help of pausing the video to make the watermark animated.
However, when you select the Add animated text option, you can easily add text to the video in the desired style and layout. But it only allows up to 140 letters input in the animated text box, and the style is all fixed.
Method 3 - Add Watermarks to Video Using Online Tool Veed.IO
Veed.IO is a powerful, free, and versatile online tool that helps users add watermarks like text, logos, and more to their videos online. You need not install the app. Just upload your video, add your watermark photo, and place it anywhere on the video frame. Ensure using a transparent watermark background so it doesn't block your video.
Key Features of
- It offers a clean and elegant interface with capable tools
- Provides exclusive editing tools to create thumbnails, trim clips, remove background noise, etc.
- Enhances audio quality, adds stock videos, and auto-generates subtitles in one click
- It makes training and development videos look professional
- Enables you to add watermarks, text, and logos to your videos online in a few clicks
- Supports all popular video file types, including iPhone videos
- Supports other popular formats like AVI, MP4, MKV, and more
Step by Step Guide
Step 1: Launch and open Veed on your browser and upload your video to the site by clicking the Choose Video tab on the homepage.
Step 2: Select your video from the folders or drag and drop your video into the box.
Step 3: Tap Upload from the left menu and click Upload Image.
Step 4: Select your image and keep it in your chosen location on the video frame.
Step 5: That's it. Your video will now have the watermark. Tap on Export to download your video to your device.
Final Words
Watermark is an excellent branding tactic that helps prevent web scraping and restricts unauthorized modifications. While manual watermarking is a great idea, automated watermarking is more effective in enhancing better content security. We have shared three watermarking tools for PC and online to help you add watermarks and safeguard your creation seamlessly.
FAQs
1. Does watermark mean copyright?
Artists resort to watermarking their digital creations to prevent others from stealing their work. Though a watermark is a great deterrent and serves as a reminder of copyright, it's different from copyright.
2. How can I create a watermark and use it on my photo?
Many tools are available online to help you create a personalized watermark text or logo. For example, you can use Canva to create and add a watermark to your photo.
Step 1: Launch and open Canva on your web browser. Or download the free Canva mobile app on your phone or tablet.
Step 2: Explore its readymade watermark designs or personalize by typing Watermark or Logo in the search bar. Alternatively, you can create a custom photo watermark from scratch.
Step 3: Start a new project and use Canva's text tool and extensive font and media library.
Step 4: Save your watermark design as a PNG logo or image with no background. However, if you already have a watermark file, upload it to the editor.
Step 5: Once created, you can upload your photo to be watermarked or drag and drop your image file onto a blank editor. Place your watermark on the photo frame and adjust its appearance by resizing it. After previewing your photo, download your newly watermarked picture and save it as a PNG, JPG, SVG, or PDF file.
3. Can I add a watermark to my uploaded YouTube videos?
Yes. Ensure to create and save your watermark outside your video editing program.
Step 1: Open your YouTube account > Tap your profile icon > Select Settings.
Step 2: Click on View additional features > Branding (third option in left window)
Step 3: Tap on Add watermark > Choose an image from your computer > Click Save

