WiseCleaner Think Tank
Encounter difficult computer problems?
All about maintenance and optimization of your Windows System.
Apr 7, 2024
Windows 11 introduces a new look for the right-click context menu. The new look uses the Fluent Design and optimizes the text layout. It also hides some uncommon options, making it look more beautiful and easier to read and touch.
While it's a fresh update for some, others might miss the old setup they were used to in previous versions of Windows. If you're someone who prefers the classic right-click menu, here's a simple guide to getting it back. We've broken it down into four easy methods.
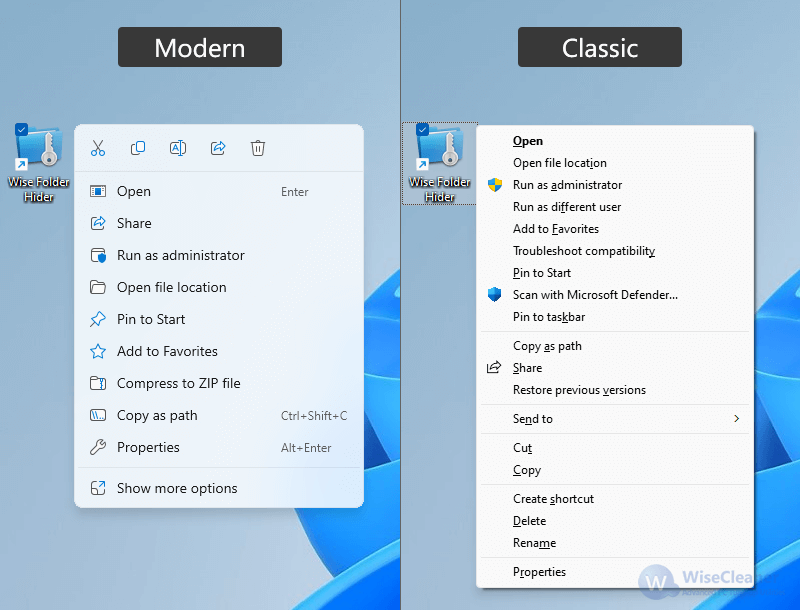
One quick way to see the classic context menu without changing any settings is to right-click on an item, and then choose "Show more options" at the bottom of the menu. This brings up the traditional right-click menu you're familiar with. It's a straightforward method, but you have to do it every time you want to see the old menu.
For a slightly quicker alternative, hold down the Shift key on your keyboard, and then right-click on an item. This shortcut immediately opens the legacy right-click menu, skipping the new Windows 11 version. It's a handy trick that saves you an extra click.
The above 2 methods allow you to temporarily use the old right-click menu without making any settings. If you want to use the classic right-click menu permanently, editing the Windows Registry is the way to go.
The registry is important for Windows systems, any incorrect changes may cause system failure. Therefore, we should back up the Windows registry before editing. We highly recommend fully backing up your Windows registry using Wise Care 365 or Wise Registry Cleaner.
Once backed up, we can start editing the registry to restore the old context menu.
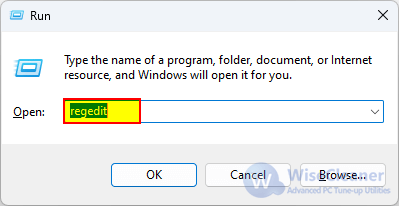
Press the Windows logo + R on the keyboard to open the Run window, type regedit, and click the OK button.
If you are using Windows Home Edition, you may not be able to open the Registry Editor using the above command. Click here to learn How to Fix Registry Editing Has Been Disabled by Your Administrator.
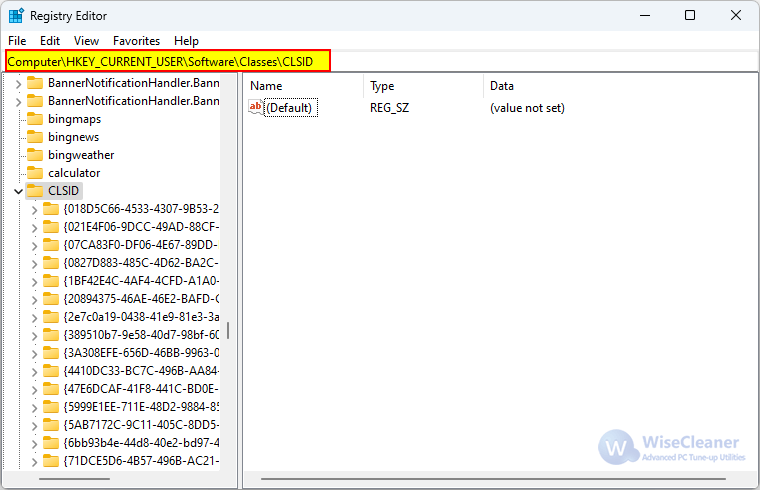
In the left pane, click to expand the key HKEY_CURRENT_USER, find and click the subkey Software, find and click the subkey Classes, then find and click the subkey CLSID.
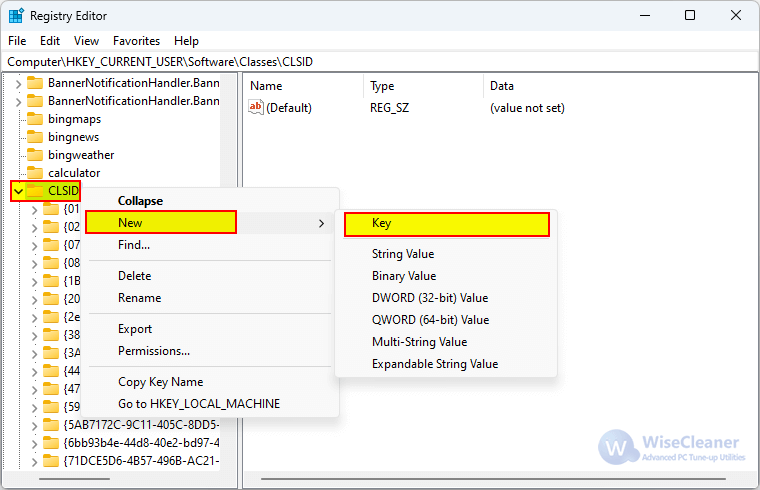
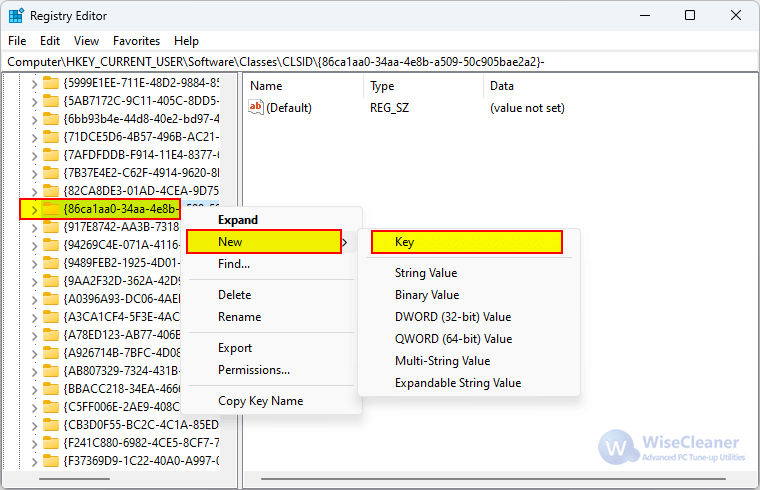
Right-click on the subkey CLSID, select New > Key, and name it {86ca1aa0-34aa-4e8b-a509-50c905bae2a2}.
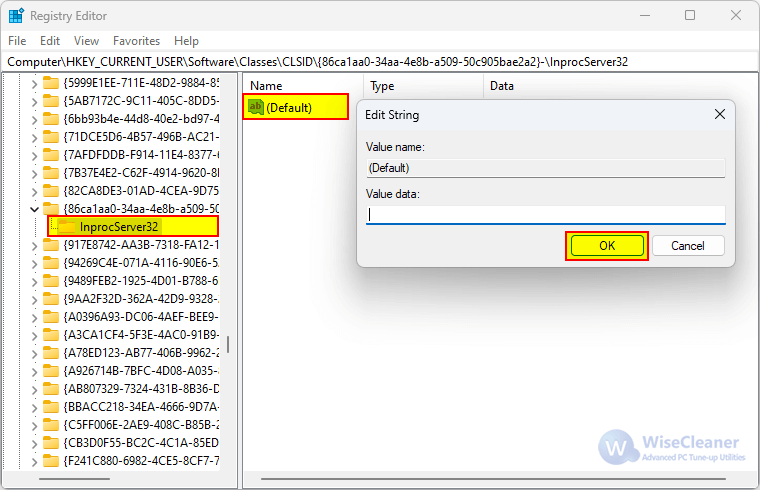
Right-click on the new key {86ca1aa0-34aa-4e8b-a509-50c905bae2a2}, choose New > Key again, and name this one InprocServer32.
With InprocServer32 selected, double-click the (Default) value in the right pane and hit OK without typing anything.
For the registry changes to take effect, we need to restart the system. Or you can just restart the Windows Explorer.
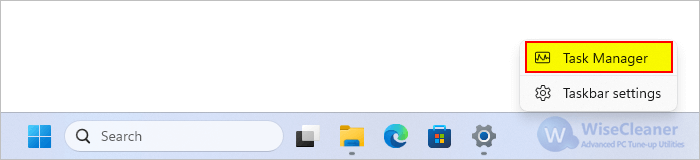
1) Right-click on the Taskbar, and select Task Manager. There are 8 ways to open Task Manager in Windows 11, just use the one you prefer.
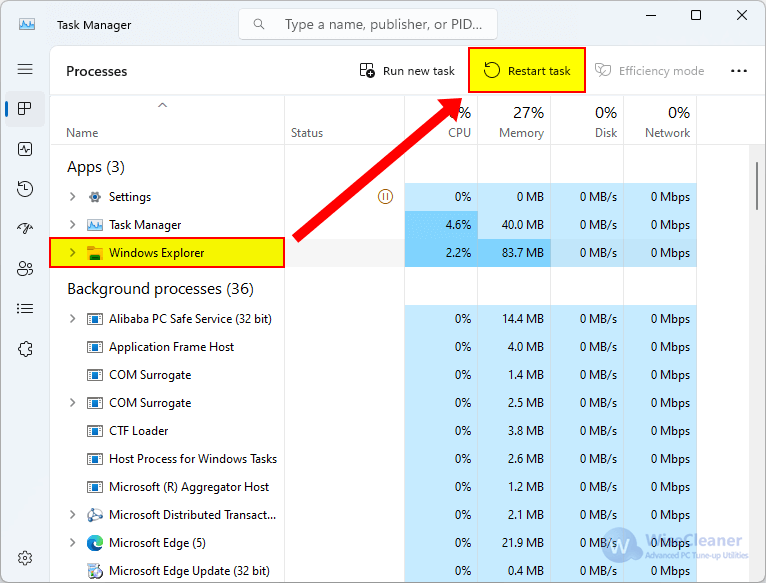
2) Find Windows Explorer in the Processes list and select it, then click the Restart task button at the top.
This method requires careful steps, but once done, it brings back the classic menu for good. If you want to restore the new context menu in Windows 11, just need to DELETE or RENAME the registry key {86ca1aa0-34aa-4e8b-a509-50c905bae2a2}.
For those comfortable with command lines, the Command Prompt offers another way to switch back to the classic menu. Although Windows Terminal is now the default command line program on Windows 11, you can also use the old command prompt and Powershell to perform the following steps.
1. Press the Windows logo key + X and select Terminal (Admin).
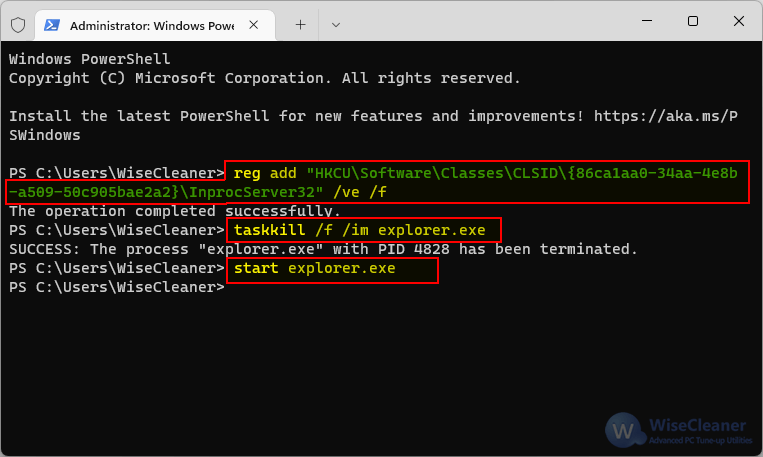
2. Type the following command and press Enter to create new registry key.
reg add "HKCUSoftwareClassesCLSID{86ca1aa0-34aa-4e8b-a509-50c905bae2a2}InprocServer32" /ve /f
3. Type the following command and press Enter to end Windows Explorer.
taskkill /f /im explorer.exe
4. Type the following command and press Enter to restart Windows Explorer.
Start explorer.exe
This command does the same as the registry edit but faster and with less clicking around. Now you can use the legacy right-click menu permanently.
1. Right-click the Start icon and select Terminal (Admin).
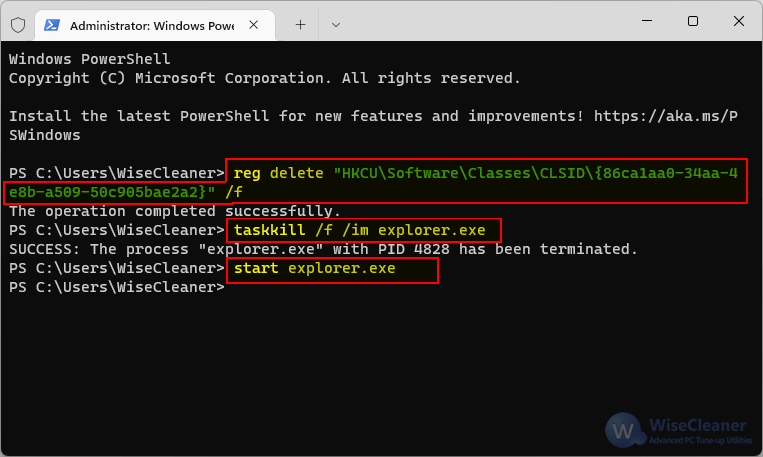
2. Type the following command and press Enter to create a new registry key.
reg delete "HKCUSoftwareClassesCLSID{86ca1aa0-34aa-4e8b-a509-50c905bae2a2}" /f
3. Type the following command and press Enter to end Windows Explorer.
taskkill /f /im explorer.exe
4. Type the following command and press Enter to restart Windows Explorer.
Start explorer.exe
Whether you prefer the classic right-click menu for its familiarity or functionality, these four methods provide options for all levels of computer comfort. From quick shortcuts to a lasting change, you can easily switch back to the classic menu in Windows 11. Just pick the method that works best for you and enjoy the nostalgic feel of the old right-click menu.
Additional Related Articles
wisecleaner uses cookies to improve content and ensure you get the best experience on our website. Continue to browse our website agreeing to our privacy policy.
I Accept


