WiseCleaner Think Tank
Encounter difficult computer problems?
All about maintenance and optimization of your Windows System.
May 26, 2025
Various apps play a crucial role in our daily lives, helping us stay connected, productive, and entertained. However, like any operating system, it can be frustrating when an app starts malfunctioning or stops working altogether occasionally. Fortunately, Windows 11 provides built-in tools to resolve these problems. In this article, we'll guide you through two simple methods to troubleshoot and resolve app-related problems efficiently.
If you're experiencing minor issues with an app, such as occasional crashes or glitches, repairing the app is a great first step to generally resolves issues without affecting your app settings or user data.
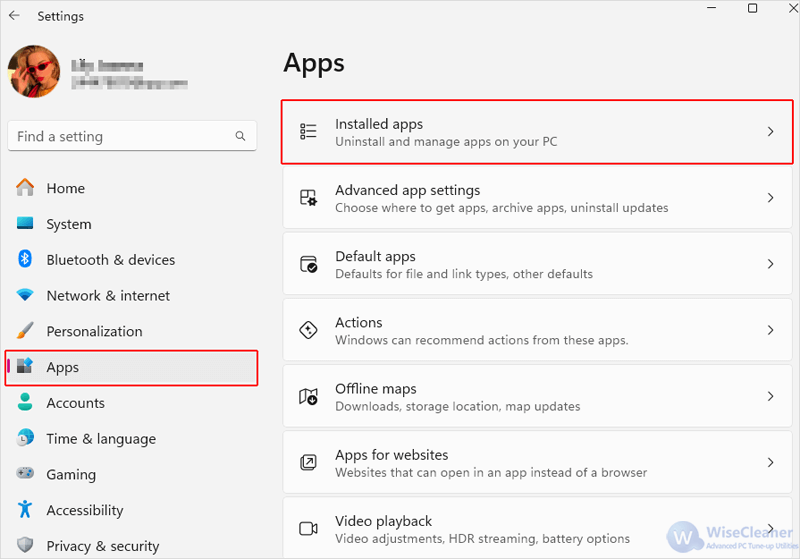
Press Win + I on your keyboard to open the Windows Settings app directly.
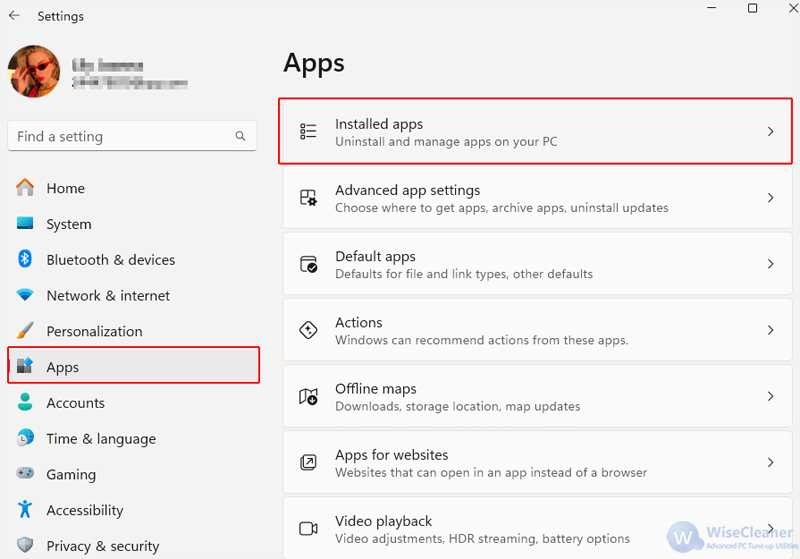
In the Settings window, click on Apps from the left sidebar, then select Installed Apps from it.
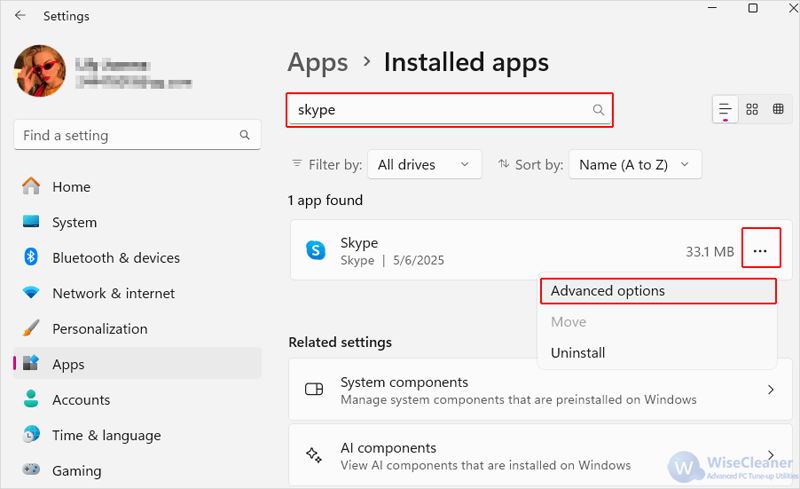
Scroll through the list or use the Search apps bar to locate the app you want to repair.
Once you find the app, click on the three-dot menu next to it and select Advanced options.
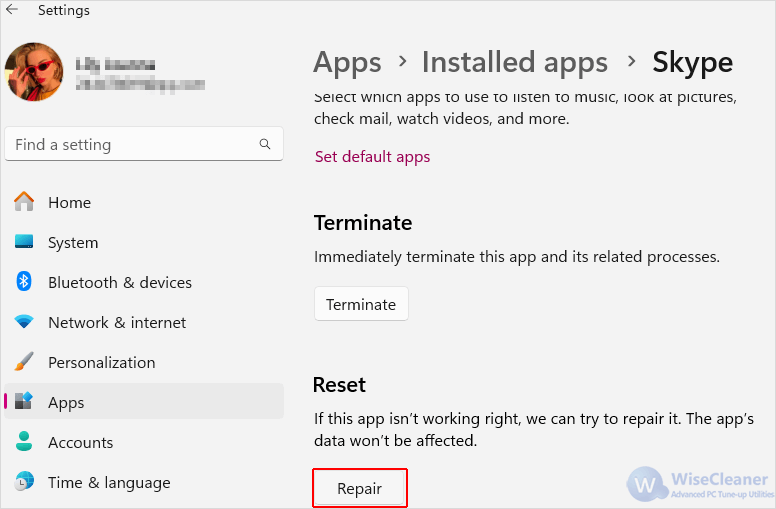
Scroll down to find the Repair button under the Reset section. Click on it to allow the system to initiate the process.
This process might take a few minutes. Once completed, check if the app is functioning correctly.
Please note: Always consider repairing an app first to preserve your data, and use the reset option if a more thorough solution is required.
If repairing the app does not resolve the issue, or if the app is severely malfunctioning, you may need to reset it. By resetting the app, you restore it to its default state, but this also means losing any custom settings or data associated with the app.
The first three steps are exactly the same as the method above.
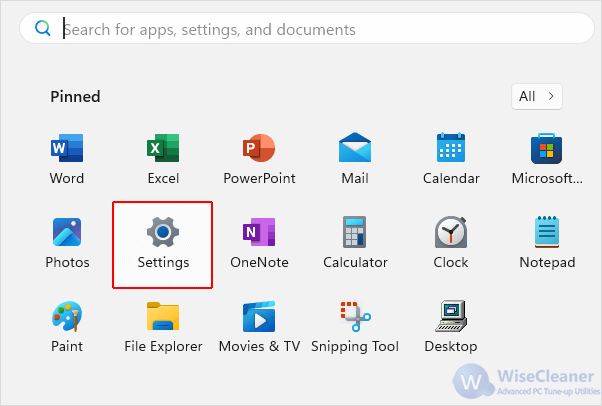
Click on the Start button, then select Settings from the menu.
Click on Apps from the sidebar, then select Installed Apps
Locate the app you wish to reset by scrolling through the list or using the Search apps bar.
Click on the three-dot menu next to the app name and select Advanced options.

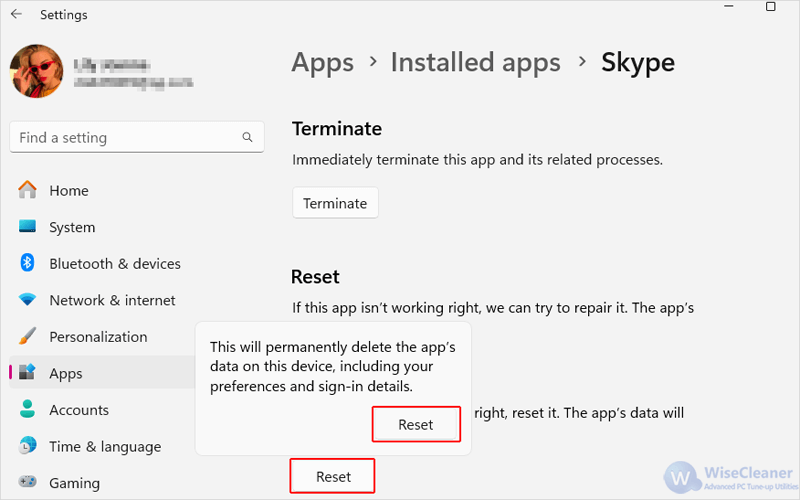
Scroll down to click on the Reset button under the Reset section.
Confirm by clicking Reset when the prompt appears to start the reset process and delete all the data related to this app.
After the reset is complete, you can check if the app is functioning correctly.
Windows 11 offers robust tools, repair and reset options to manage app issues. By following these steps, you can often resolve issues with apps that aren't working correctly. Regular maintenance, such as keeping your software updated and managing device storage, can also prevent many common app problems.
Additional Related Articles
wisecleaner uses cookies to improve content and ensure you get the best experience on our website. Continue to browse our website agreeing to our privacy policy.
I Accept


