WiseCleaner Think Tank
Encounter difficult computer problems?
All about maintenance and optimization of your Windows System.
Oct 12, 2023
Enabling your computer's Quick Start feature can help you boot up your computer faster. When you shut down your computer, the fast startup feature saves the current system state to the hard drive and then shuts down the computer. When you next turn on the computer, it can read the saved system state directly from the hard disk without having to load the system from scratch, thus greatly reducing boot time.
Although fast startup brings convenience, it also brings some hidden dangers. First of all, because 'Fast Startup' does not completely shut down the computer when shutting down, it consumes more power and wastes resources than regular mode. Secondly, the computer is constantly running, which may increase the pressure on the hardware and affect the life of the hardware after long-term use. The most critical thing is that turning on the fast startup function may cause the computer to encounter errors during the startup process and cause startup failure. If you want to turn off the fast startup feature, just keep reading on.
If you are familiar with the command prompt, you can use Command Prompt to enter commands to disable fast startup. Here are the specific steps.
Click on Windows Start and type cmd in the search box. Find the matched item and select Run as administrator.

In the console, copy and paste the following command. And hit Enter.
Powercfg -h off
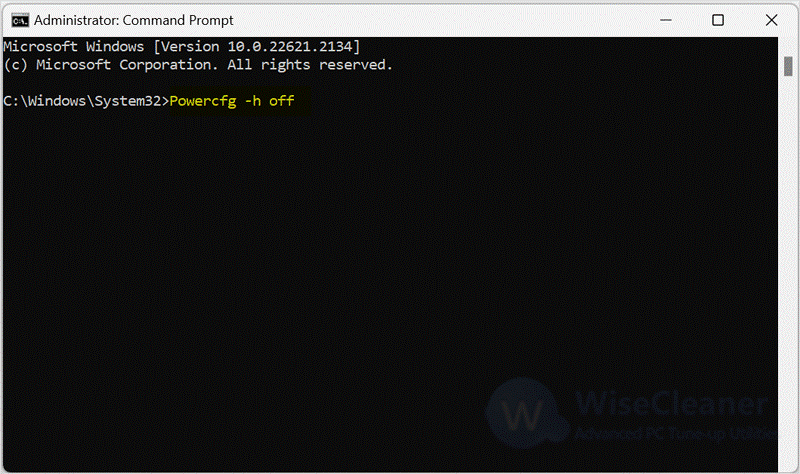
After running the command, the fast startup feature can be disabled.
You can also change the Group Policy settings to disable the fast startup feature. Here are the specific steps.
Press the Windows key + R to launch the Run dialog box. Type gpedit.msc in the text box and press OK.

Open the Local Group Policy Editor and follow the steps below to navigate to the desired location.
Computer Configuration > Administrative Templates > System > Shutdown
Select Shutdown, and double-click the Require use of fast startup policy on the right pane.

In the window that appears, select Disabled and click on Apply. Finally, hit OK to close the window.

Notice: The above two methods will disable the Hibernation function at the same time as disabling Fast Startup. If you only want to disable fast startup but keep the hibernation function, please try the following three methods.
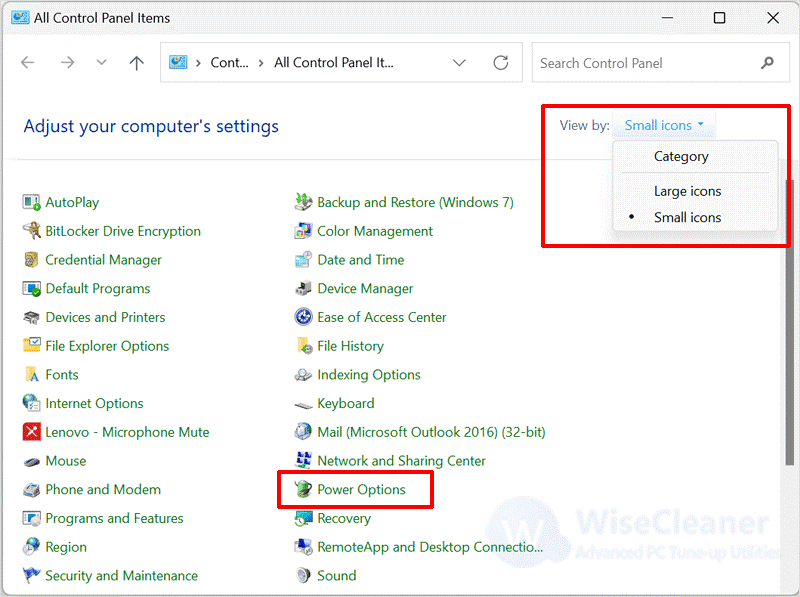
Click on Windows Start and type Control Panel in the search box. Find the matched item and open it.
After opening the Control Panel, click the View by drop-down menu in the upper right corner of the window and select Large icons or Small icons. Then select Power Options in the list.
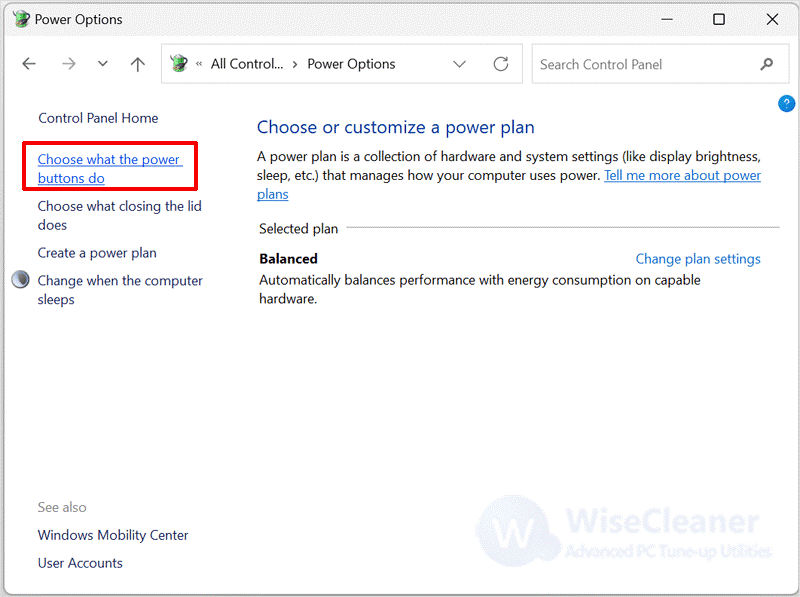
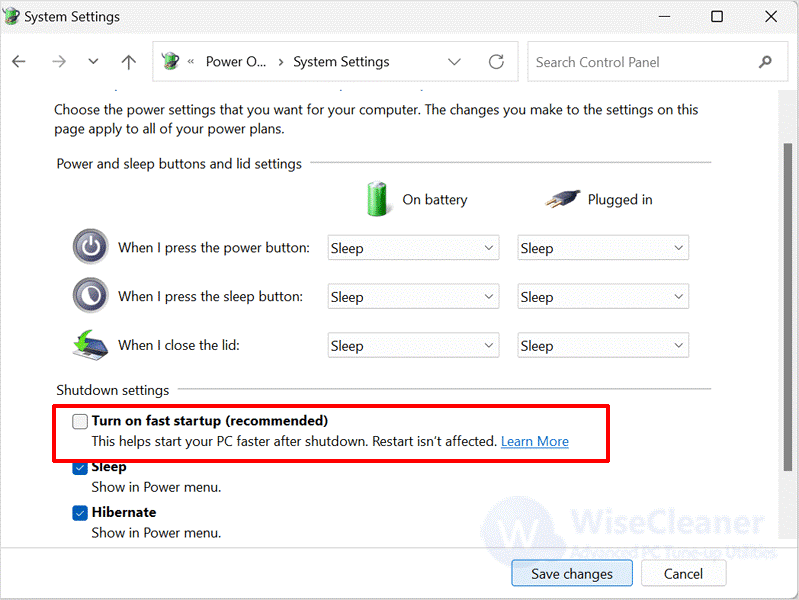
Select Choose what the power buttons do in the left column of the Power Options window.
Click on Change settings that are currently unavailable.
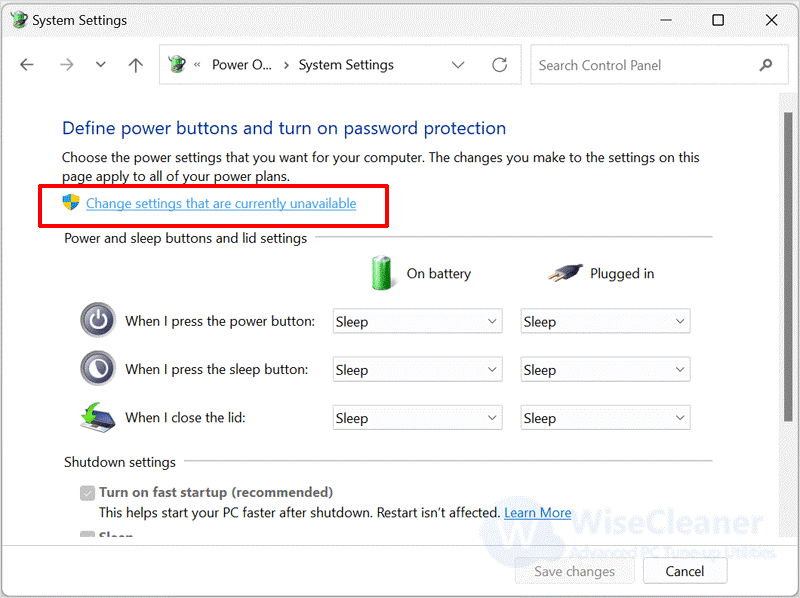
Find Turn on fast startup (recommended) under Shutdown settings, and uncheck the checkbox. Finally, click Save changes.
Another way to disable fast startup on Windows is through the Registry Editor. Incorrect changes to the registry can cause problems on your computer, so make changes with caution and always back up the registry before making any modifications.
Click on Windows Start and type Registry Editor in the search box. Find the matched item and click Run as administrator. Select Yes when the UAC prompt shows up.
In the Registry Editor window, paste the following path into the address bar and hit Enter.
HKEY_LOCAL_MACHINE\SYSTEM\CurrentControlSet\Control\Session Manager\Power
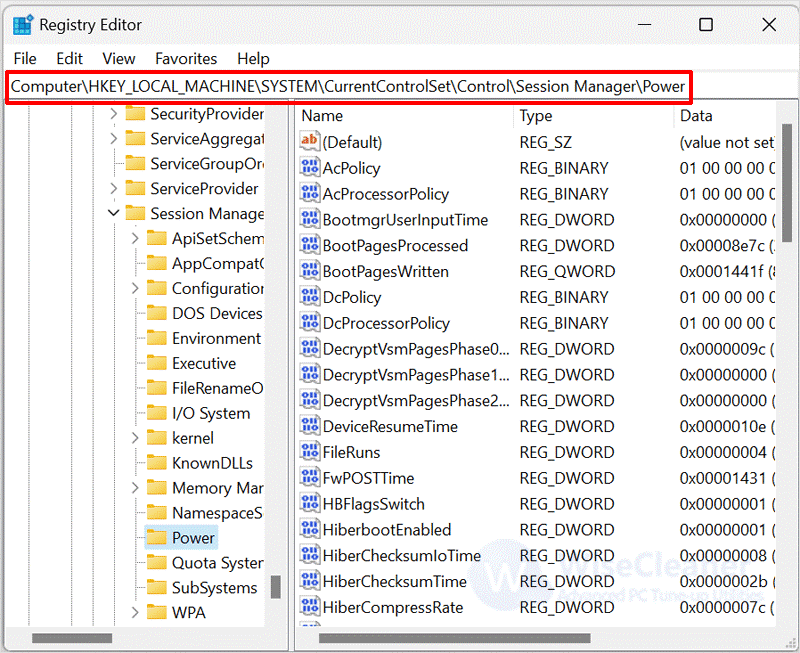
After locating the target location, select the Power key, then find and double-click the HiberbootEnabled DWORD in the right column. Change its value to 0, then click on OK to save changes and close the window.
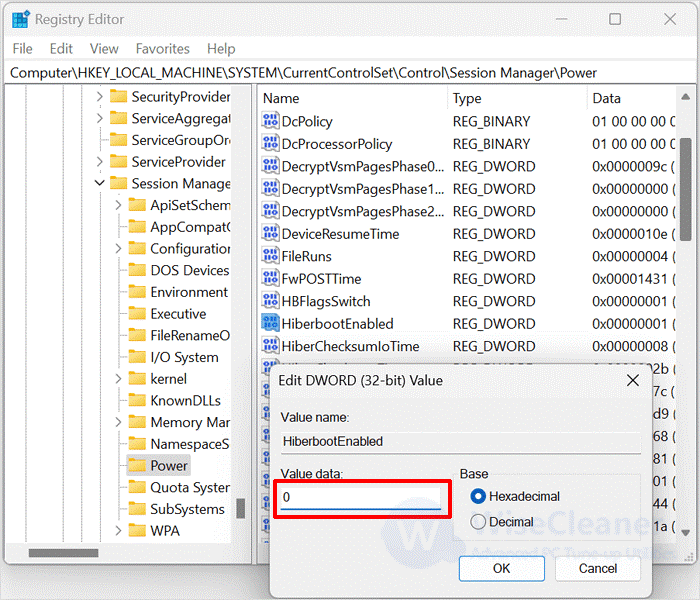
Restart your computer to adapt to the registry changes.
In addition to the above methods, you can also create REG files to disable fast startup on your computer. Here’s how.
Click on Windows Start and type Notepad in the search box. Find the matched item and open it.
Paste the following command in the notepad window.
Windows Registry Editor Version 5.00
[HKEY_LOCAL_MACHINE\SYSTEM\CurrentControlSet\Control\Session Manager\Power]
"HiberbootEnabled"=dword:00000000
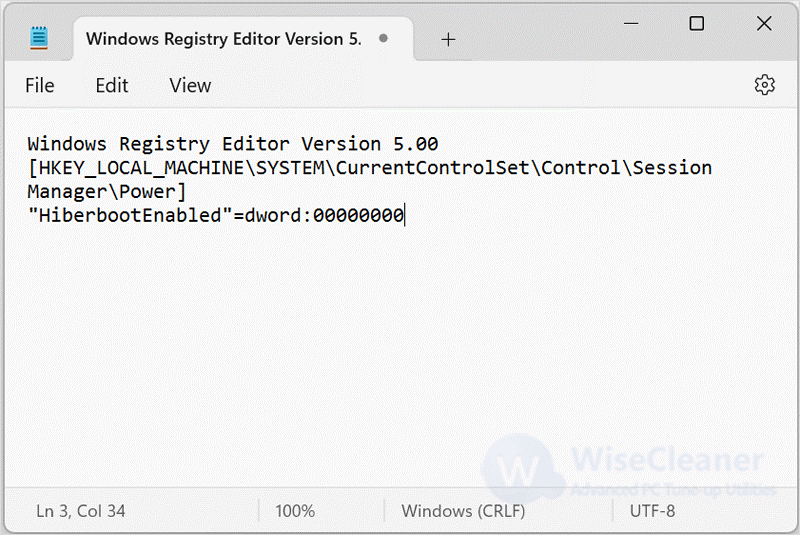
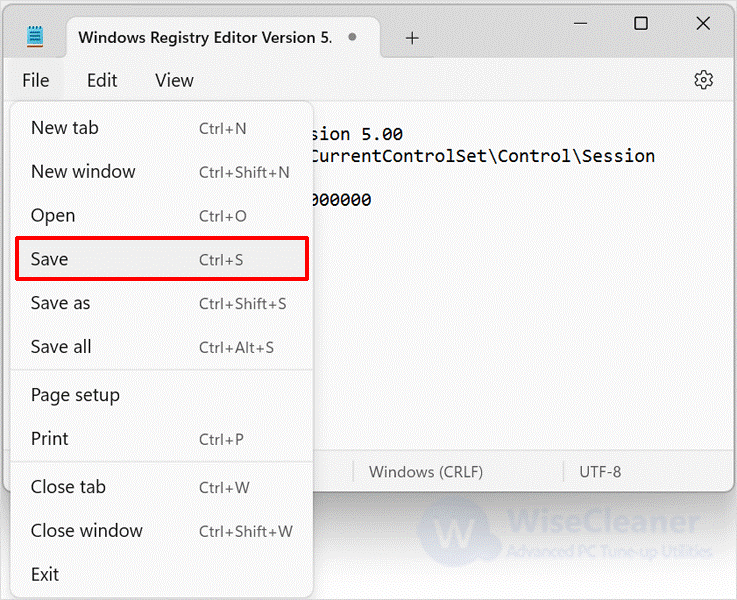
Click the File menu and select the Save option.
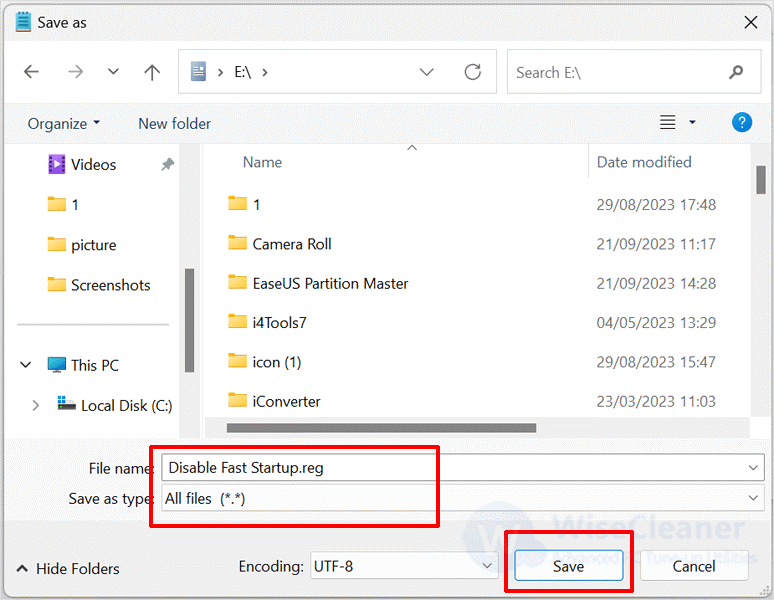
Name the created REG file and change the extension to .reg.
Click on Save as type drop-down and select All Files. Then, hit Save.
Double-click the REG file on your computer. Then, select Yes to apply the changes.
Although the Fast Startup can reduce the boot time of your computer to some extent, it can also cause a series of problems. If you want to disable the fast startup feature on your computer, the above method can help you. If you have other difficulties with computer use, please feel free to contact us.
wisecleaner uses cookies to improve content and ensure you get the best experience on our website. Continue to browse our website agreeing to our privacy policy.
I Accept


