WiseCleaner Think Tank
Encounter difficult computer problems?
All about maintenance and optimization of your Windows System.
Apr 30, 2025
Have you ever been caught off guard by a loud, auto-playing audio or video in an awkward situation? Imagine you’re on public transport and accidentally play a video out loud—this creates a sense of embarrassment and can also disturb those around you. Fortunately, Apple released a new feature, Volume Limited, which allows you to set a maximum volume limit on your iPhone or iPad with iOS 18.2 and above.
Setting a maximum volume limit on your device could benefit you in multiple ways. And it’s simple to realize by following these steps below.
1. Open the Settings app on your iOS 18 device (make sure it is updated to iOS 18.2 or iPadOS 18.2).
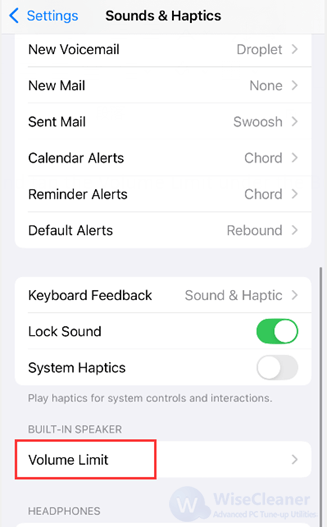
2. Scroll down to find Sound & Haptics and open it.

3. Scroll down again, and tap the Volume Limit under the BUILT-IN SPEAKER section to go on.
4. Turn on the toggle beside Limit Maximum Volume, then you will see a Slider to set the volume limit. Set the Maximum limit between 20% and 90% as per your preference.
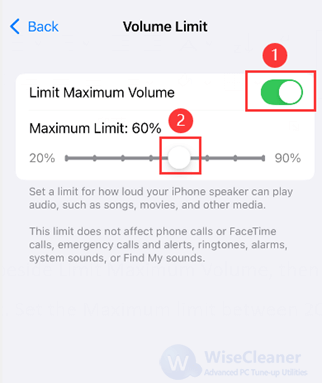
That’s it. Now you can play some audio to ensure the volume limit is working as expected.
Volume Limit is perfect for shared family devices or your child's iPad, keeping audio levels safe and manageable for everyone. Also, it's a lifesaver during quiet moments, like late-night video binges or commutes on public transport, where unexpected loud sounds could disrupt the peace.
wisecleaner uses cookies to improve content and ensure you get the best experience on our website. Continue to browse our website agreeing to our privacy policy.
I Accept


