WiseCleaner Think Tank
Encounter difficult computer problems?
All about maintenance and optimization of your Windows System.
May 17, 2024
Sleep mode is a useful feature on Windows that helps save system power. However, it can also be troublesome if it happens too often or in situations where you don't want it to happen. In this article, we will guide you on how to disable sleep mode on Windows 11.
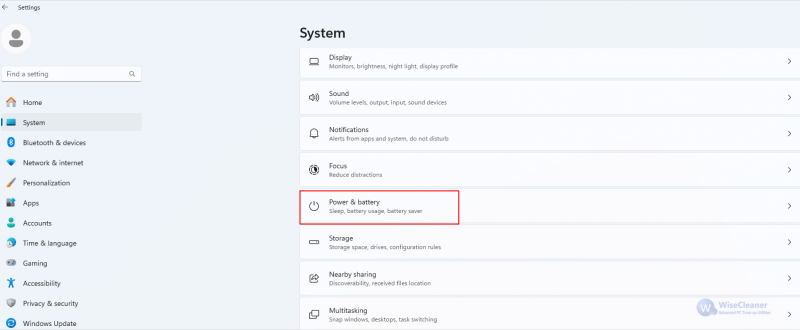
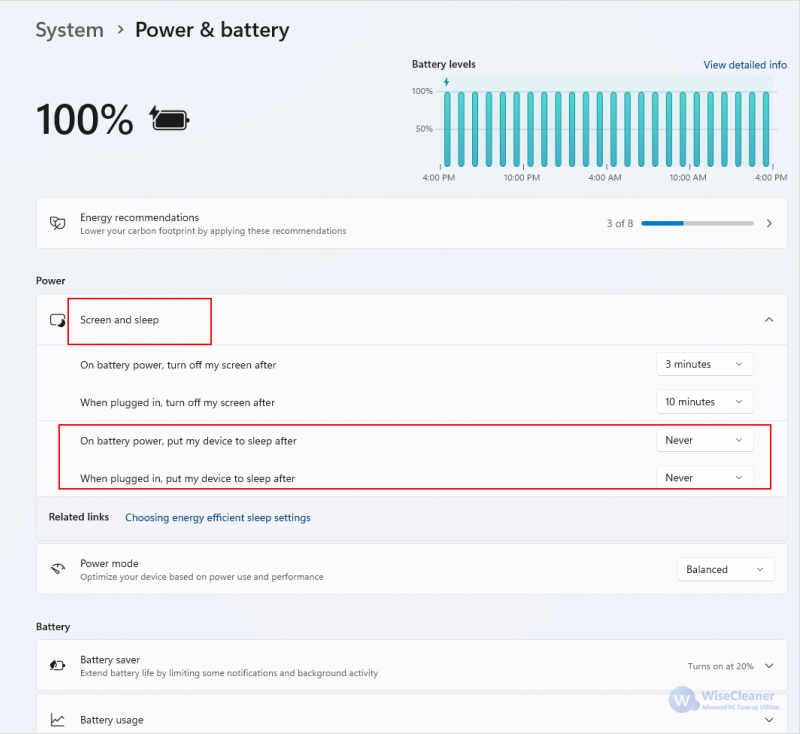
The easiest way to disable sleep mode in Windows 11 is through the Settings app.
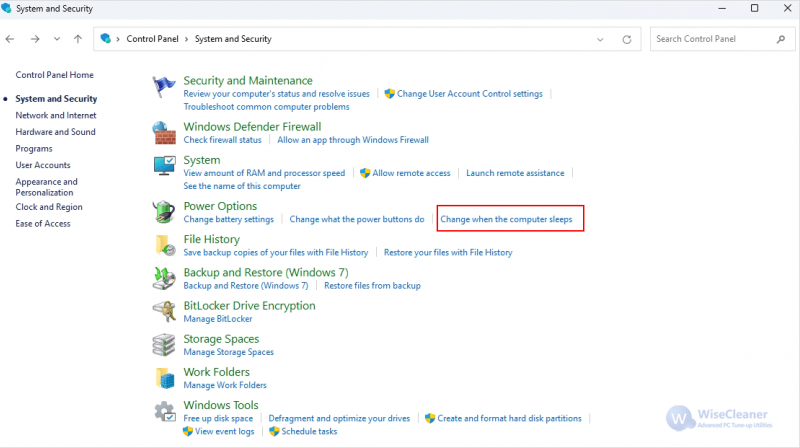
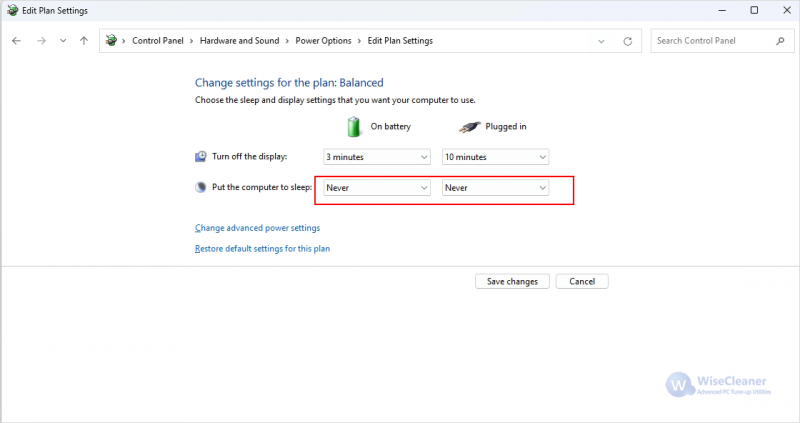
If for some reason you don't want to use the Settings app or are unable to do so, you can also disable Windows 11 sleep mode from the Control Panel.
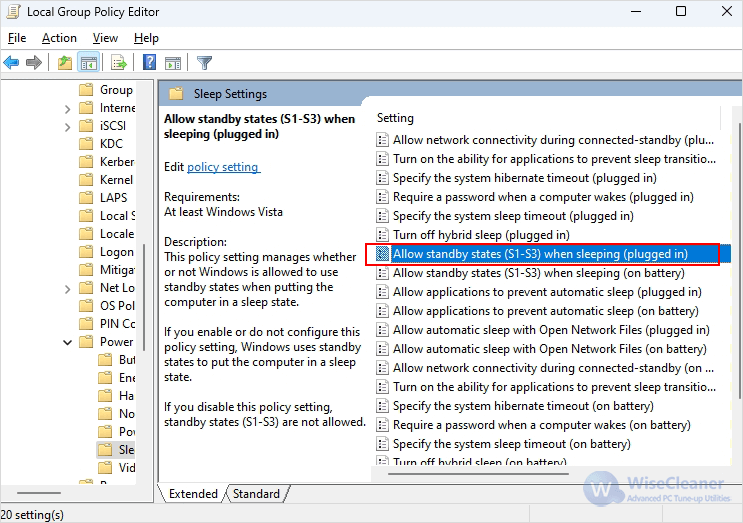
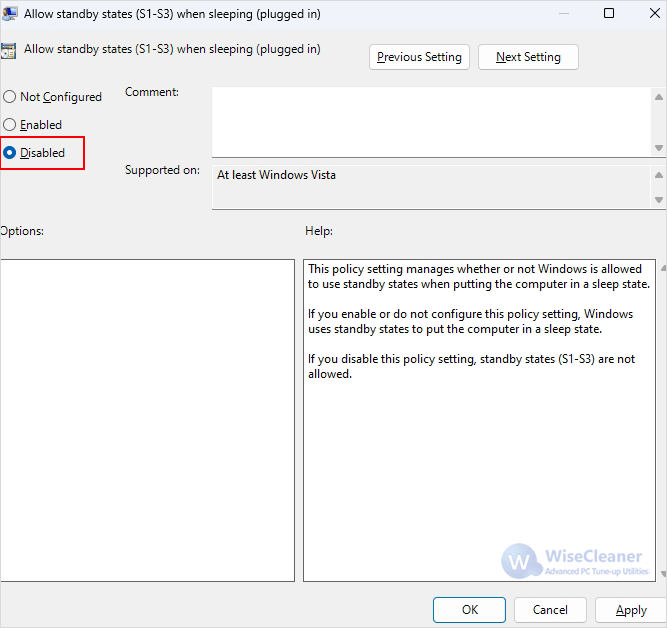
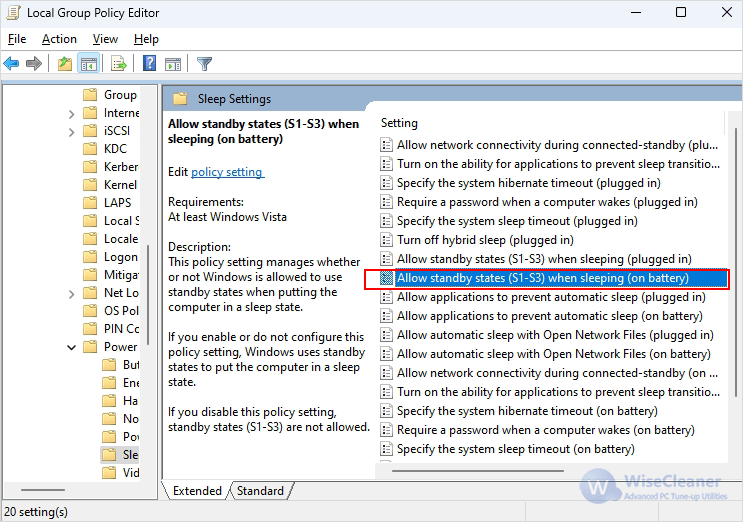
Most Windows behaviors can be intervened through the Group Policy Editor. Therefore, you can use it to change the sleep settings of your computer.

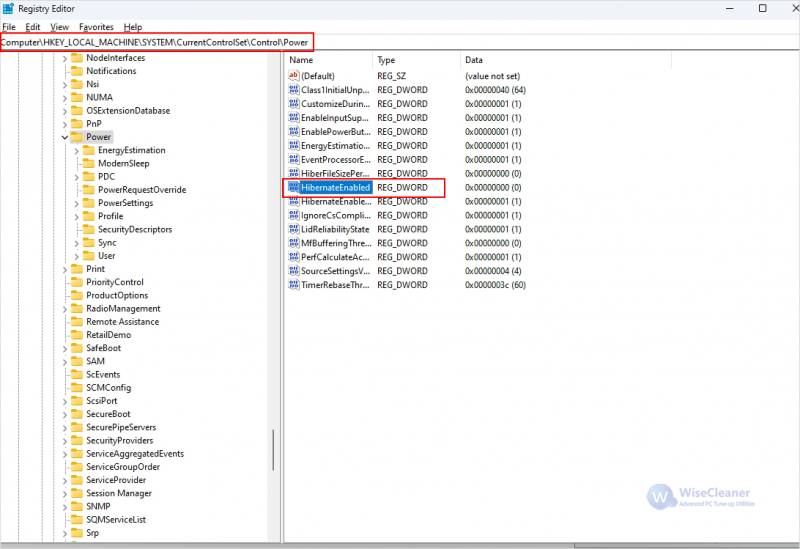
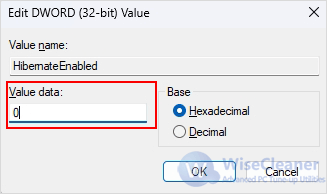
You can also use the Registry Editor if the above methods do not achieve the desired results. But before that, we recommend you to backup Windows registry.
In conclusion, disabling sleep mode can enhance your computing experience by ensuring that your computer stays active. With the methods described in this article, you can easily change your computer's sleep settings to suit your needs.
wisecleaner uses cookies to improve content and ensure you get the best experience on our website. Continue to browse our website agreeing to our privacy policy.
I Accept