If certain applications on your Windows 11 system feel sluggish or lag behind in performance, it may be due to insufficient RAM allocation. While you can't directly assign physical RAM to apps like you would GPU memory in some games, there are several methods to optimize RAM usage and indirectly prioritize more RAM to apps that need it most. This guide walks you through several methods to maximize memory usage effectively.
Method 1: Optimize RAM Usage Using Wise Memory Optimizer
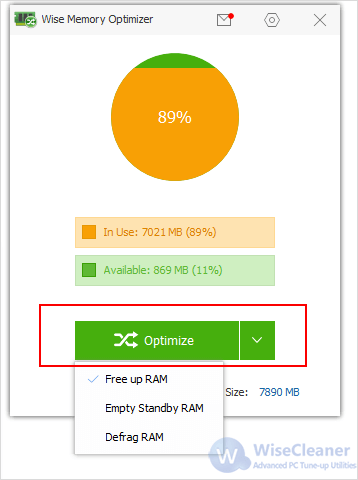
Wise Memory Optimizer is a free tool that can help clear unnecessary memory usage and make more RAM available for the apps you need. Here’s how to use it:
Step 1. Download and Install Wise Memory Optimizer
Visit the official WiseCleaner website and download Wise Memory Optimizer. Install and run the application.
Step2. Manually optimize the memory
Upon launch, the app displays your total RAM usage. You’ll see a pie chart indicating RAM that’s in use and available. Click the drop-down arrow next to the Optimize button choose Empty Standby RAM, Free Up RAM, and Defrag RAM. Click the Optimize button after you have selected them. Of course, you can also set automatic optimization for more convenience.
Method 2: Adjust a Program’s Priority via Task Manager
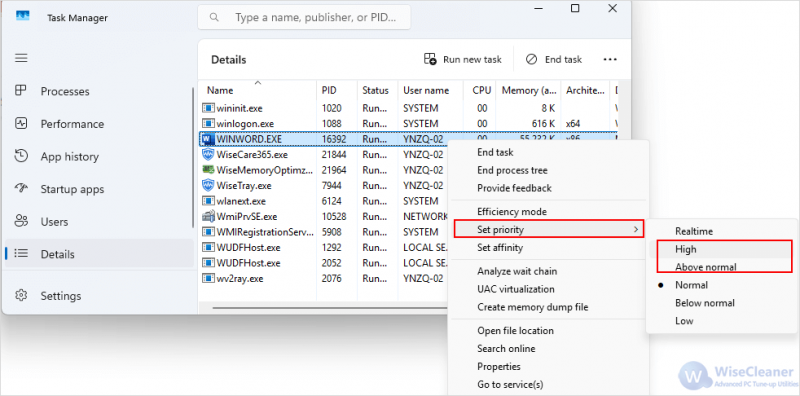
You can increase the priority of an application to ensure Windows allocates more CPU and RAM resources to it.
Step 1. Open Task Manager
Press Ctrl + Shift + Esc to open Task Manager.
Step 2. Change Priority
Under the Details tab, find the application you want to prioritize. Right-click the process, select Set Priority and choose High or Above Normal.
Method 3: Increase Virtual Memory
Virtual memory acts as overflow space on your drive when physical RAM is full. Increasing it can help apps run more smoothly.
Step 1. Open System Properties
Press Win + R, type sysdm.cpl, and press Enter.
Step 2. Navigate to Performance Options
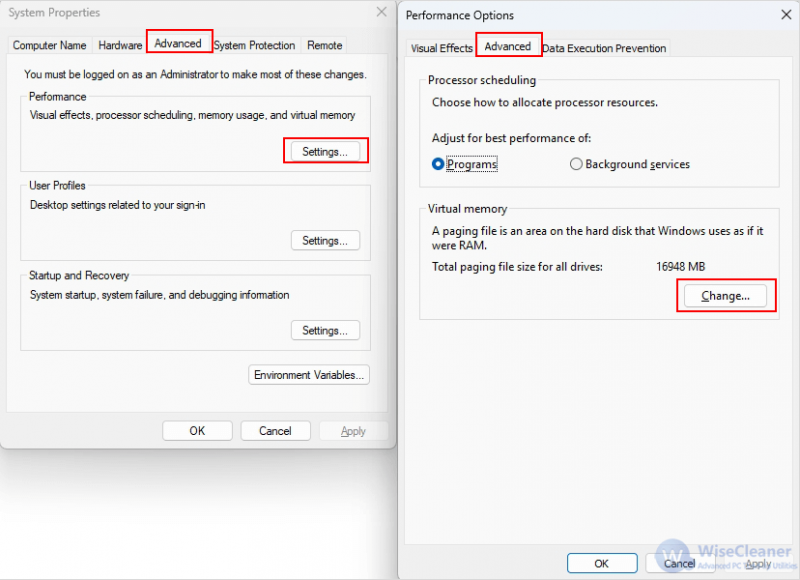
- Under the Advanced tab, click Settings under Performance.
- Go to the Advanced tab and click Change under Virtual memory.
Step 3. Configure Virtual Memory
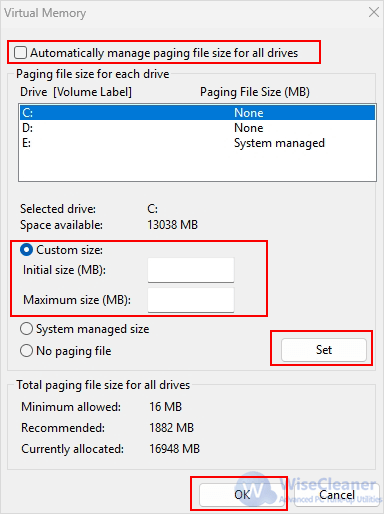
- Uncheck Automatically manage paging file size for all drives.
- Select your system drive.
- Choose Custom size, set Initial size and Maximum size.
- Click Set, then OK, and restart your computer.
Method 4: Disable SysMain Service
SysMain is a Windows service that preloads apps into memory, which can slow down overall system performance, especially on HDDs or low-RAM systems.
Step 1. Open Services
Press Win + R, type services.msc, and press Enter.
Step 2. Disable the Service
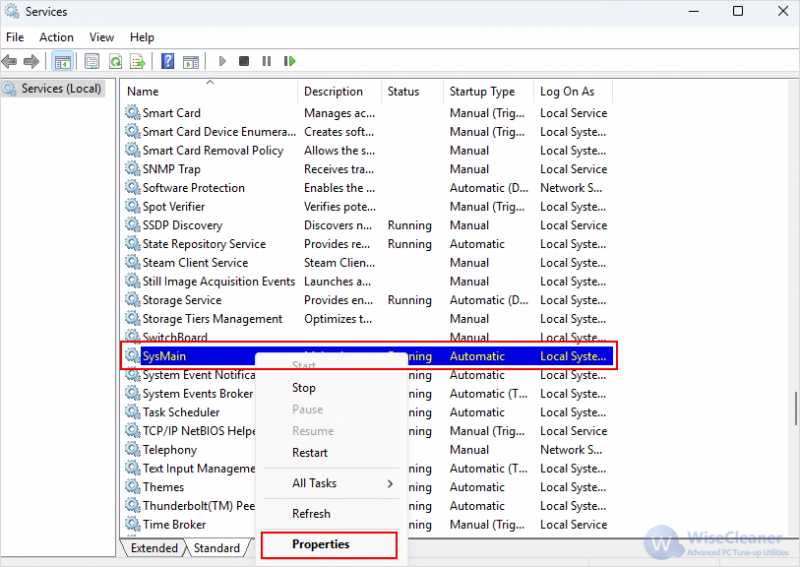
Scroll down and find SysMain. Right-click on it and select Properties.
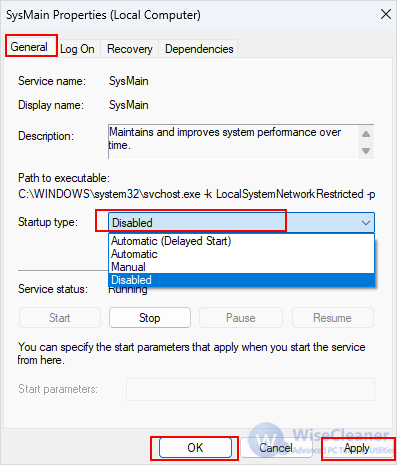
- In the General tab, expand Startup type > choose Disabled.
- Click vApply and OK.
Conclusion
While you can’t force Windows to allocate more RAM to an app permanently, using a combination of memory optimization, task prioritization, virtual memory configuration, and service management can significantly improve performance and ensure your most-used apps get the resources they need.

