Optimizing a drive refers to the process to improve the performance and health of a hard drive on your computer. A significant difference after optimizing your drives is that your system will be functioning better. Whether you are looking to boost overall speed or free up storage space, this guide will walk you through the steps to optimize a drive on Windows 11.
Optimize a drive with Windows built-in tool-Optimize Drivers
To optimize a drive on Windows 11, you can follow these steps:
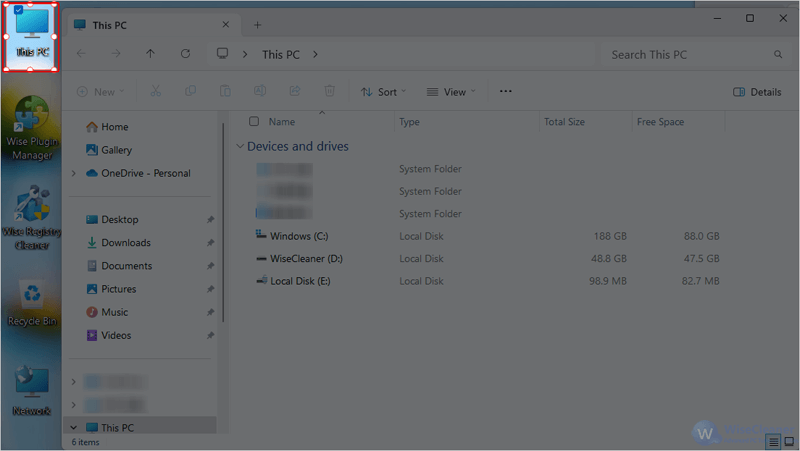
Step 1. Open File Explorer
Double-click on the icon of This PC on your desktop to open the File Explorer.
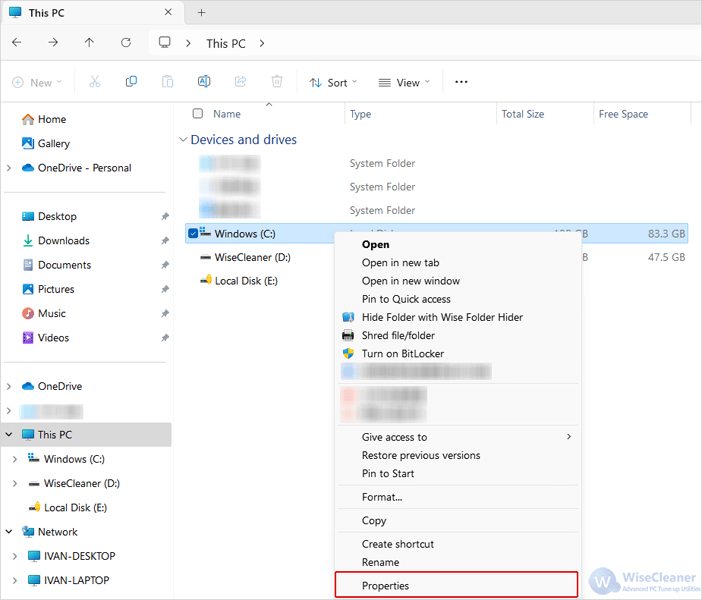
Step 2. Select Properties
Right-click on the drive you want to optimize and select Properties from the drop-down menu.
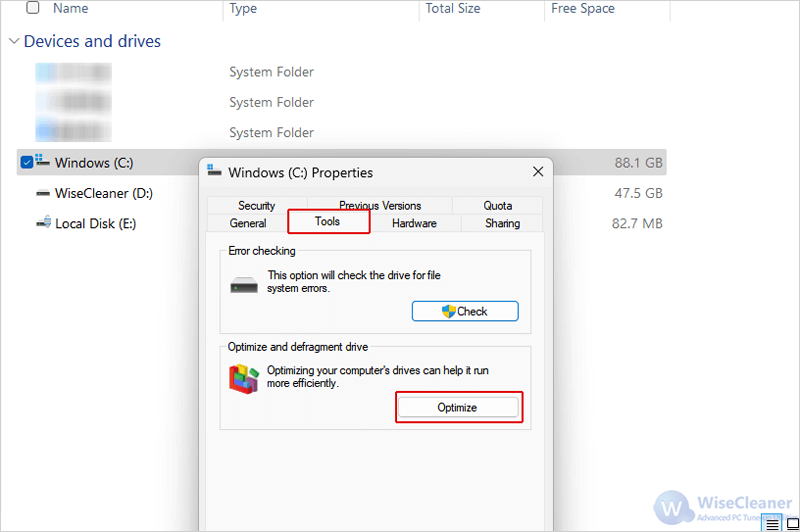
Step 3. Open Optimize Drives
Go to the Tools tab, and click on Optimize in it to open the Optimize Drives app.
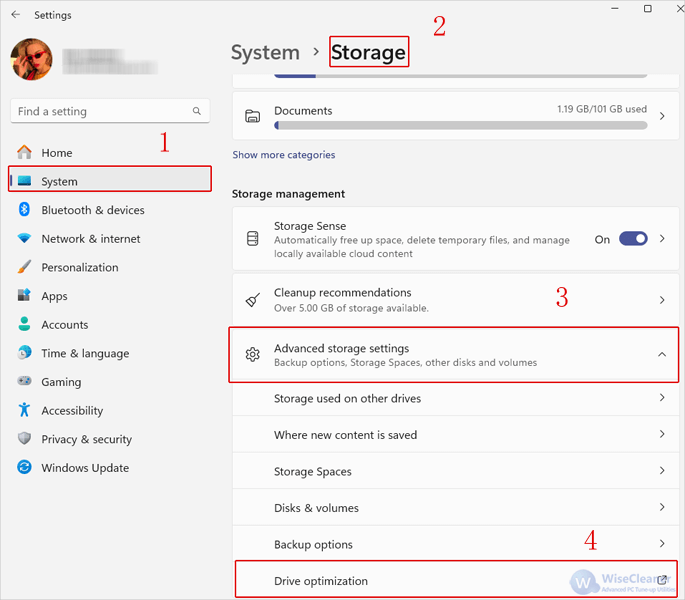
Another way to open the Optimize Drives window is to go to Settings > System > Storage > Advanced storage settings > Drive optimization.
Step 4. Analyze & Optimize
On the Optimize Drives window, if the drive you want to optimize is locked by BitLocker, try unlocking it first. Then select the drive and click on Analyze (if it is not a SSD). After analyzing, keep clicking on Optimize. Once finished, close the Optimize Drives window.
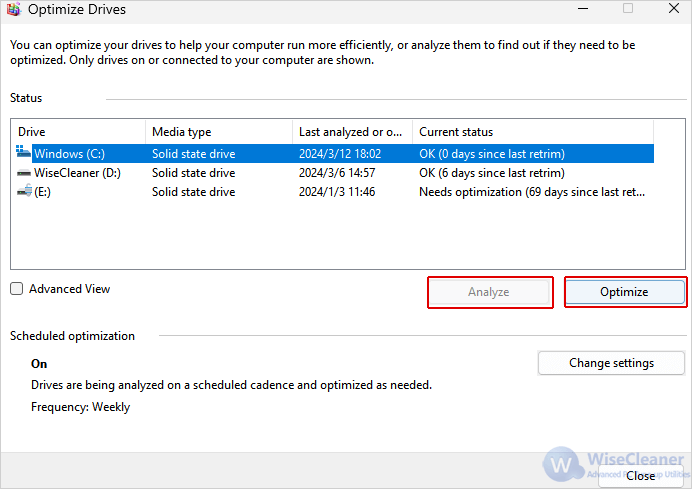
The Analyze and Optimize features in the built-in Optimize Drivers app can only access the drive’s health and fragmentation levels, then help consolidate these fragments. Moreover it is not easy for novice users. That’s why we suggest that you use Wise Care 365-a third party comprehensive optimization software which is more convenient and effective than the built-in ones.
Better solution-optimize drivers with one click by using Wise Care 365
Wise Care 365 offers a variety of comprehensive tools to optimize, tweak and maintain the performance of computers based on Windows system with simple clicks. The software runs a thorough scan of the Windows system, identifying any junk files, redundant registry entries and other elements that could be bogging down your PC.
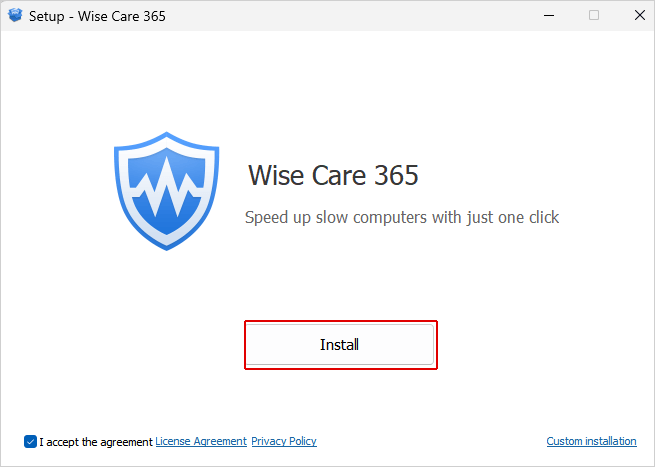
Step 1. Download and install
Wise Care 365 can be safely downloaded from the official website. After downloading, open the installer and follow the instructions to install it on your Windows 11. If you have a firewall, turn it off temporarily before installing.
Step 2. Launch and Backup
Launch Wise Care 365. Create a system restore point and back up your important data first before making any significant changes to the system settings.

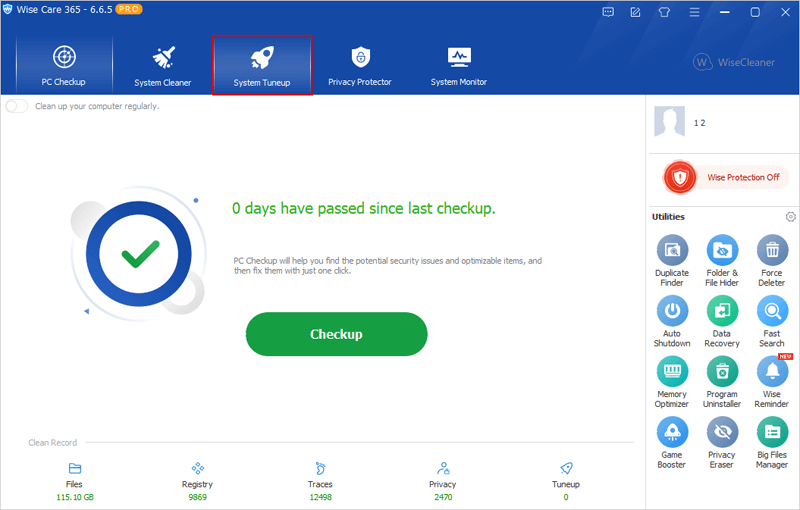
Step 3. Select System Tuneup
There are 5 tabs on the top of the main interface. Switch to the System Tuneup tab, where you can optimize system and network settings, and defragment the drives and registry.
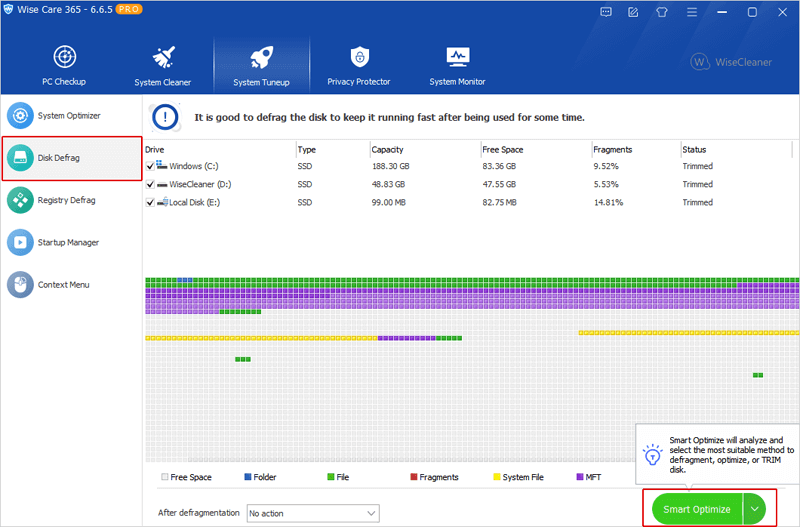
Step 4. Optimize the disk
On the left-hand pane, click Disk Defrag. Check the boxes in front of the disks you want to optimize, and click on the Smart Optimize button. This will analyze and select the most suitable method to defragment, optimize or TRIM the disks, whether it is SSD or HDD.
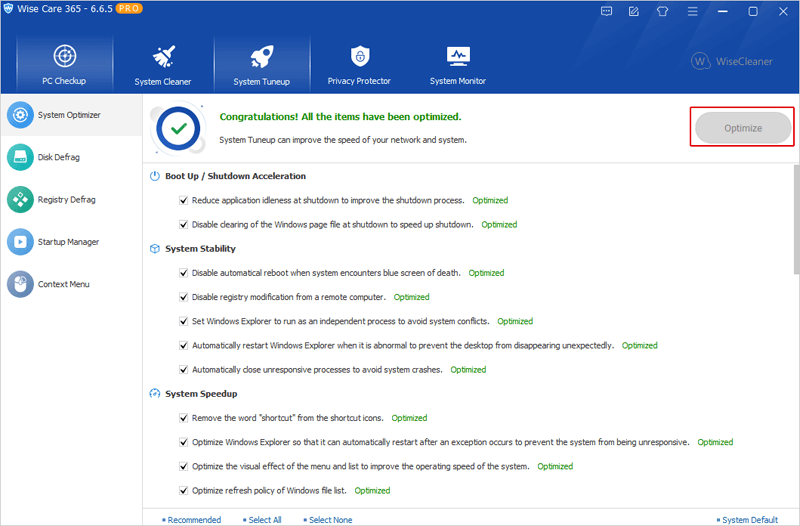
Step 5. Keep optimizing the system
System Tuneup offers other useful features to optimize the overall performance of your Windows PC. So it is suggested that you keep optimizing your computer by using System Optimizer, Registry Defrag, and Startup Manager.
Conclusion
Optimizing you drive on Windows 11 is a simple yet effective way to ensure peak system performance. By optimizing your drive with Wise Care 365, you can unlock the full potential of your Windows 11 system and enjoy a faster, more responsive computing environment.

