The font cache in Windows 11 accumulates data to expedite font handling and display, which generally enhances system performance. However, over time, this cache can become corrupted, leading to issues like fonts not displaying correctly or system lags when accessing font-heavy applications. Clearing the font cache is a useful troubleshooting step that can resolve such issues, ensuring optimal system performance and font rendering.
Method 1. Using the Services and File Explorer
Stopping or restarting the Windows Font Cache Service will temporarily clear the font cache on your Windows 11 PC. This is the quickest and easiest way to clear the font cache.
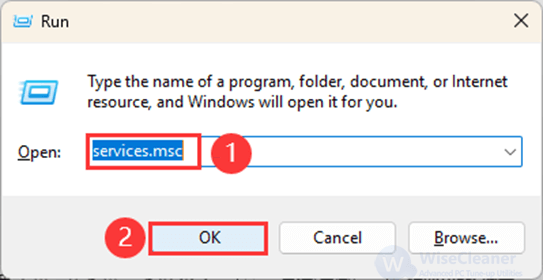
Step 1. Find the Windows Font Cache Service
Press Win + R to open the Run dialog, type services.msc, and hit Enter. This opens the Windows Services Manager.
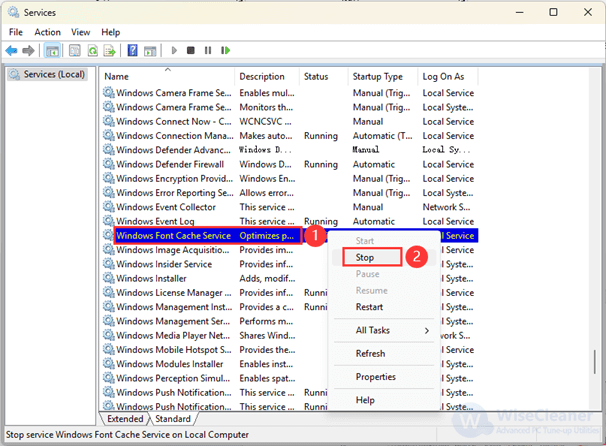
Step 2. Stop the Windows Font Cache Service
Right-click on it and select Stop. This action will temporarily halt the font cache service, allowing you to delete the existing cache files.
Step 3. Delete Font Cache Files
Open File Explorer and navigate to the following directory:
C:\Windows\ServiceProfiles\LocalService\AppData\Local\
Ensure that hidden items are visible by clicking on the View menu and checking Hidden items, then locate and delete FontCache folders.
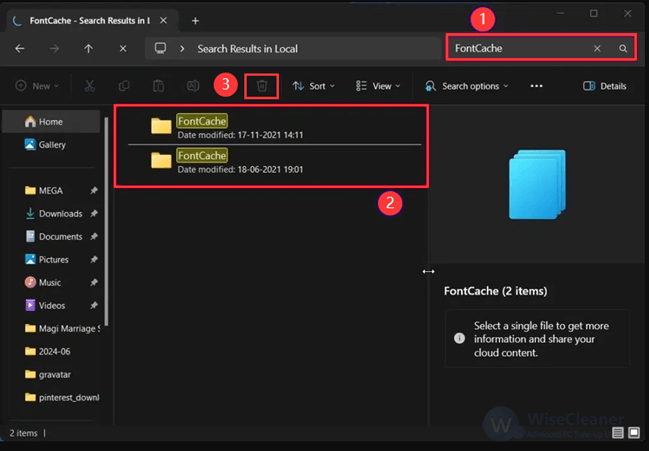
You can also delete the temporary font cache folder by following C:\Windows\System32\FNTCACHE.DAT path, and then delete the FNTCACHE.DAT file.
Step 4. Start the Font Cache Service
Follow the same steps to open the Windows Services Manager (Right-click on Windows Font Cache Service and select Start to reactivate the service).
Step 5. Restart Your System
Restart your computer to ensure all changes take effect. Upon restart, Windows will automatically recreate and repopulate the font cache based on current font data, often resolving related issues.
Method 2. Using Wise Care 365
If you think the above steps are cumbersome, then I recommend you to use Wise Care 365, which is a comprehensive tool to help clean up disk and fix registry problems on your computer, protecting your privacy and making your PC more secure. Correspondingly, it can also quickly clear various cache, including font cache to make your computer run smoother and well-performed.

Step 1. Run Wise Care 365
You can download and install Wise Care 365 from here, then open it directly.
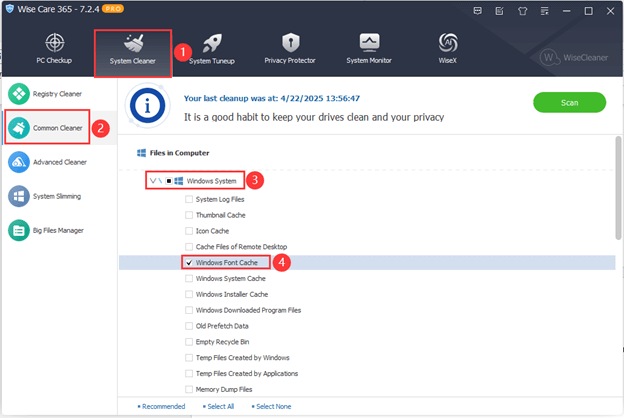
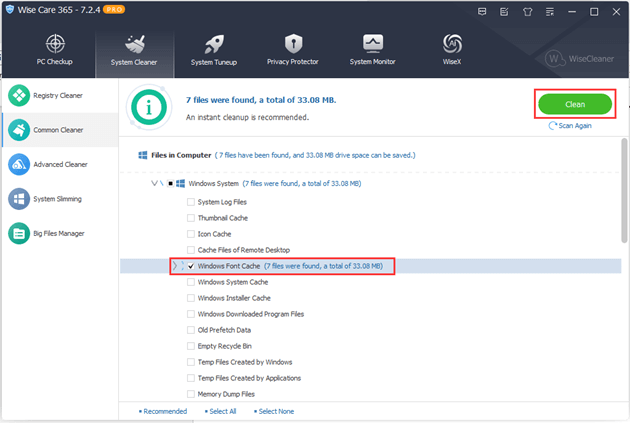
Step 2. Select Font Cache
Click System Cleaner> Common Cleaner, then check the Windows Font Cache item under the Windows System part.
Step 3. Scan and Clean
Click the Scan button to go on, then click Clean after the scan is complete.
Conclusion
Clearing the font cache in Windows 11 is a relatively simple process that can resolve several font-related issues. Compared with the first method, the third-party tool, Wise Care 365 offers more effective way to help you find and remove Windows font cache. Choose the method that suits you best for cleaning now.

