The upgrade of Windows 11 brings users a good experience, but too many startup programs will still slow down the running speed of the computer, and even affect the performance and service life of the computer. How to manage these startup programs on Windows 11? Read on and this article will tell you the answer.
Method1. Manage Startup Programs Using Task Manager
Task Manager is a great tool to help you manage startup programs quickly and easily.
Step1. Open the Task Manager.
Click the Task Manager on the Taskbar. If it's not on the taskbar, click Windows Search, type Task Manager in the search box, and open it. Or you can check here to learn more about how to open Task Manager.
Step2. Manage startup programs.
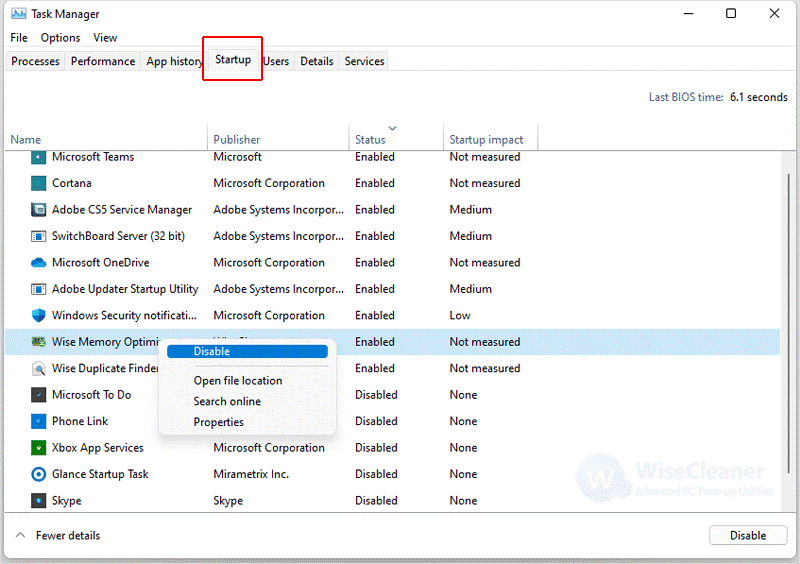
Click the Startup button on the top label of the window, then find the program you want to disable below, right-click the program, and select the Disable button. The program will no longer automatically start in the background when the PC starts up next time.
Likewise, if you want to automatically start the program in the background again, just follow the same steps, right-click and select the Enable button.
Method2. Manage Startup Programs Using File Explorer.
In addition to using Task Manager, you can also find the location of the Startup folder in File Explorer, where you manage startup programs.
Step1. Find the location of the Startup folder.
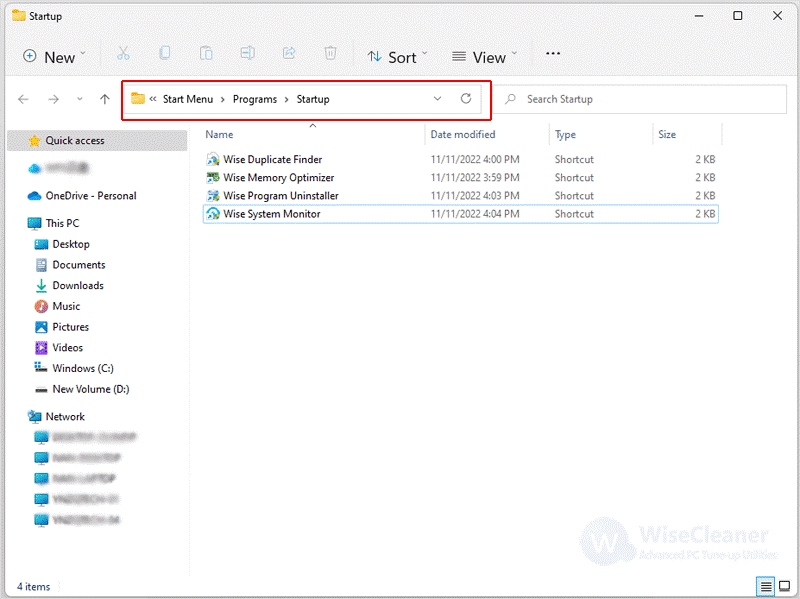
Press Win + E to open the File Explorer and enter the following location in the address bar to help you quickly navigate to the Startup folder
C:\Users\username\AppData\Roaming\Microsoft\Windows\Start Menu\Programs\Startup
Notice: Replace the username with your PC’s username.
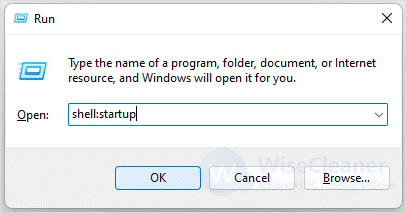
Or there is a faster way to navigate to the Startup folder. Press Win + R on your keyboard to open the Run, type shell:startup and click ok.
Step2. Manage startup programs.
You can drag the program you want to startup into the folder, and the next time it will start automatically in the background. If you want to disable a startup program, you just need to delete it inside the folder.
Method3. Manage Startup Programs Using Wise Care 365.
In addition to using Windows built-in tools to manage startup programs, you can also use Wise Care 365 to quickly manage startup programs with one click. Wise Care 365 is a free Windows PC cleanup and speedup tool that can help your computer have great performance.
Step1. Download Wise Care 365.
You can click here to download Wise Care 365 safely.
Step2. Manage startup programs.
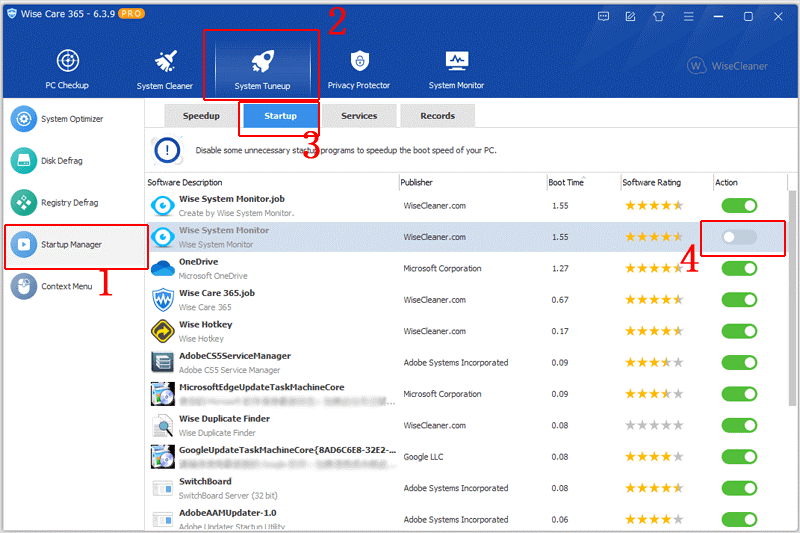
Run Wise Care 365. Click System Tuneup at the top of the window, then click Startup Manager in the left pane and click the Startup button at the top of the right pane. Find the program you want to manage, and click the switch toggle behind the program. When the switch turns green, the startup program is enabled, and when the switch turns gray, the startup program is disabled.
If your computer is running very slowly, there is a high probability that there are too many programs running in the background. To speed up the computer, you can also click the Speedup button, select the programs that need to be closed, and then click the Optimize button to speed up the computer.
These are three quick and easy ways to manage your computer's startup programs. If there is an infrequently used program in the startup item, close it as soon as possible to avoid it slowing down the computer's running speed. If you have other problems with computer usage, you can visit WiseCleaner, which has a lot of computer tips, and hope it can help you.

