WiseCleaner Think Tank
Encounter difficult computer problems?
All about maintenance and optimization of your Windows System.
Mar 17, 2023
It is more and more popular to copy and transfer files with a USB flash drive. Although it is convenient, it also comes with some potential dangers. The probability of stealing important data from others has risen. Do you want to protect the data on your Windows computer from being stolen or spread? In this guide, we will introduce two effective ways to achieve this by blocking the USB drive or disabling the USB ports.
Blocking USB drives and disabling USB ports can be done in the Registry Editor and Device Manager on both Windows 11 and Windows 10. Please continue reading.
The Windows Registry Editor lets users view, monitor and edit (only if necessary) the registry. It allows Administrators to perform root-level changes to the computer and the configuration settings of applications. Follow the steps to block the USB drive in Registry Editor.
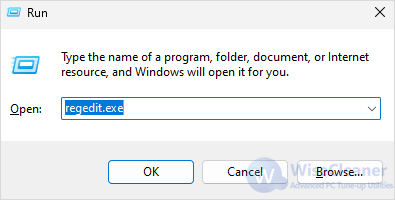
Press the Windows key + R on the keyboard. In the Run box, type regedit.exe, then click on OK to open the Registry Editor. If the User Account Control window pops up, click on Yes.
On the left panel, select and expand
HKEY_LOCAL_MACHINE\SYSTEM\CurrentControlSet\Services\USBSTOR one-after-another.
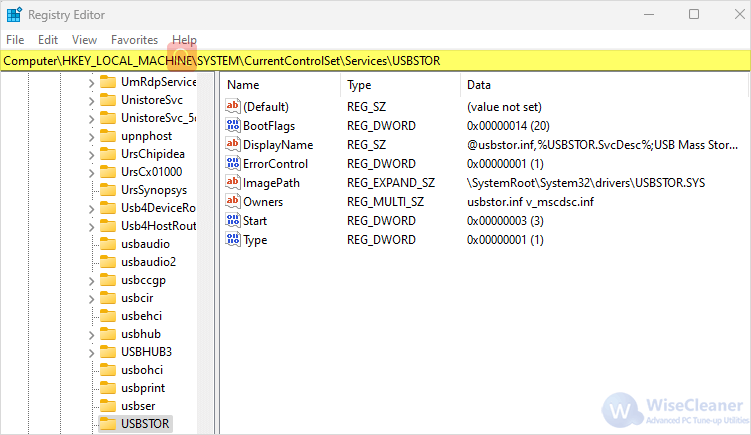
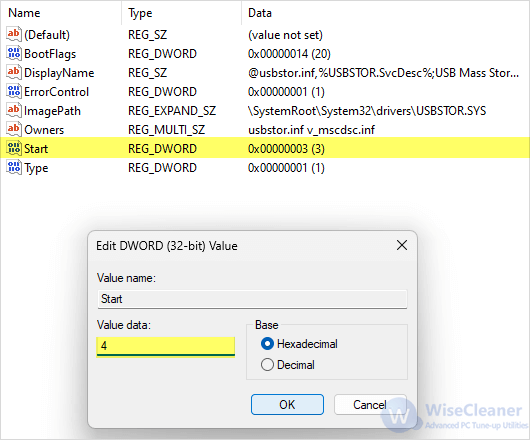
On the right panel in the USBSTOR, double-click on Start. Change the Value data in the box from 3 to 4. Click on OK to block the USB drive. Next time when anyone inserts a USB into the computer, it won’t be recognized.
A careless change to the operating system configuration in the Registry Editor could cause irreversible damage, so you should be very careful while using it and always create a restore point in it.
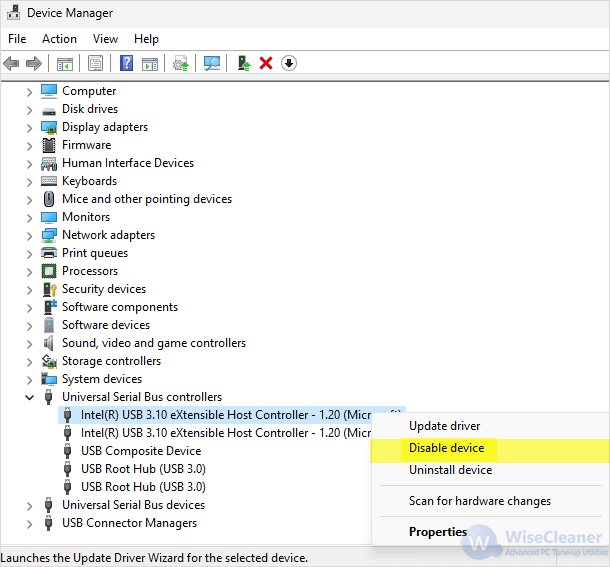
Device Manager is a component which allows Windows users to view and control the hardware connected to the computer. By disabling the USB ports, every device connecting to the PC through the USB ports will be disabled, including the USB mouse, USB keyboard, USB printer, and so on. As a result of this, the USB drive won’t be working if the USB ports don’t, either.
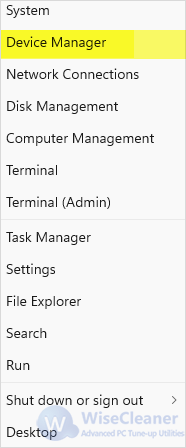
Right-click the Windows Start icon on the Taskbar to open the Power User Menu. Select and open Device Manager.
Select and expand Universal Serial Bus controllers. There are 5 items under it. Right-click on each of them, and choose Disable device option on their context menu. Click on Yes when the confirmation dialog shows up.
We suggest two different ways to disable the USB on Windows PC in this tutorial, and both of them are easy to operate and useful. I believe you have decided which one to choose for your own good. If you find this helpful, please visit WiseCare Think Tank to get more Windows tips.
wisecleaner uses cookies to improve content and ensure you get the best experience on our website. Continue to browse our website agreeing to our privacy policy.
I Accept


