In the digital world, people are increasingly taking highly of privacy protection, clearing surfing traces, setting passwords for some applications involving private information, and more.
Our browsing history reveals a lot about our preferences and habits. Although these features improve our user experience, there are some reasons we need to pay attention to, especially when it comes to privacy. In this post, we will show you how to clear browsing history in Google Chrome and Microsoft Edge manually and how to make it with Wise Disk Cleaner automatically.
Manually delete browsing history in Chrome
Known for its speed and efficiency, Google Chrome stores your browsing history to enhance your web experience through faster page loads and quick access to previously visited sites. If you wish to clear the surfing traces on it, follow the steps below:
1. Open Google Chrome
2. Click the three dots in the upper-right corner to open Settings
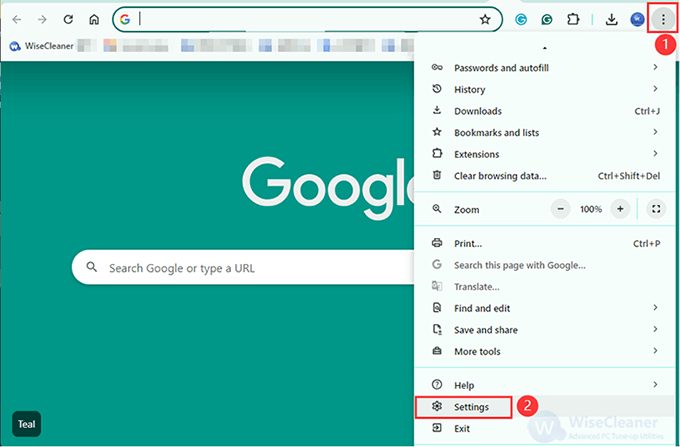
3. Navigate to Privacy and security> Clear browsing data

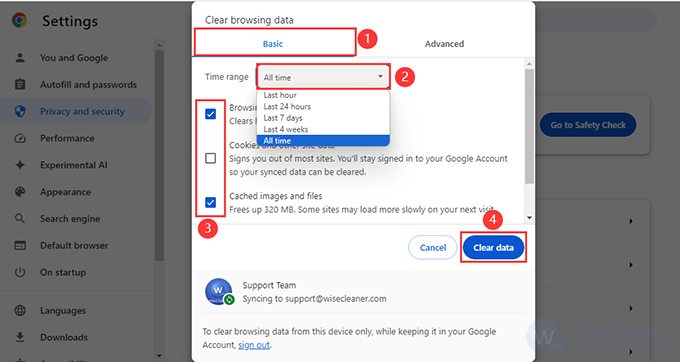
4. Extend the Time range to choose the period from which you want to delete your history
You will see several items including Browsing history, Cookies and other site data, and Cached images and files under the Basic tab. Check items that you want to delete, then click the Clear data button.
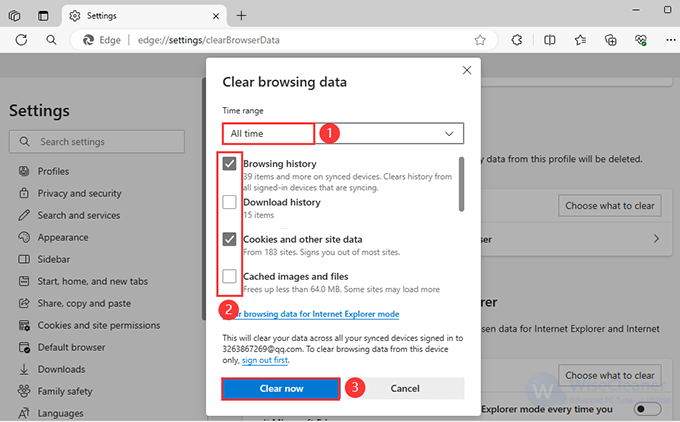
Manually clear browsing history in Edge
Microsoft Edge offers a seamless browsing experience with features aimed at enhancing productivity. Clearing your browsing history in Edge not only helps safeguard your privacy but also contributes to optimizing browser performance by removing stored data that’s no longer needed.
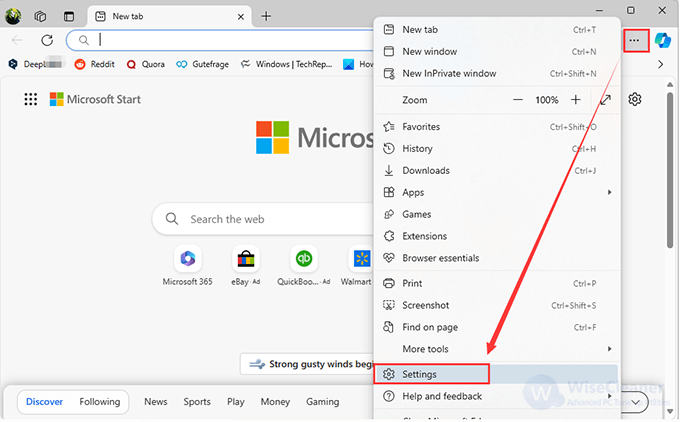
1. Launch Microsoft Edge
2. Find the three dots in the top-right corner to click Settings
3. Tap on Privacy and Security in the left pane, scroll down to find the Clear Browsing Data field, and click the Choose what to clear button to go on
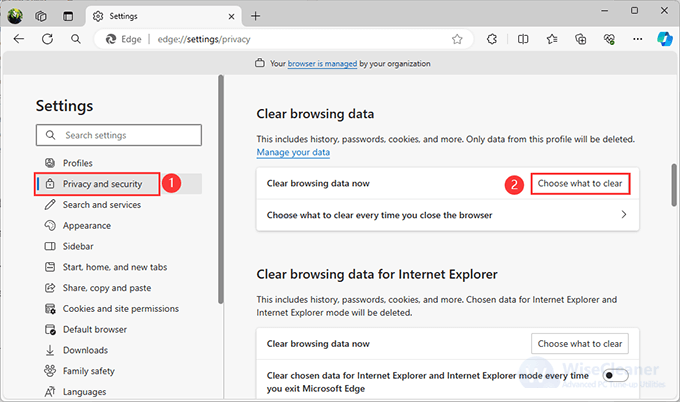
4. Similar steps to check the items that you want to delete, then click Cleaner now to finish
How to automatically clear the browsing history for different browsers
If you have two or more browsers on the system, it would be troublesome to delete the browsing traces individually. These browsing traces may accumulate unconsciously and bring potential troubles in the long run. Therefore, it is important to have a tool to help you automatically clear your browsing history regularly. Wise Disk Cleaner is such a program.
As a free disk cleanup and defragment tool, Wise Disk Cleaner can clean browser traces, useless and outdated junk files, cookies, and more to protect your privacy, free up your disk space, and make your PC run faster.
Following the steps below to set an auto clean task to clear your web browsing history regularly with Wise Disk Cleaner.
Step 1. Get Wise Disk Cleaner
You can download and install the free program from here.
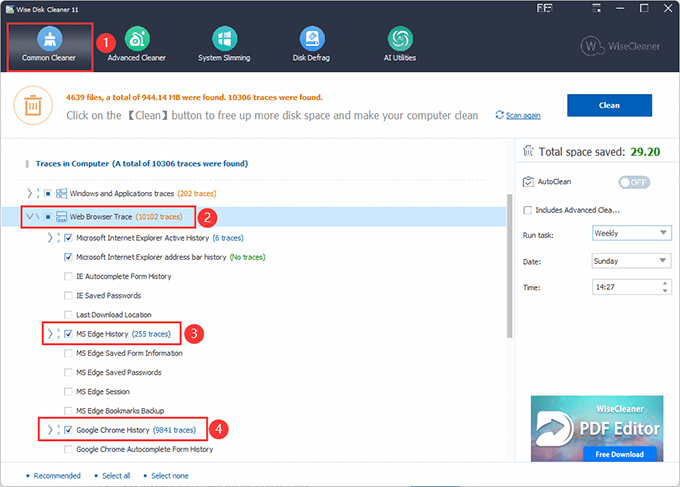
Step 2. Locate to relevant items to check
After getting into Wise Disk Cleaner, click Common Cleaner> Traces in Computer> Web Browser Trace, then find the MS Edge history and Google Chrome history to check. If you have other browsers that need to be cleaned, take the same steps to select the items.
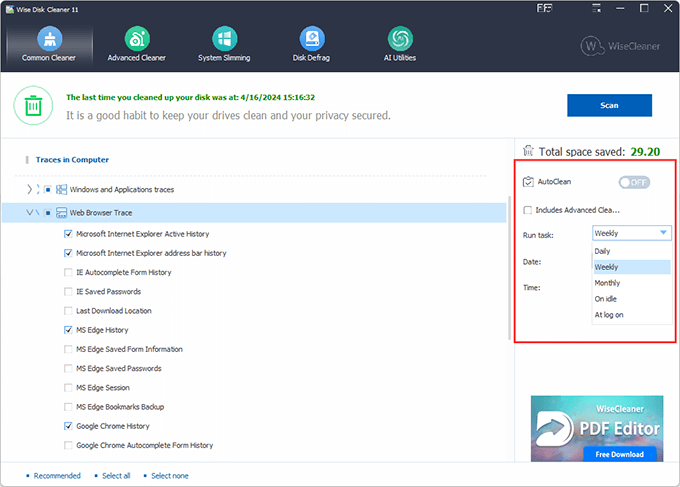
Step 3. Set up auto-clean task
There is an AutoClean switch on the right side, before turning it on, you can set a certain time to run the task. Daily, weekly, monthly, on idle, and at log on are available.
Once you create such a task from Wise Disk Cleaner, the browsing history will be automatically cleared at a specific time.
Conclusion:
In a word, deleting browsing history can safeguard privacy to some extent. You can manually adjust some specific settings from each browser to clean, but setting up an auto-clean task through Wise Disk Cleaner to help clear would also be a timesaving choice.

