Windows Error Reporting (WER) is a helpful feature in the Windows operating system that collects and sends error logs and reports to Microsoft when programs crash or encounter issues. While this feature aids in diagnosing and resolving software problems, the accumulated error reports can occupy a significant amount of disk space over time. If you notice that your hard drive is getting full and you’re not actively using these reports, deleting them can free up valuable storage. Here's how you can safely remove Windows Error Reporting files from your system.
Method 1. Using Disk Cleanup
To delete Windows error reporting files via Disk Cleanup, follow the steps below:
1. Press Win + S to open the search bar. Type Disk Cleanup and select the Disk Cleanup app from the search results.
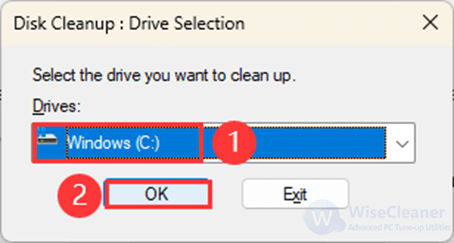
2. You will be prompted to select a drive to clean. Choose your primary drive (usually the C: drive) and click OK.
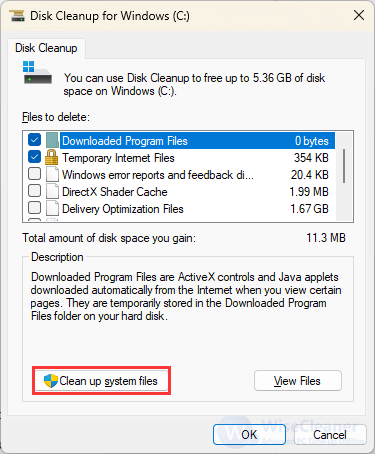
3. Once Disk Cleanup scans your drive, you'll see a list of file types you can delete. To find system files, click on Clean up system files and allow the tool to rescan your drive.
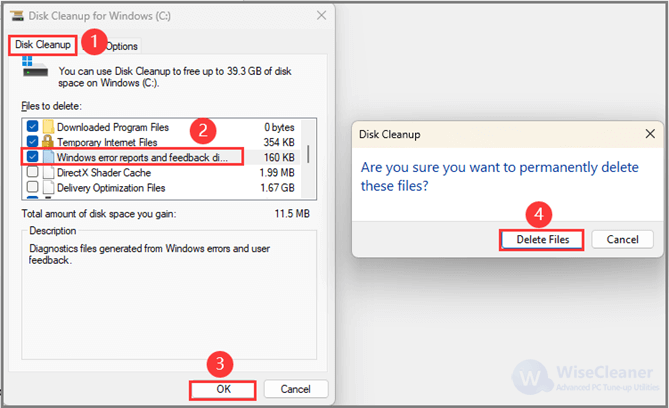
4. In the list of files to delete, look for options such as Windows Error Reporting Files, System created Windows Error Reporting, and Queue Reporting. These are files related to error reporting.
5. Check the boxes next to these items, then delete the files. Click OK and then Delete Files to remove them from your system. Confirm any prompts to complete the process.
Method 2. Manually Deleting from File Explorer
You can also try to delete the Windows Error Reporting files manually. Here is how to make it.
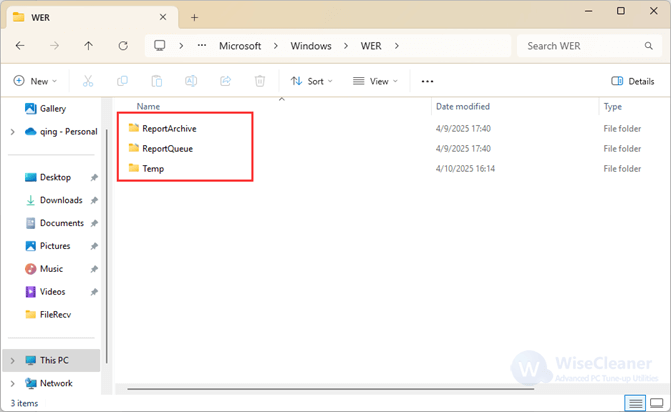
1. Press Win + E to open File Explorer. Navigate to this location by following this path:
C:\ProgramData\Microsoft\Windows\WER
2. Within the WER directory, you will find several folders such as ReportArchive, ReportQueue, and Temp. These folders contain the error logs and reports.
3. Open each folder and delete the contents by selecting all files (press Ctrl + A) and pressing the Delete key. You may be prompted to provide administrator permission; click Continue to proceed.
Method 3. Use Wise Disk Cleaner
As a free disk cleanup and defragment tool, Wise Disk Cleaner can clean browser traces, useless and outdated junk files, cookies, and more to protect your privacy, free up your disk space, and make your PC run faster. Undoubtedly, it can also clear Windows Error Reporting files.
Step 1. Get Wise Disk Cleaner
You can download and install the free program from here.
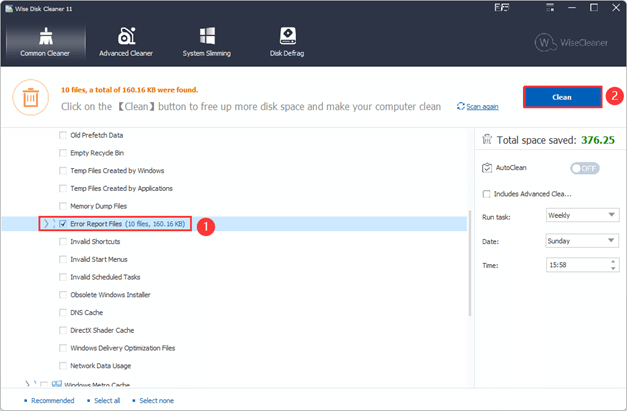
Step 2. Locate to relevant items to check
After getting into Wise Disk Cleaner, click Common Cleaner> Files in Computer> Windows System, then find the Error Report Files item to check.
Step 3. Scan & Clean
Click the Scan button to scan the item that you just selected, then tap Clean to finish.
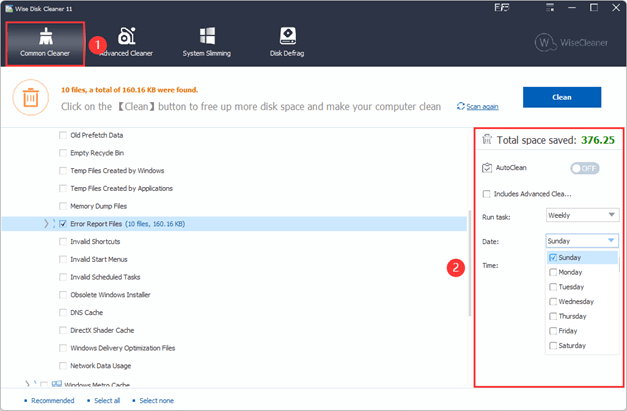
Step 4. Set an AutoClean Task (optional)
There is an AutoClean switch on the right side. Before turning it on, you can set a certain time to run the task. Daily, Weekly, Monthly, On idle, and At log on are available.
Once you create such a task from Wise Disk Cleaner, the Error Report Files will be automatically cleared at a specific time.
Conclusion
We present three methods to help you delete WER files, including using Disk Cleanup, manually deleting from File Explorer, and employing a free third-party tool like Wise Disk Cleaner, which also allows for automated cleaning tasks, as discussed in this post. By following these steps, you can efficiently clear unnecessary files and optimize your system's performance.

