If you are the Windows users, you will find that in the right-click menu of Windows Explorer, we can’t find Copy To and Move To commands. And if you add these commands, you will enjoy faster access to file transfer, furthermore, it can save a lot of time. This article will discuss how to do it in your Windows File Explorer right click context menu.
How to add Move To in right click context menu:
Step 1: Type “Regedit” in run to open the Registry Editor and navigate the following path:
Computer\HKEY_CLASSES_ROOT\AllFilesystemObjects\shellex\ContextMenuHandlers
Step 2: Right click on “ContextMenuH” and choose New and Key.
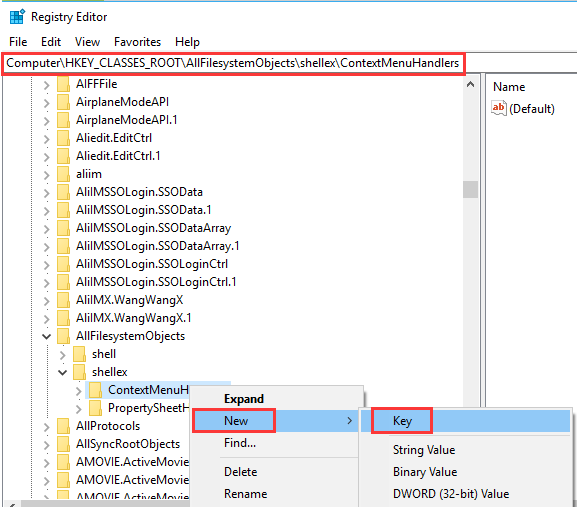
Step 3: Name your new key “Move To”, and double click its default settings in the right navigation pane and change its data value to:
{C2FBB631-2971-11D1-A18C-00C04FD75D13}
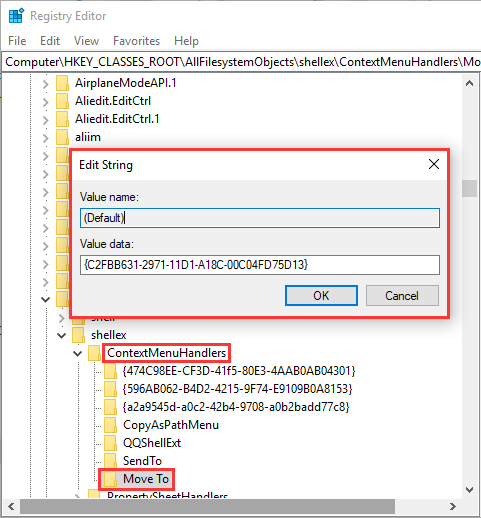
Now it will add Move to in the context menu.
How to add Copy To in right click context menu:
Repeat the above steps and name the new key as Copy To and input its value:
{C2FBB630-2971-11D1-A18C-00C04FD75D13}
After settings, your right click menu will be changed as the following shows:
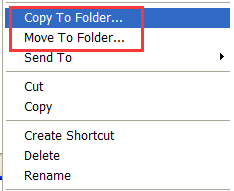
By adding Copy To and Move To in context menu, you can easily move or copy files from one folder to another one. Have a try?

