Most of us use the recycle bin regularly, so we are familiar with it. But it seems like a feature that we can’t customize it. In this article, we will take a closer look at it and find out how it works and how we can get the best use of it.
Change recycle bin size
Step 1: Right-click on recycle bin icon and then click “Properties”.
Step 2: Select “Custom size” option in “Settings for selected location” section, and then type in a customized value.
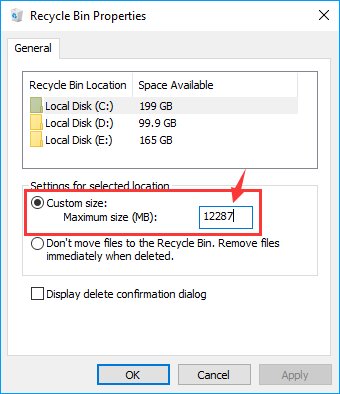
Step 3: Click “Apply” to save the changing.
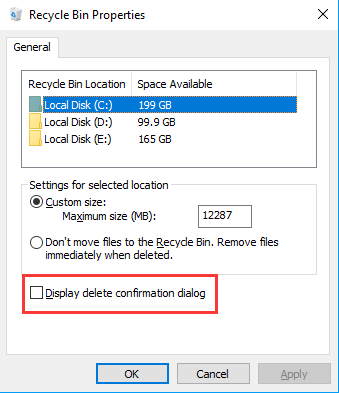
Disable the confirmation message
Whenever you want to delete a file, you will get this message “Are you sure you want to move this file to recycle bin?” Annoying? To disable the confirmation message, right-click the recycle bin icon and choose “Properties”. Then uncheck the “Display delete confirmation dialog”.
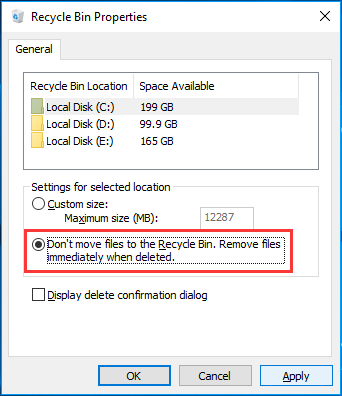
Disable recycle bin
Step 1: Click “Properties” by right-click on the recycle bin.
Step 2: Check “Don’t move files to the Recycle Bin, remove files immediately when deleted”.
Step 3: Then click “Apply”.
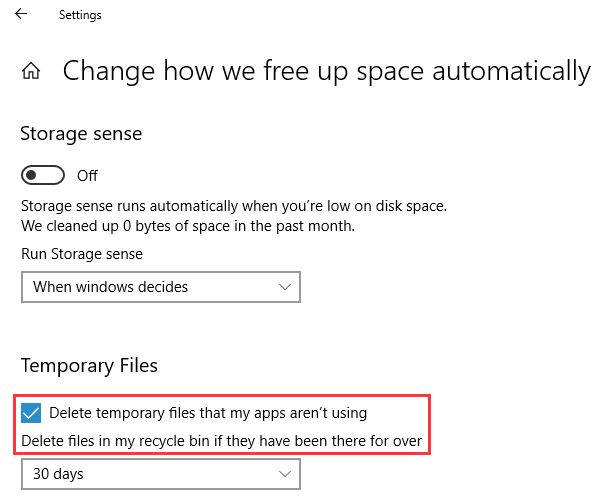
Automatically delete old files from recycle bin
Step 1: Choose “Settings”à”System”à”Storage”.
Step 2: Turn on “Storage sense” option and click “Change how we free up space automatically” link.
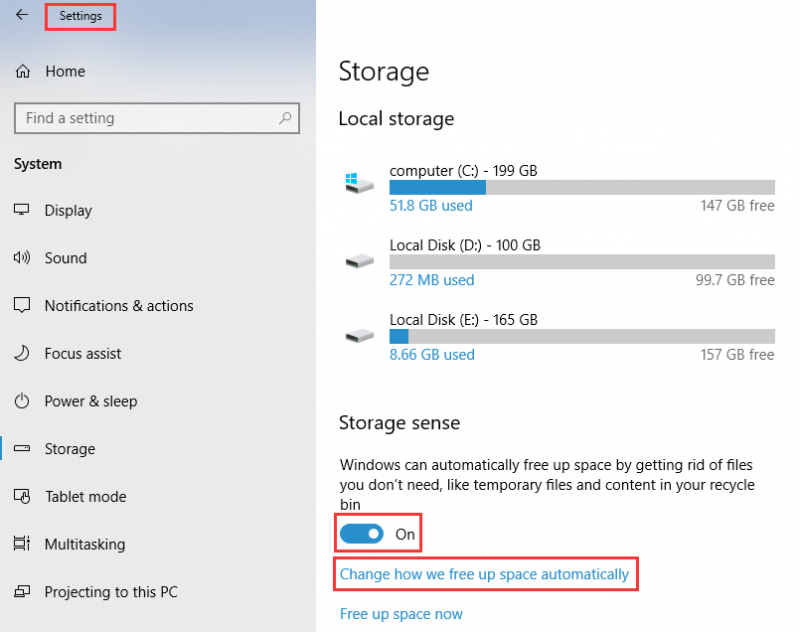
Step 3: Turn on “Delete temporary files that my apps are not using” in the “Temporary files”. Then select the days as you like.
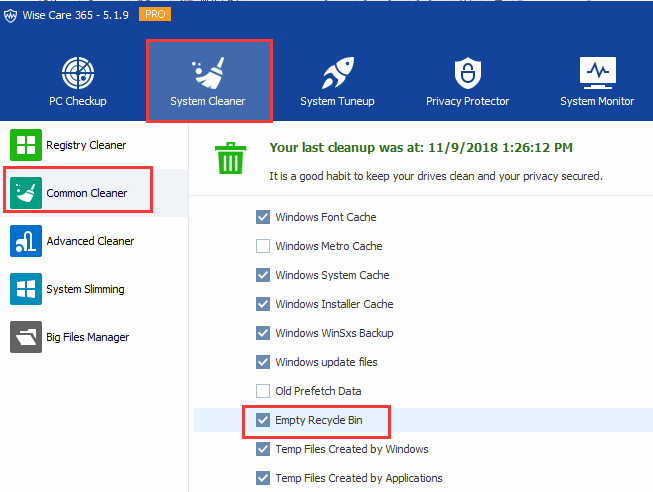
What’s more, you can also use Wise Care 365 to empty the recycle bin automatically, which is safe and easy.
How do you customize your Recycle Bin? Do you know any other tricks? Welcome to leave a comment and share it here!

