WiseCleaner Think Tank
Encounter difficult computer problems?
All about maintenance and optimization of your Windows System.
Mar 29, 2024
Windows Defender is a robust antivirus tool that comes built into Windows, providing real-time protection against various threats. Windows Defender Scans folder is a folder of this software which is usually used to record details of virus scans and files generated during temporary storage.
However, sometimes you may need to delete this scan history folder for troubleshooting or to free up space. This WiseCleaner post will walk you through the steps to delete the Windows Defender Scans folder or the files in it.
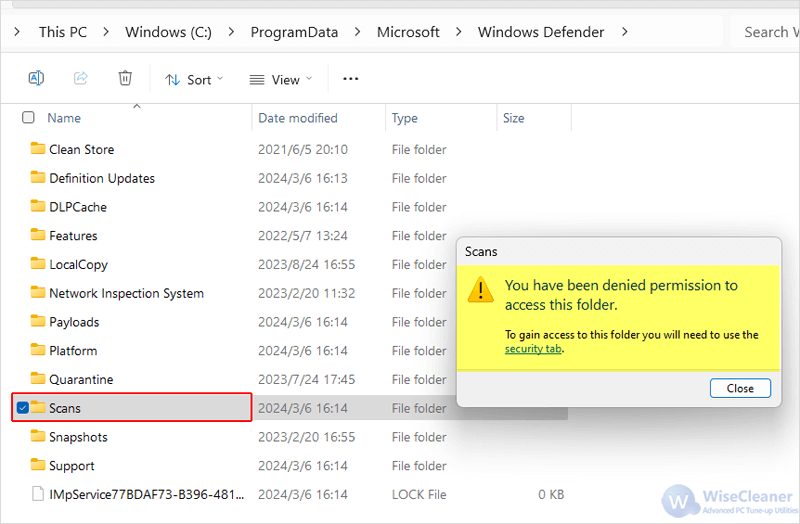
The Windows Defender Scans folder, especially the History subfolder contains Windows Defender history. However, as a system folder, you cannot directly delete or simply open it even with Administrator permission.
Over time, this folder accumulates a large amount of data and occupies your precious disk space. Clearing the scan history may help resolve some problems with Windows Defender, as this removes potentially corrupt data. Deleting the scan history also help protect your privacy. It is also important to be noted that deleting Windows Defender Scans folder will remove the record of past scans and detected threats.
In most cases, users can access the Windows Defender Scans folder successfully after running the the Deployment Image Servicing and Management Tool (DISM). Follow the steps below to delete the Scans folder.
Right-click on the Start button or press Win + X. Choose the Terminal (Admin) option from the list.

On the window of Windows Terminal, type each of the DISM command and press the Enter key one after another:
DISM /Online /Cleanup-Image /CheckHealth
DISM /Online /Cleanup-Image /ScanHealth
DISM /Online /Cleanup-Image /RestoreHealth
Wait for the process to complete. This can take some time, so be patient. Then, the process will provide feedback on its progress and completion.
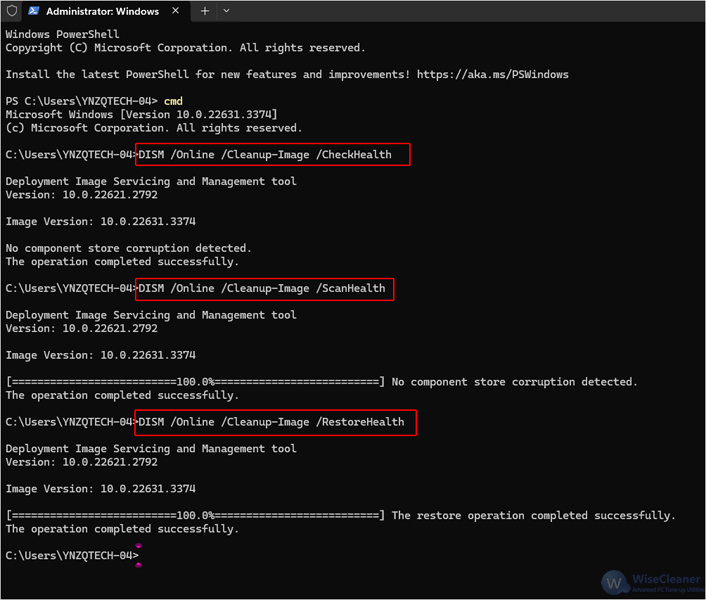
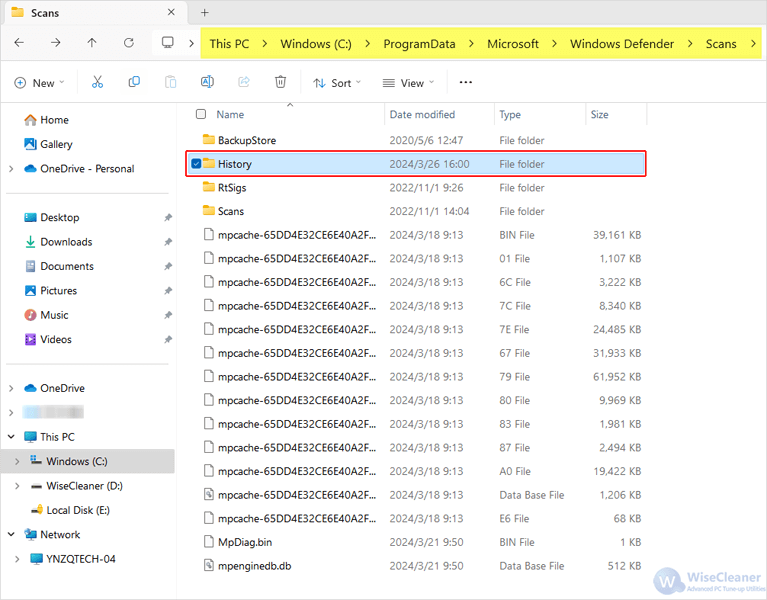
After running the DISM command, you should be able to access the Scans folder and delete the History subfolder in it.
To do this, open File Explorer and navigate to the following path:
C:\ProgramData\Microsoft\Windows Defender\Scans
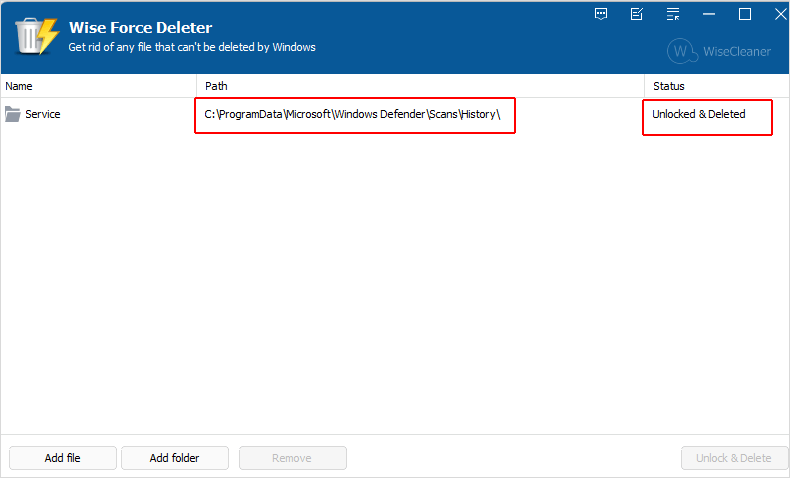
In addition, Wise Force Deleter is a software tool designed to help users delete files and folders that are difficult to remove through conventional means in the Windows OS.
Wise Force Deleter can forcefully unlocks and removes the file or folder which is being used or needs restrictions to be accessed. It can also make sure that the deletion process does not harm the operating system or other essential files, which is much safer and convenient to use.
By following these steps, you can successfully delete the data in Windows Defender Scans folder. Hope this article helps you with managing your Windows Defender scan history. If you have any further questions about Windows PCs or need assistance with other features, feel free to go to WiseCleaner Think Tank or contact us!
wisecleaner uses cookies to improve content and ensure you get the best experience on our website. Continue to browse our website agreeing to our privacy policy.
I Accept


