WiseCleaner Think Tank
Encounter difficult computer problems?
All about maintenance and optimization of your Windows System.
Sep 27, 2023
Protecting your passwords is essential for maintaining the security of your saved accounts in Google Chrome. One way to enhance password security in Google Chrome is to use Windows Hello for filling passwords. Doing this will add an extra layer of security to ensure that only you have access to your accounts in Google Chrome.
Windows Hello is a biometric authentication feature introduced in Windows 10 & 11. It allows users to log in with their face, fingerprint, or even iris. This provides a more convenient and secure way compared to traditional passwords, as biometric information is unique to each individual and hardly possible to be replicated. Please read on as we discuss all you need to know about how to use the Windows Hello feature to fill in your passwords in Google Chrome.
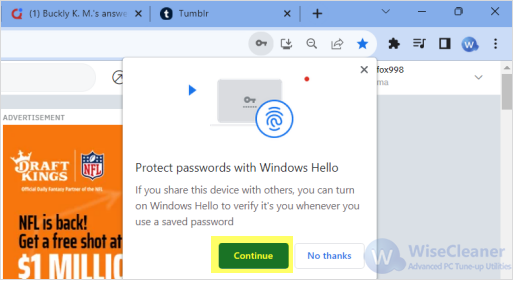
Windows Hello is disabled by default on the system. The first thing you need to do is to enable and set it up in Settings.

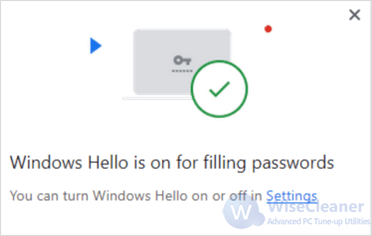
After logging in with your preferred Windows Hello method, Windows Hello is now on for filling passwords in Chrome to strengthen your password security. You might need to restart Google Chrome for the changes to take effect.
You can also turn it off in the Settings page of Google Chrome at any time if you don’t need this feature.
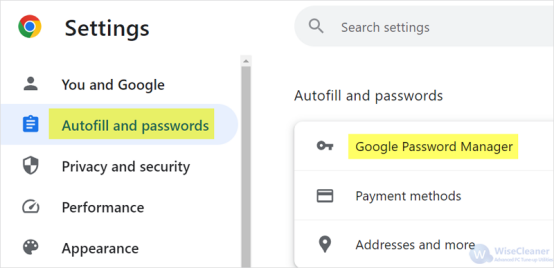
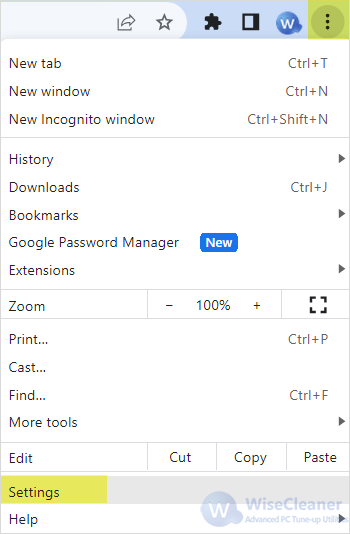
Open Google Chrome, click the Customize and control Google Chrome (three-dotted) button in the top-right corner, and then select Settings.

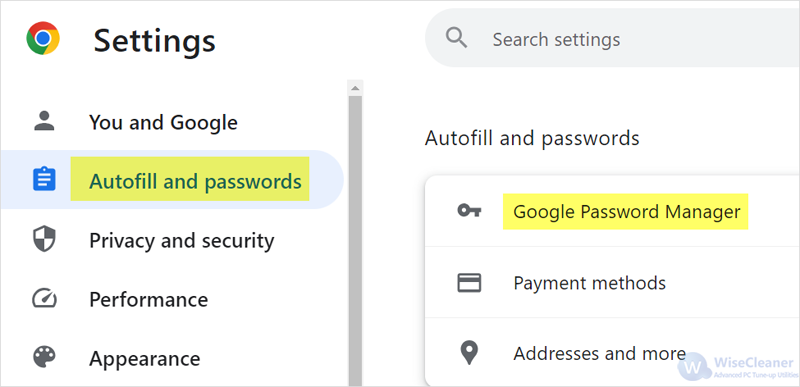
Select the Autofill and passwords tab on the left pane, and click Google Password Manager on the right pane.
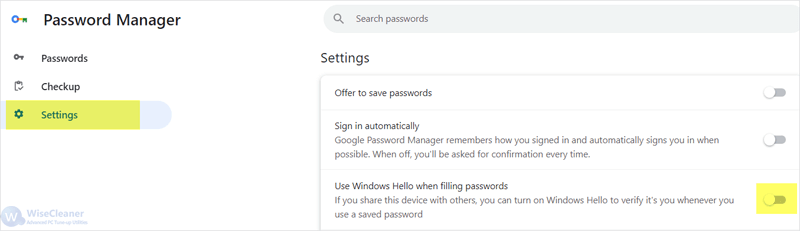
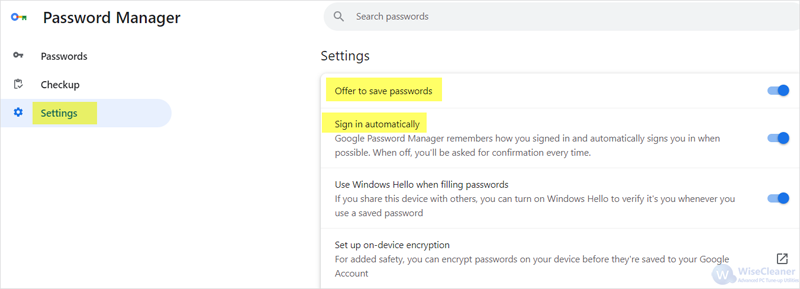
Click on Settings in Password Manager. Toggle off the "Use Windows Hello when filling passwords" switch to disable the Windows Hello feature in Chrome.
The autofill feature in Google Chrome allows the browser to automatically fill in information for you on certain websites, including your usernames, passwords, address information, and payment details. You can turn it off to protect your passwords.
Open Google Chrome browser, click the Customize and control Google Chrome button, and then select Settings.
Select the Autofill and passwords tab, and click Google Password Manager.
Click on Settings on the left pane. Toggle off both the "Offer to save passwords" and "Sign in automatically" switches to disable the autofill feature.
This is how to use Windows Hello when filling passwords to protect your saved passwords in Google Chrome. Other useful tips to protect your passwords in Chrome include but not limited to, using strong passwords and updating them regularly if necessary, not reusing passwords on different websites, keeping Google Chrome up to date, etc. Please share this WiseCleaner article if it helps.
wisecleaner uses cookies to improve content and ensure you get the best experience on our website. Continue to browse our website agreeing to our privacy policy.
I Accept


