In today's digital age, protecting the integrity and ownership of your documents is paramount. One effective way to assert ownership and prevent unauthorized use of PDF documents is by adding watermarks. Watermarks not only serve as a visual identifier but also deter plagiarism and unauthorized distribution. Here’s a comprehensive guide on how to add watermarks to your PDF documents.
Method 1: Using Microsoft Word
Microsoft Word offers a straightforward method to add watermarks, if you only want to do some simple watermark adding process, then you can refer to the following steps.
Step 1. Open PDF in Microsoft Word
- Open Microsoft Word and create a new document.
- Go to File > Open and select your PDF file. Word will convert the PDF into a Word document format.
Step 2. Insert text watermark
- Go to the Design tab and click on Watermark in the Page Background group then select Custom Watermark.
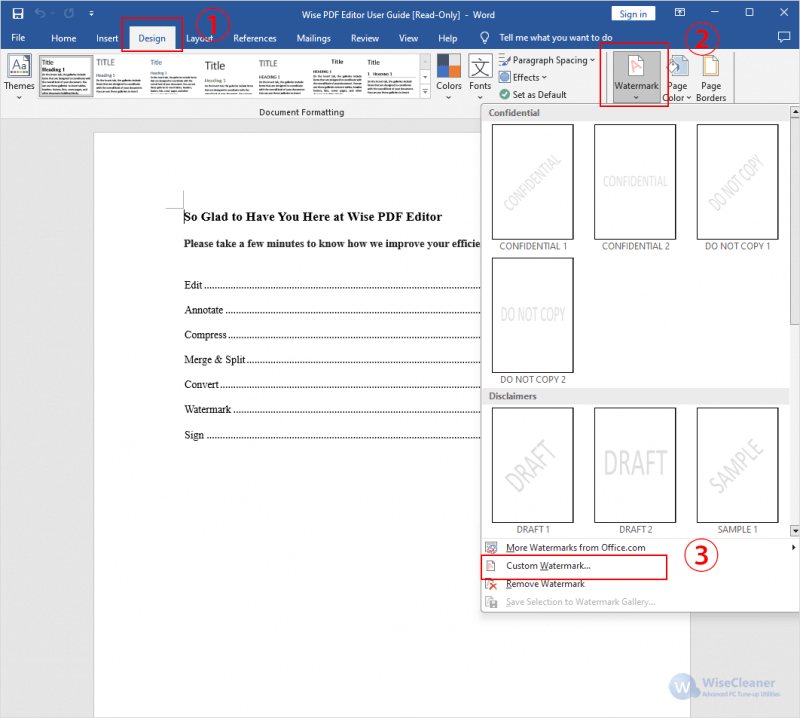
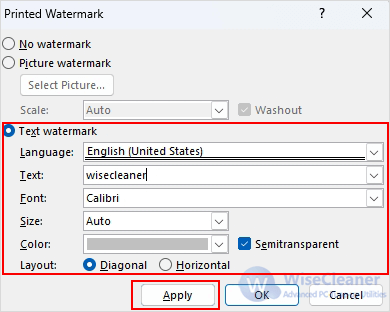
- In the Printed Watermark window, you can choose to insert picture watermark or text watermark. Here is an example of text watermark.
- Choose Text watermark, then enter the text for your watermark and adjust settings such as font, size, color, and layout.
Step 3. Save as PDF
Save the document as a PDF file by going to File > Save As and selecting PDF from the file format options.
Method 2: Using Wise PDF Editor
However, using Microsoft Word to convert the document format may cause the page to be messy, which will bring us more problems. At this time, you can use Wise PDF Editor-a comprehensive PDF editing software that allows you to create, edit, and manage PDF documents. It also offers robust features for adding and customizing watermarks.
Step 1. Download and install Wise PDF Editor
If you haven't downloaded Wise PDF Editor yet, you can click here to download.
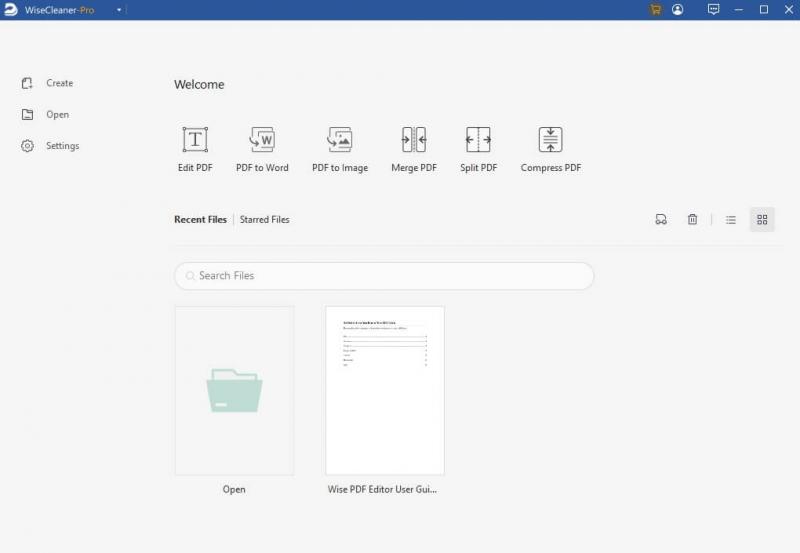
Step 2. Open PDF in Wise PDF Editor
After opening Wise PDF Editor, you will see its many features on the homepage, open the PDF document to which you want to add a watermark.
Step 3. Add Watermark
1. Click on the Protect tab in the top of the Wise PDF Editor window.
2. In the editing toolbar, click on Watermark and then select Custom Watermark.

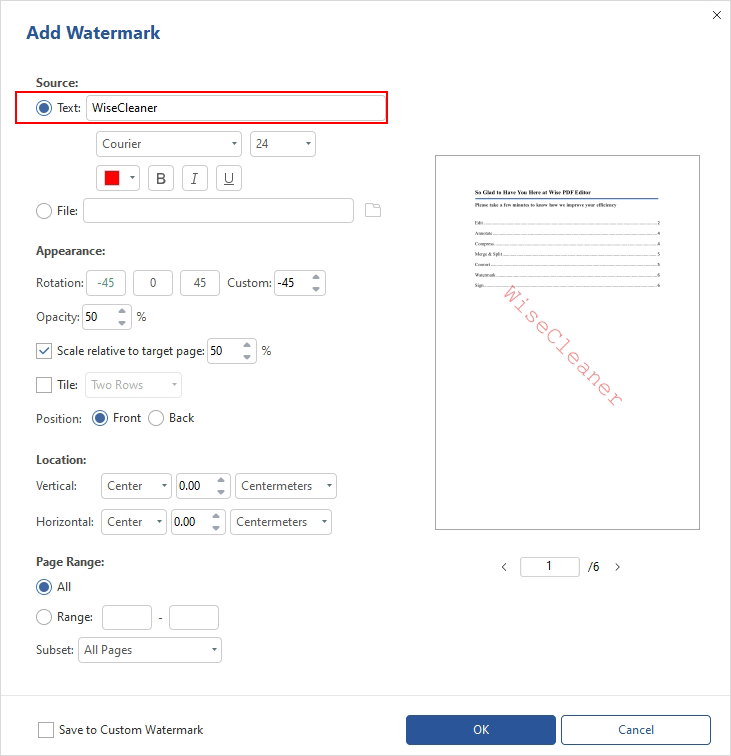
3. In Add Watermark window, choose whether you want to add a text watermark or an image watermark.
For Text Watermark:
- Enter the text you want to use as the watermark.
- Customize the appearance, location, and page range of the watermark.
For Image Watermark:
- Select File and upload the image file you want to use as the watermark.
- Customize the appearance, location, and page range of the watermark.
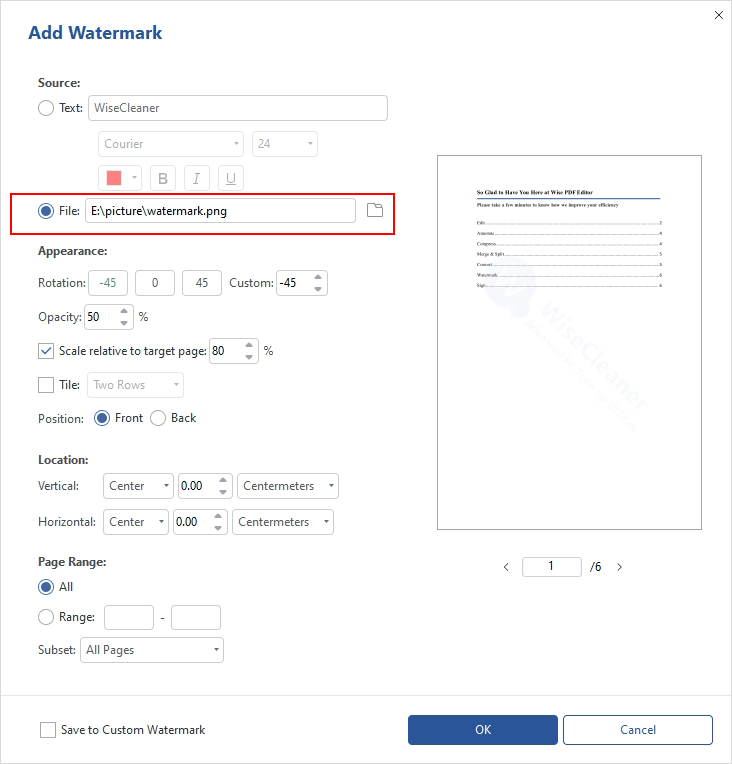
4. Click OK to apply the watermark.
Step 4. Save the PDF document with the added watermark.
Conclusion
Adding a watermark to PDF documents is a simple yet effective way to enhance document security and maintain ownership rights. Whether using Microsoft Word for simple watermarks, or use Wise PDF Editor for its comprehensive features, the process ensures that your documents remain protected and professionally presented.

