It is convenient to have multiple users accounts on the same device in Windows, however, if you have a user account that you want to make unavailable without deleting it, you can disable the account, of course, the disabled account can be enabled again. Now I will show you how to do that. In order to enable or disable user accounts, you need to be signed in as Administrator.
Disable/Enable a User Account
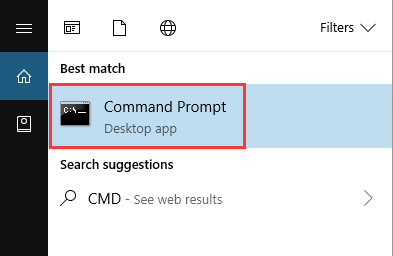
Step 1. Run Command Prompt
Type “CMD” into the search box, and right-click “Run as administrator”.
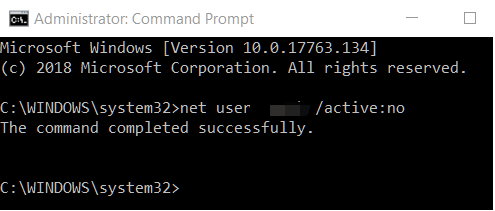
Step 2. Enter the command
Type or copy the following command, and hit Enter. After that, the user account will be disabled, and you won’t find it as an active account.
Net user “User Name” /active:no
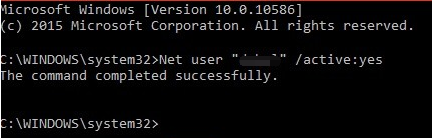
Step 3. Enable the user account
It is easy to enable this user account again, by just typing the following command:
Net user “User Name” /active:yes
Multi-user Cleaning
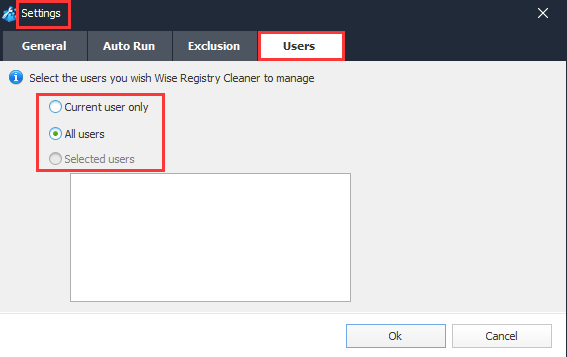
If you want to scan and clean all users’ registries at the same time instead of logging in to an individual account, Wise Registry Cleaner is your best choice, with its help, you don’t need to log in under each account to scan and fix registry issues.
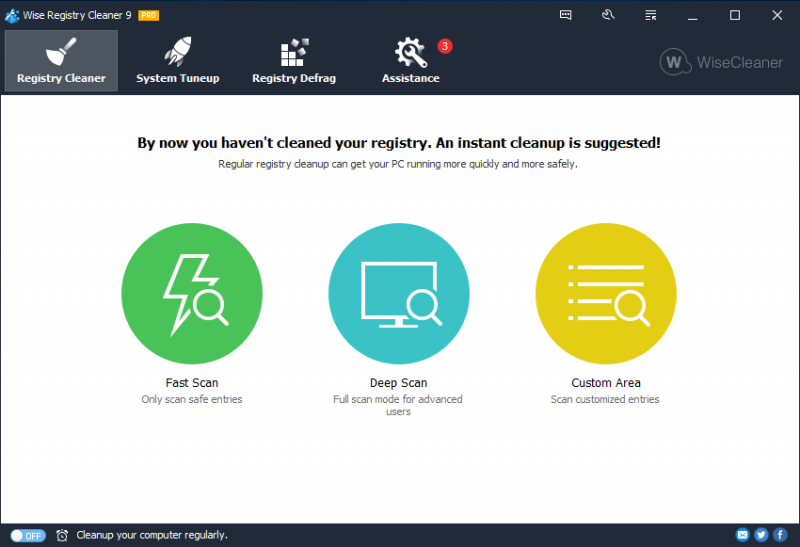
In settings, you can select the users you wish Wise Registry Cleaner to manage:
Do you have any methods to manage user account in windows? Welcome to drop a comment below.

