WiseCleaner Think Tank
Encounter difficult computer problems?
All about maintenance and optimization of your Windows System.
Nov 28, 2024
When handing your iPhone over to your child or sharing it temporarily, it is essential to keep control. This is where the Guider Access feature comes in. It is an accessibility feature built into iPhone and iPad which is designed to allow users to stay focused on a single app by limiting access to other functions and apps.
Once started, it can prevent users from navigating to other areas or making unintended changes. This makes it especially useful for parents who wants to allow their children to use a certain app without worrying about them accessing into other features or making accidental purchases, or educators who wishes to keep their students focused on a particular task at class.
In this WiseCleaner article, we will explorer a comprehensive guide on what can Guided Access do, how to enable it and how to use it on a iPhone 16.
Open the Settings app on the Home Screen, the Search bar or from the App Library.
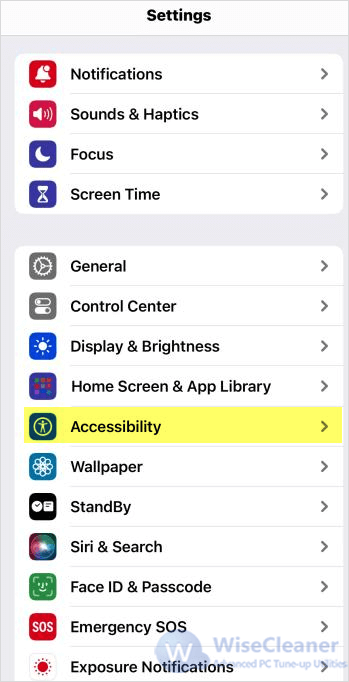
Scroll down and select Accessibility.
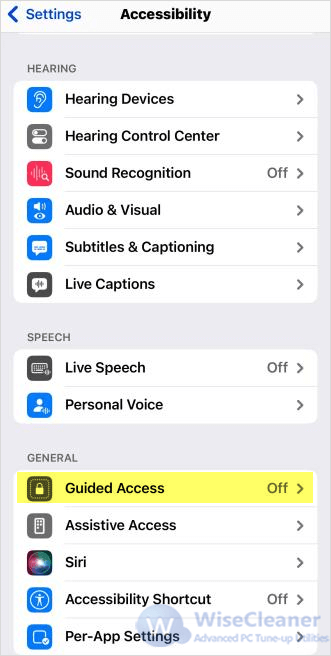
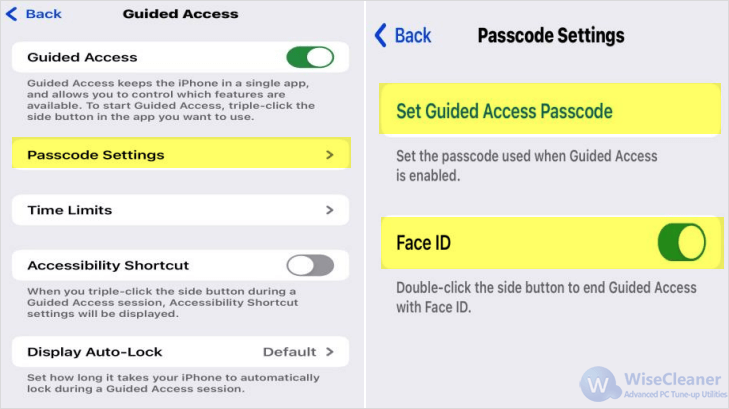
Locate and tap on Guided Access under the GENERAL section.
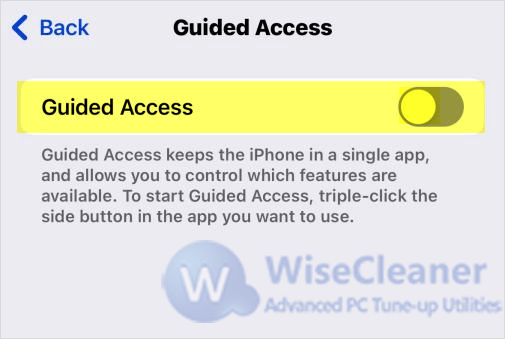
Toggle the switch of Guided Access to On.
Tap on Passcode Settings and set the Guided Access passcode by entering a passcode or using the Face ID. This passcode is used to end the Guided Access session.
Open and stay in the app you want to use the Guided Access feature with.
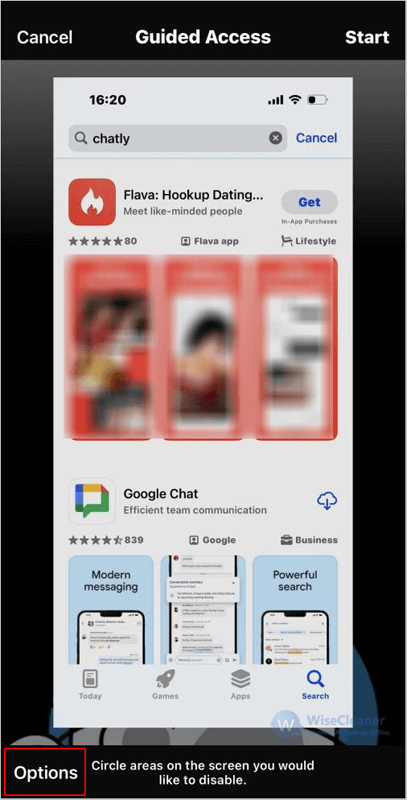
To start Guided Access, triple-click the side button to open the screen of Guided Access.
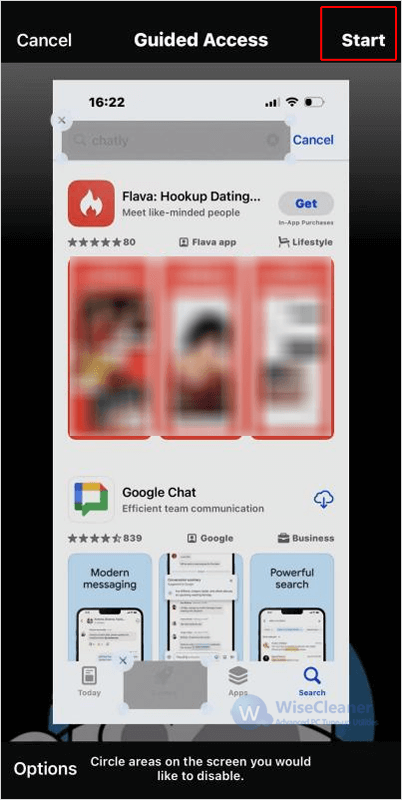
You can circle areas on the screen that you would like to disable, or adjust Options to disable the Volume or other hardware buttons.
Tap the Start button in the top right corner to begin the session.
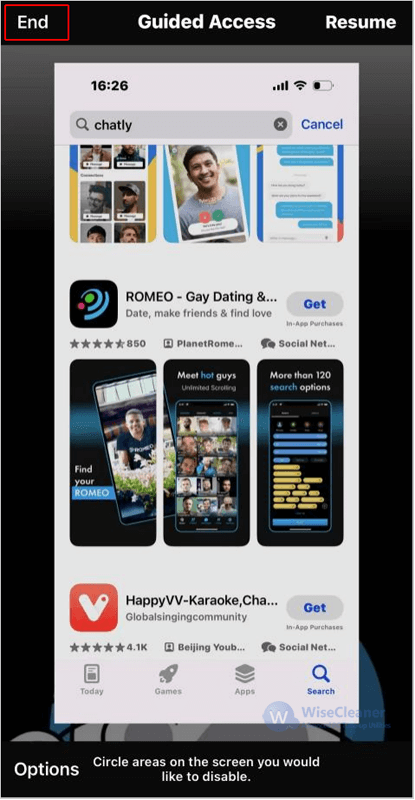
Once you have finished, triple-click the side button and enter your passcode, then tap End in the top left corner or use Face ID to exit.
Guided Access is a powerful feature that offers both control and convenience when using iPhone or iPad. Whether you are a parent, a teacher, a business professional or simply someone seeking to avoid distractions, by following the steps in this WiseCleaner Think Tank to set up the Guided Access feature, you can ensure a more focused experience.
wisecleaner uses cookies to improve content and ensure you get the best experience on our website. Continue to browse our website agreeing to our privacy policy.
I Accept