WiseCleaner Think Tank
Encounter difficult computer problems?
All about maintenance and optimization of your Windows System.
Sep 24, 2021
The network has become an indispensable part of people's daily life, work and study. But sometimes, it is inevitable to forget the Wi-Fi password. Therefore, the key to mastering how to check the saved Wi-Fi password is a skill that can give you extra points. The following will take Windows 10 as an example to show you how to view the saved Wi-Fi password.
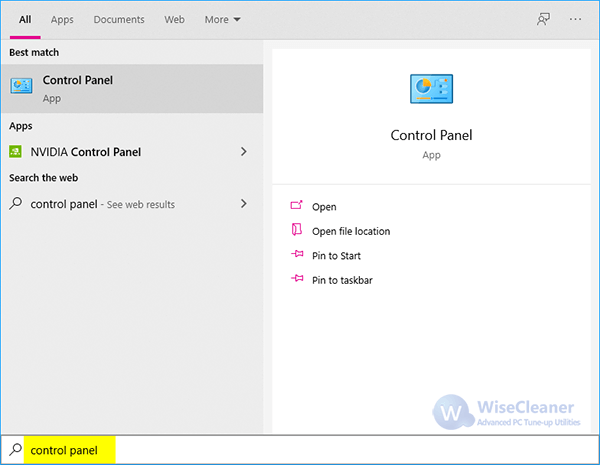
1. Press Win+S to open the Search window, and type control panel. Then click and open the Control Panel.
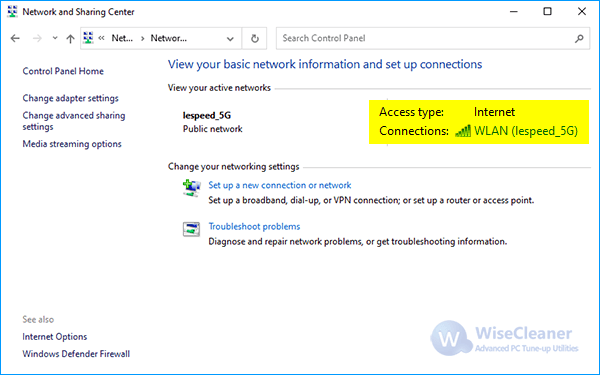
2. Click Network and Internet -> View network status and tasks.

3. Then you will see your active networks. Click the Wi-Fi name after Connections.
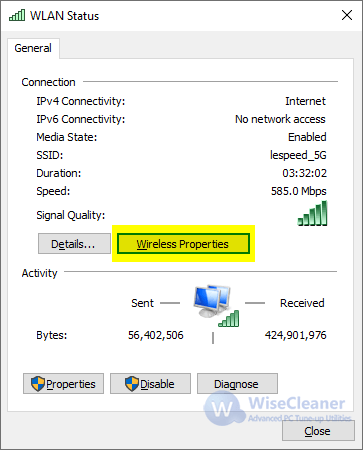
4. In the WLAN Status window, click Wireless Properties.
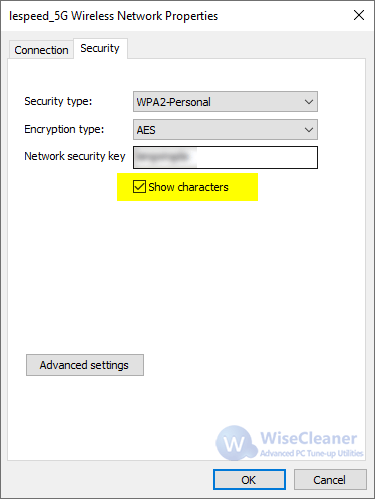
5. Switch to Security tab, and check Show characters under Network security key, the password can be displayed in plain text.
NOTE: The above method can only view the password of the currently connected Wi-Fi. If you want to konw the saved passwords of the Wi-Fi you have connected to, please click here to learn How to view all Wi-Fi passwords saved in Windows 10 & 11.
wisecleaner uses cookies to improve content and ensure you get the best experience on our website. Continue to browse our website agreeing to our privacy policy.
I Accept


