WiseCleaner Think Tank
Encounter difficult computer problems?
All about maintenance and optimization of your Windows System.
Dec 12, 2023
The file drag-and-drop feature greatly simplifies the process of file manipulation, allowing users to easily move files from one location to another, or add files to a program for opening or processing. This intuitive and convenient operation method improves the user's work efficiency and reduces the complexity of the operation. It is a very practical and intuitive interaction method. Whether in personal use or work scenarios, file drag and drop has become an indispensable and important function in computer operations.
However, recently some Windows users have found that the computer cannot use the file drag and drop function. The reasons are various, which may include permission issues, system setting errors, damaged system files, background services not running correctly, etc. These problems may cause the file drag and drop function to fail, causing inconvenience to users. This article will show you how to fix the drag-and-drop feature not working on Windows 11.
If you have enabled the drag and drop feature, but drag and drop files in File Explorer are unresponsive, you can try to restart File Explorer. The specific method is as follows.
Press the Control + Shift + Escape keyboard shortcut to open the Task Manager. Find Windows Explorer in the list, right-click on it, and select the Restart option.
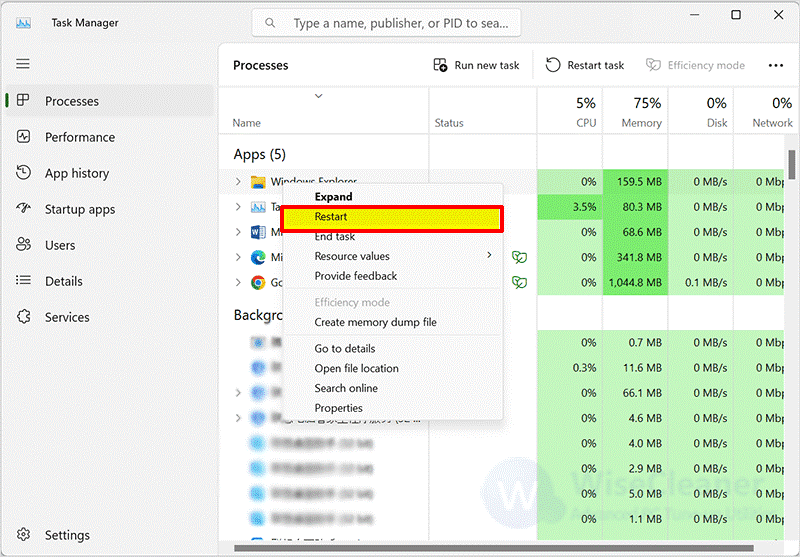
The screen will blink for a few seconds and then you can close Task Manager and open Windows Explorer again to see if you can drag and drop files.
If you drag and drop files between two apps unresponsive, you can try to end the app process in Task Manager and then reopen it again. The steps are as follows.
Press the Control + Shift + Escape keyboard shortcut to open the Task Manager. Find the two apps in the list, right-click on them, and select the End task option.
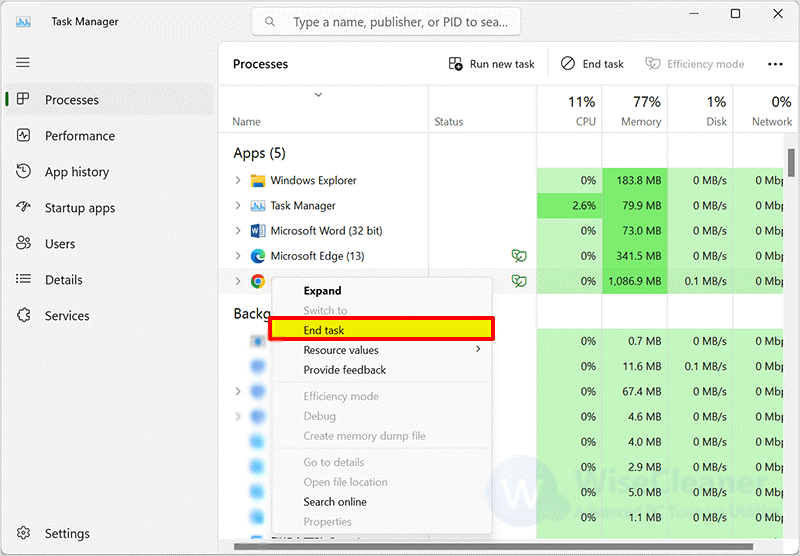
Then close the task manager, reopen both apps, and try again to see if you can drag and drop.
You can use a hardware troubleshooter to see if there is a problem with your mouse or trackpad connected to your computer. The steps are as follows.
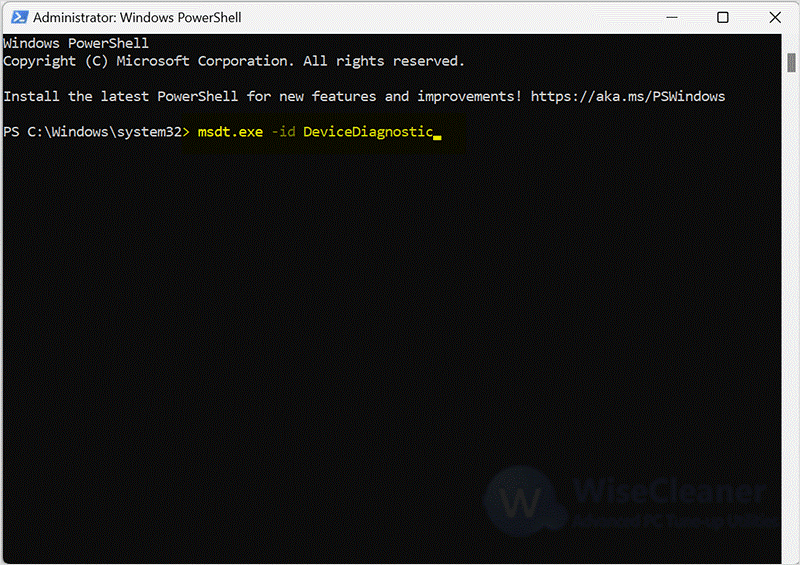
Click on Windows Start and type Windows PowerShell in the search box. Find the top result and select Run as administrator. When the User Account Control window appears, click on the OK button.
Type the following command and press Enter.
msdt.exe -id DeviceDiagnostic
The Hardware Troubleshooter window will appear. Click on the Next button.
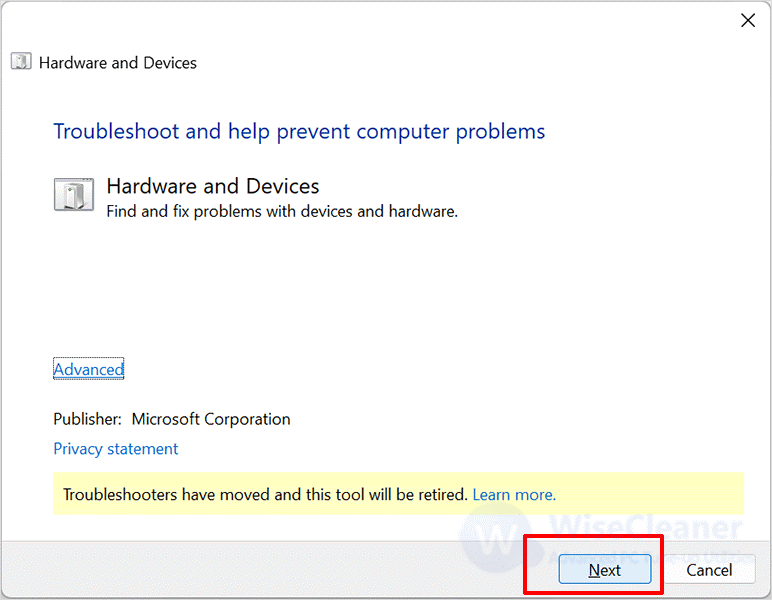
Wait for the troubleshooter to diagnose and repair the issue between hardware connections. Finally, close the Troubleshooter window and restart your PC.
If the mouse driver is damaged, the mouse will not work in Windows 11, thus preventing the file drag and drop function. You can reinstall the mouse driver and check again whether the drag-and-drop function is available. Specific steps are as follows.
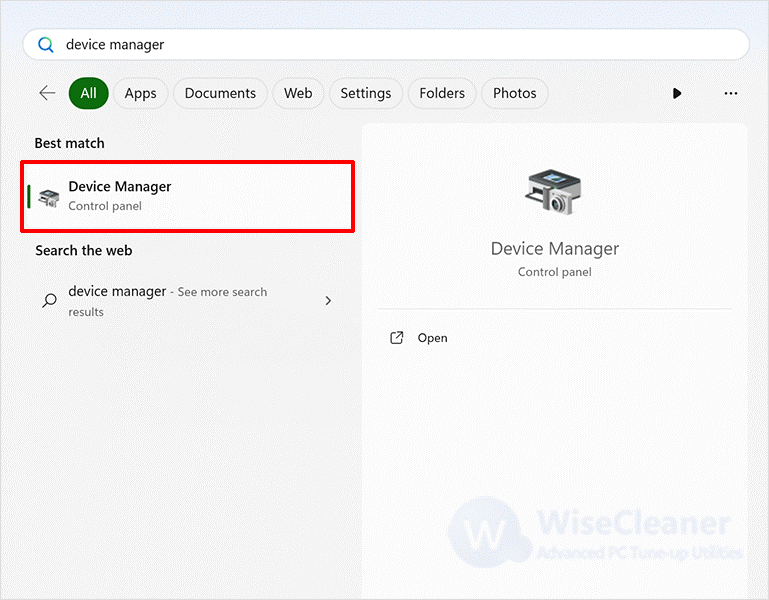
Click on Windows Start and type Device Manager in the search box. Open the top result in the list.
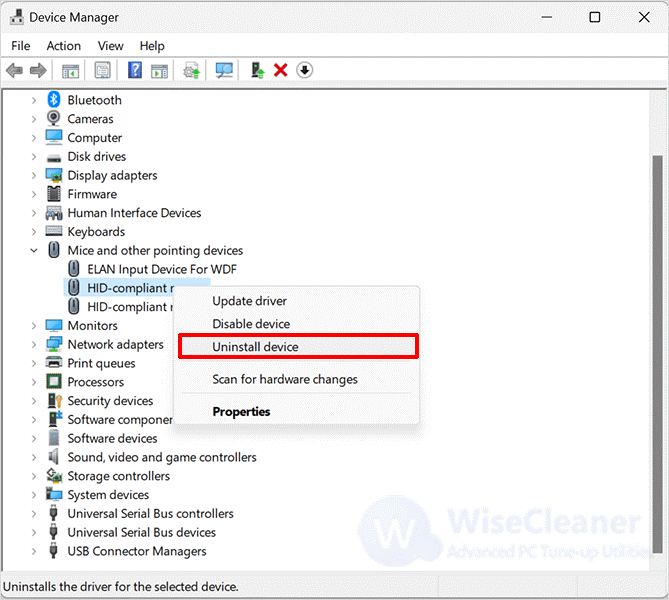
Expand the ‘Mice and other pointing devices’ section. Locate the mouse in the list and right-click to select the Uninstall device option.
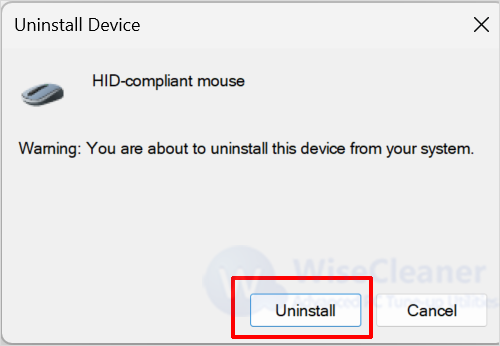
Click on the Uninstall button in the window that appears.
After the uninstallation is complete, close Device Manager, then restart your computer and Windows will automatically download the appropriate mouse driver.
If you are not able to realize the drag and drop function, there may be an error in the registry configuration. You can fix it by changing the registry values. Please make a backup of your registry before making changes to prevent incorrect changes.
Click on Windows Start and type regedit, find the matched item, and open it. When the UAC window appears, click on Yes.
Paste the following path into the address bar, and press Enter.
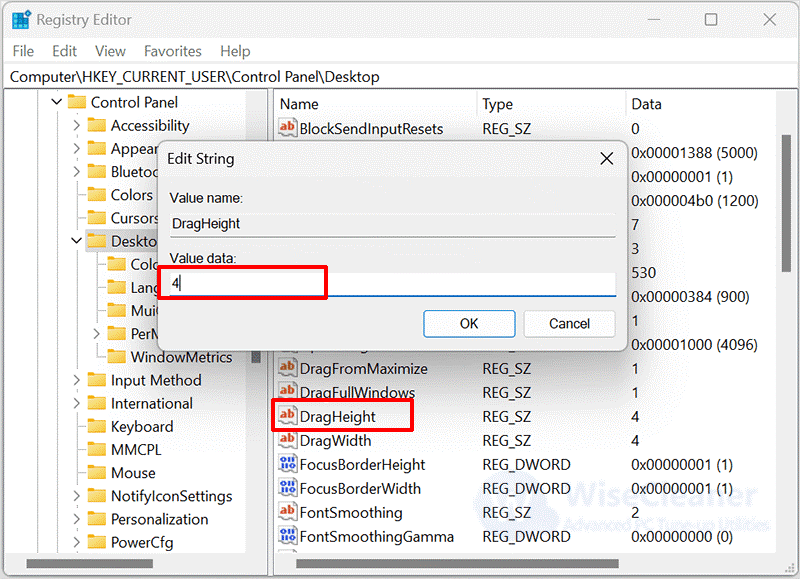
HKEY_CURRENT_USER\Control Panel\Desktop
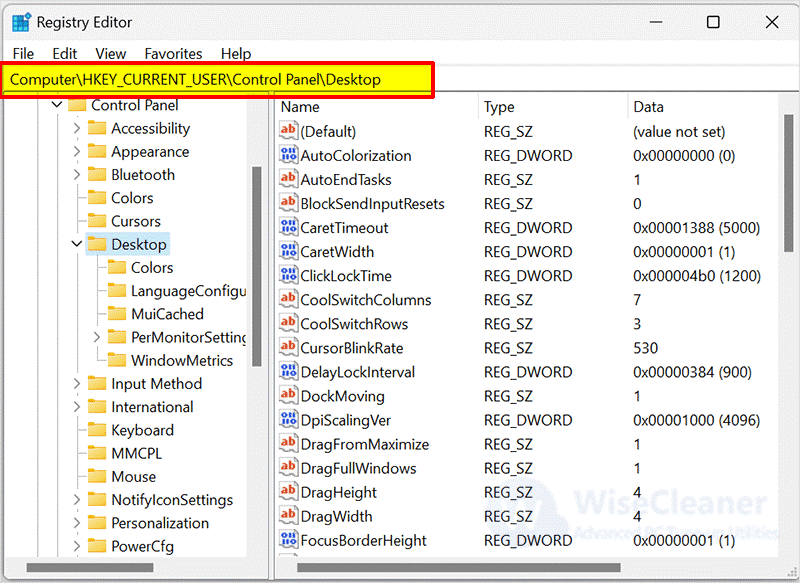
Double-click on the DragHeight. There will be a new window that appears, type 4 in the value data and click on OK.
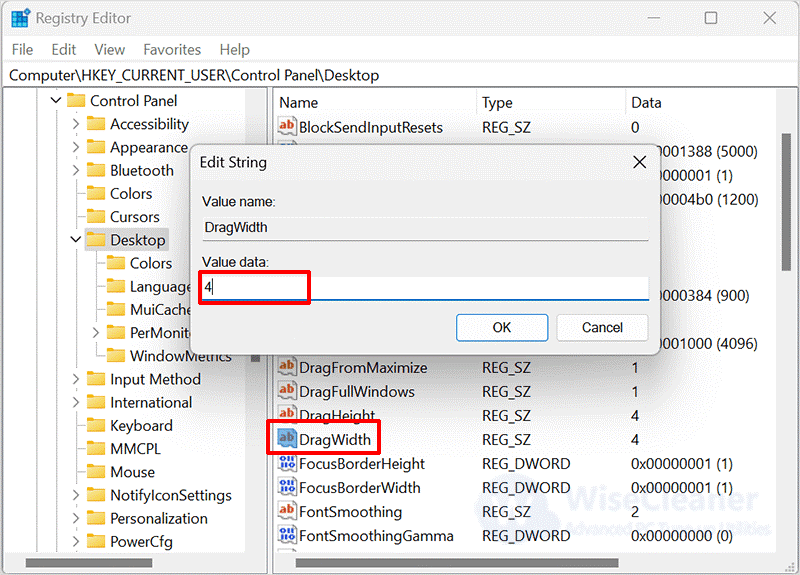
Next, double-click on the DragWidth and edit the value as 4, and click on OK to close the window.
Finally, close the Registry Editor window and restart your PC to apply the changes.
Sometimes corrupted system files or corrupted component storage can also cause the drag-and-drop feature to not work. You can use SFC and DISM to fix these problems. The steps are as follows.
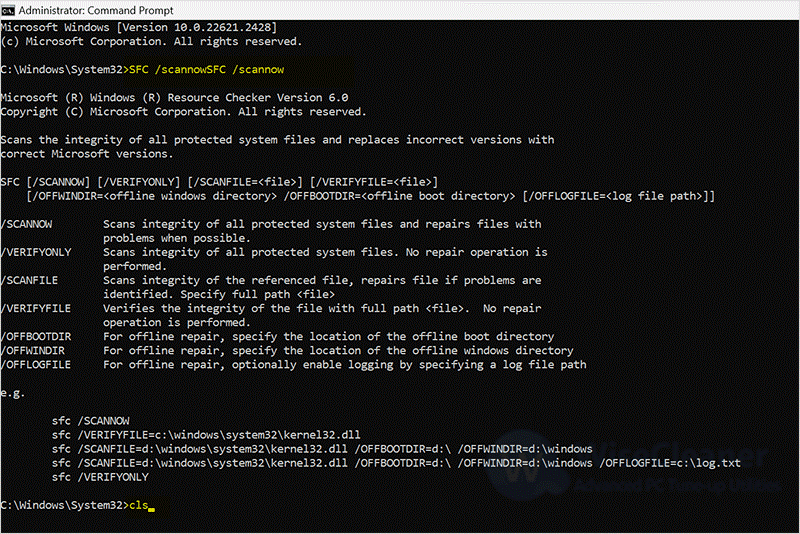
Click on Windows Start and type Command Prompt in the search box. Run the matched item as the administrator.
When the User Account Control window appears, click Yes to continue.
Type the following command and press Enter to execute it.
SFC /scannow
Then, type cls and press Enter.
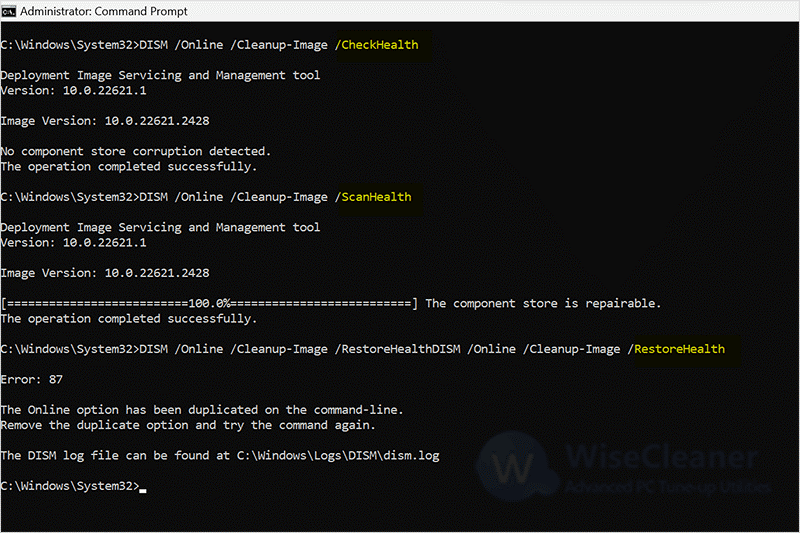
Next, type the following commands one by one.
DISM /Online /Cleanup-Image /CheckHealth
DISM /Online /Cleanup-Image /ScanHealth
DISM /Online /Cleanup-Image /RestoreHealth
Finally, after execution is complete, close the Command Prompt. Restart your computer to see if the problem is resolved.
If you have already created a system restore, you can restore the system to a previous point in time and come back to see if the file drag-and-drop feature is available.
File drag and drop is a very important function for computer use. Once problems occur, it will affect our work efficiency. The above are all ways to solve the problem that files cannot be dragged and dropped. If you have other computer-related questions, you can visit WiseCleaner to learn more.
Additional Related Articles
wisecleaner uses cookies to improve content and ensure you get the best experience on our website. Continue to browse our website agreeing to our privacy policy.
I Accept


