WiseCleaner Think Tank
Encounter difficult computer problems?
All about maintenance and optimization of your Windows System.
Jan 10, 2023
Have you ever tried to remove the language you are currently using, only to find the option to remove the language pack is grayed out. This may have occurred to every Windows user who uses more than one language and caused a lot of trouble.
Often times, when the option to remove a language is grayed out, it is because the language is set to the Windows display language, or system language in other words. In this WiseCleaner post, we’ll show you the simplest way to remove the language pack you don’t need any more.
Not like older versions, since Windows 10, Microsoft put nearly every function into Windows Settings instead of Control Panel. So the method described in the post works for both Windows 10 and 11.
Click Windows key on the keyboard to popup the Start menu. Type Settings in the search box and click it open from the results.

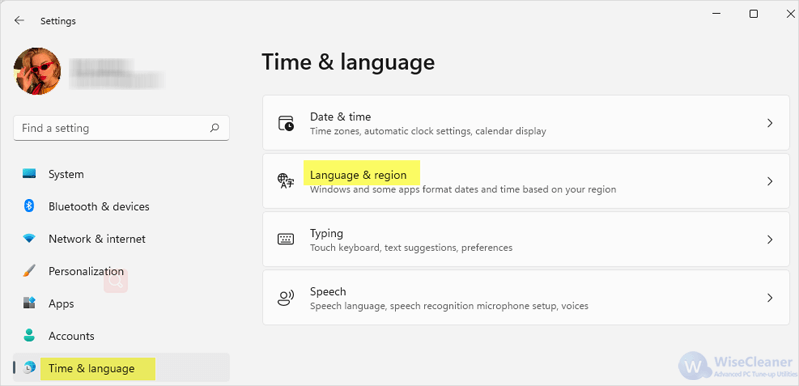
In the left sidebar, select the 7th item which is Time & language. Then click on Language & region on the right panel.
If you want to remove your current Windows display language, the most important thing to do first is to set a new language as the Windows default display language before the Remove button appears.
Click on the arrow next to Windows display language to open its drop-down menu. Select another language other than the one you want to remove.
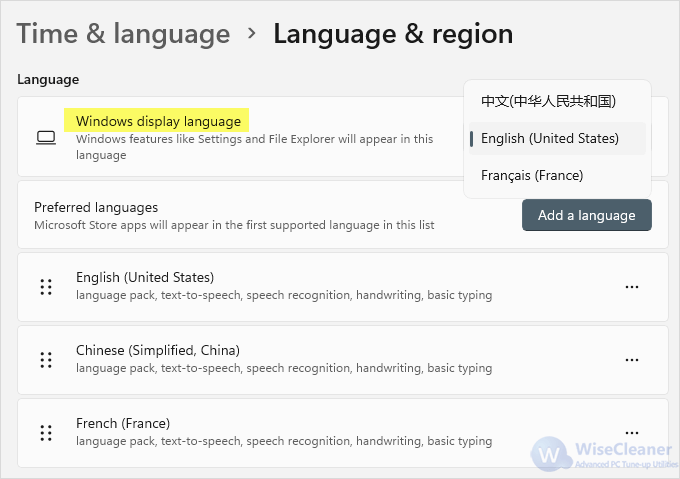
Now click the button with three dots next to the language you want to remove, and click on Remove.

The target language is now totally removed from the system. If you want to remove more IME files to free up disk space, Wise Care 365 is the best choice, and your opinions are always welcomed in the comment blank below.
Additional Related Articles
wisecleaner uses cookies to improve content and ensure you get the best experience on our website. Continue to browse our website agreeing to our privacy policy.
I Accept


