WiseCleaner Think Tank
Encounter difficult computer problems?
All about maintenance and optimization of your Windows System.
Aug 13, 2021
According to the latest news, Microsoft will release the official version of Windows 11 in October-November this year. At that time, users who meet the requirements can upgrade for free. So, the most asked question is "Can I (my PC) run Windows 11?" In order to let the majority of users know whether their computers meet the minimum requirements of Windows 11, Microsoft has launched its own check tool - PC Health Check (but now, it is unavailable to download on Microsoft website), and there are also many third-party tools, WiseCleaner Checkit is one of them.
| Processor | 1 gigahertz (GHz) or faster with 2 or more cores on a compatible 64-bit processor or System on a Chip (SoC) |
| Memory | 4 GB RAM |
| Storage | 64 GB or larger storage device |
| System firmware | UEFI, Secure Boot capable |
| TPM | Trusted Platform Module (TPM) version 2.0 |
| Graphics card | DirectX 12 compatible graphics / WDDM 2.x |
| Display | >9” with HD Resolution (720p) |
In fact, it is okay to check the compatibility rely on Windows 10 built-in components and commands without installing any tools. In this article, we will start to use the built-in components and commands of the Windows 10 system step by step to detect whether the current computer meets the requirements of Windows 11.
This is a built-in analysis and diagnosis tool, the reports detailed information about the DirectX components and drivers installed on the system. Through this tool, we can get the following information: CPU model, memory size, DirectX version, WDDM version, Boot type.
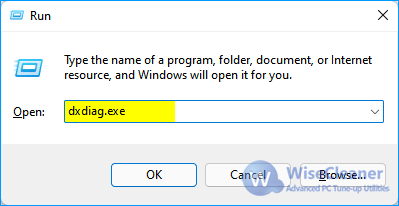
1. Press Win + r to open the Run window.
2. Type dxdiag.exe and press Enter.
3. Waiting for a few seconds and you will see the DirectX Diagnostic Tool window. Then click the button Save all information at the bottom, and select a location to save.
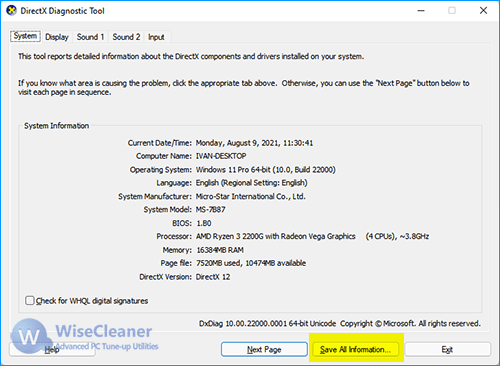
4. Open the exported file – Dxdiag.txt, then you will all required information in the first part “System Information”. BIOS, the boot type is UEFI or not. Processor, CPU model, Memory, physical memory size, DirectX Version, DirectX 12 or not, Driver Model , WDDM version.

Next, we need to check the list of CPUs supported by Windows 11 announced by Microsoft to see if our CPU is on the list.
TPM is the abbreviation of Trusted Platform Model, for more details, please click here to learn What is TPM. We only need to run a program to know whether the current system supports TPM.
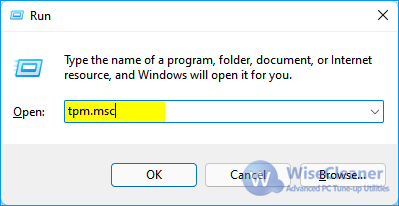
(1) Press Win+r to open the Run window.
(2) Type tpm.msc, and press Enter.
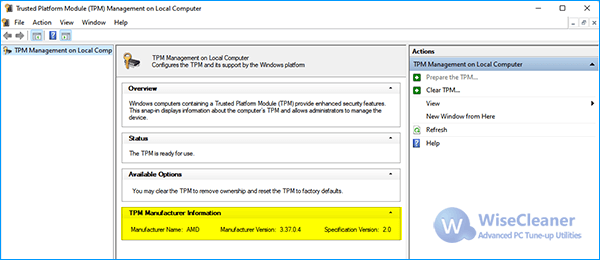
• TPM is enabled
If the TPM is enabled, you will see the information in the figure below, and you can find the TPM version in "TPM Manufacturer Information".
• TPM is missed or disabled
If the result is “Compatible TPM cannot be found”, it may be that the TPM has not been enabled. 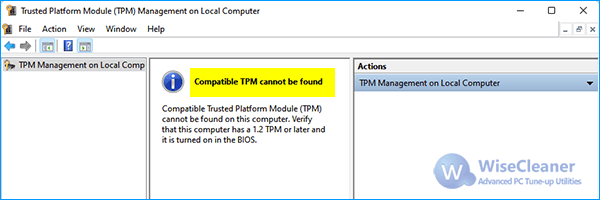
Please click here to learn How to enable TPM. Or contact the motherboard manufacturer (or check the motherboard manual) to confirm whether the motherboard supports TPM and how to activate TPM.
Here we need to use a command Confirm-SecureBootUEFI
(1) Press Win+s to open the Search window.
(2) Type powershell and select Run as Administrator.
(3) Type the command Confirm-SecureBootUEFI and press Enter.
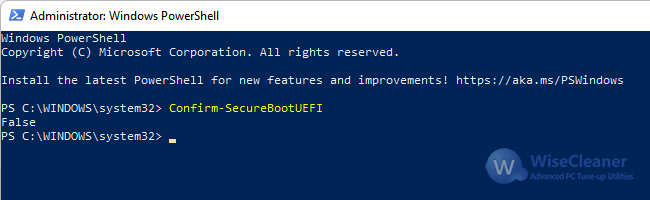
This command will return one of the following 3 results.
• True, means the secure boot has been enabled.
• False, means that the secure boot is supported but it has been disabled. We can enable it in the motherboard settings.
• Cmdlet not supported on this platform, means that the secure boot function is not detected.
This command is used to detect whether the partition style of the disk is GPT or MBR. In fact, with the DirectX Diagnostic Tool report, this step can be omitted. The combination of boot type and disk partition style is fixed, namely UEFI+GPT, Legacy(BIOS)+MBR.
(1) Press Win+s to open the Search window.
(2) Type cmd, and then select Run as Administrator.
(3) Type the command diskpart and press Enter.
(4) Type the command list disk and press Enter.
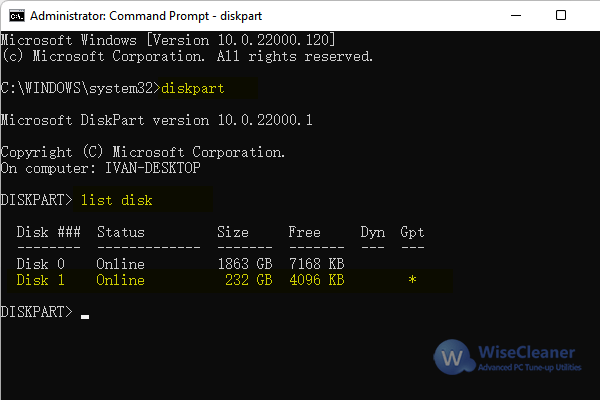
Then we will see all mounted disks on the computer. Let us focus on the last column Gpt. If a disk partition style is GPT, the Gpt column will have an asterisk (display *). If a disk partition style is MBR, the Gpt column will be blank.
Windows 10 has built-in a utility called MBR2GPT, which allows converting disk partition style without deleting files. Please click here to learn How to convert disk partition style from MBR to GPT without data loss.
Through the above steps, we have basically completed the check, and roughly understand whether the current computer meets the minimum requirements for installing or upgrading to Windows 11.
Finally, there are two things to note:
1. If the CPU is not in the support list, don't worry, Microsoft has made it clear that it will continue to try to support more CPU models.
2. If the boot type is BIOS, please do not try to convert the system drive to GPT, which will cause the current system to fail to boot.
Additional Related Articles
wisecleaner uses cookies to improve content and ensure you get the best experience on our website. Continue to browse our website agreeing to our privacy policy.
I Accept


