Whether you want to save an image or need help for an issue, screenshots are often the best way. Taking screenshots on PC is easier than you think, I will show you 2 simple methods on how to capture a screenshot on windows 10.
Method 1: Print Screen
Capture the entire screen and automatically save the screenshot
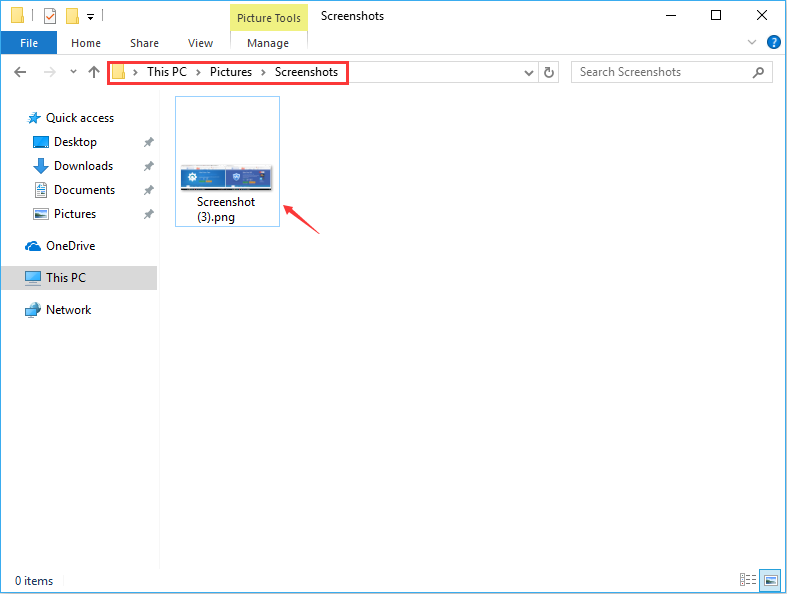
Press “Windows logo key + Print Screen”, and then you will see the screenshot appears as a file in a folder named “Screenshot”.
Take a screenshot of only one window
Press “Alt + Print Screen”, a screenshot of your currently active window will be copied. And then paste the screenshot.

Take a screenshot of part of your screen
Press “Windows + Shift + S”, then click and drag your mouse on your screen to select the part you want to capture.

Method 2: Snipping Tool
Select the start button and type “snipping tool”, then select it. Choose the type of the snip you want, select “mode”, after that you can choose Free-form, Rectangular, Window, or Full-screen Snip.
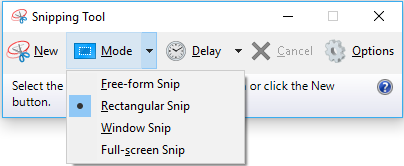
Free-form Snip: This method allows you to draw a shape around your selection by using a mouse.
Rectangular snip: Select the area of which you need to capture the screenshot
Window-snip: Enable you to capture the screenshot of the active window only.
Full-screen Snip: Capture the screenshot of the full screen.
If you want to take a new screenshot using the same mode you used last, and select “New”.
Do you have any other methods on how to take screenshot on windows 10? Welcome to leave a comment below. Thanks.

