WiseCleaner Think Tank
Encounter difficult computer problems?
All about maintenance and optimization of your Windows System.
Feb 6, 2024
In a local area network, a computer name is one of the ways to uniquely identify each computer. If two computers have the same name, it can cause network conflicts and communication problems. By renaming computers, you ensure that each computer is uniquely identified on the network. Renaming a computer enhances its personalized appeal and makes it instantly recognizable among the many technical devices.
This article will tell you how to use the Settings app, Control Panel, PowerShell, and Nearby Sharing to rename your PC. If you're interested, keep reading.
You can quickly rename your computer through the Settings app. The specific steps are as follows.
You can press Win + I to open the Settings. Or click Windows Start and type Settings in the search box, find the matched item, and open it.
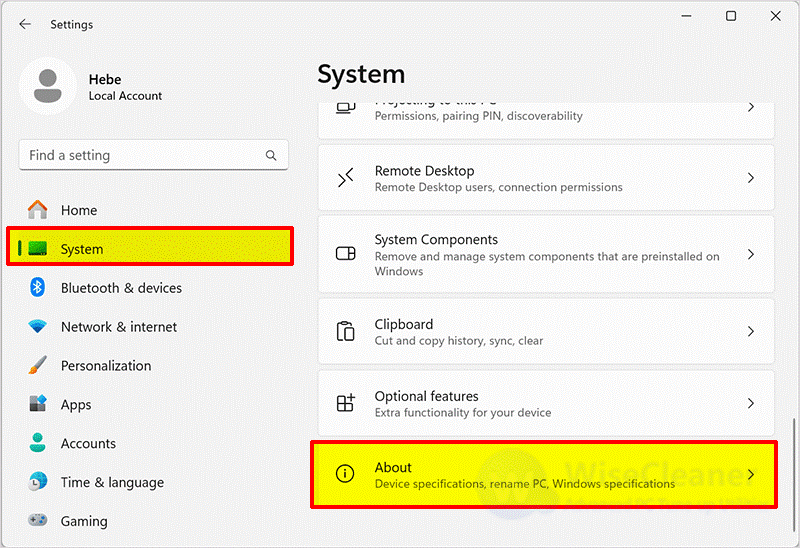
In the settings, click on System in the left pane. Select About in the right column.
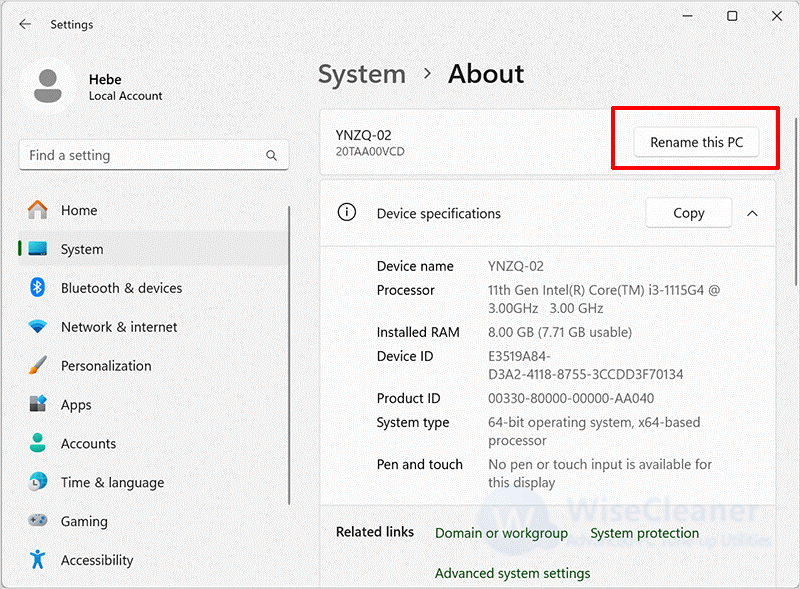
Next, click the “Rename this PC” button.
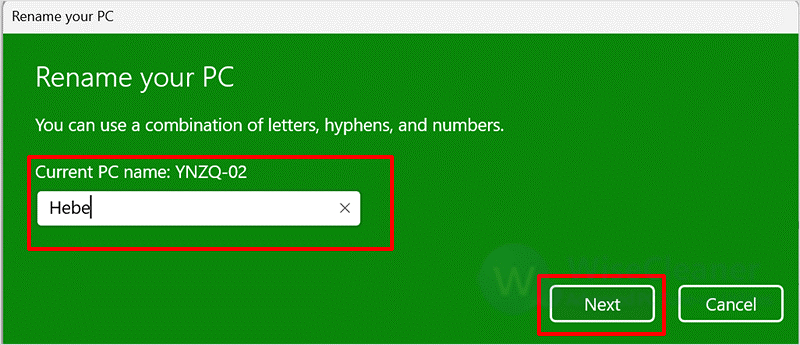
Finally, customize the name of your computer, making sure there are no spaces between letters and preferably less than 15 characters. After setting, click the Next button, and then restart the computer.
In addition to using settings, you can also rename the computer through the Control Panel. The steps are as follows.
Click on Windows Start and type Control Panel in the search box, find the matched item, and open it.
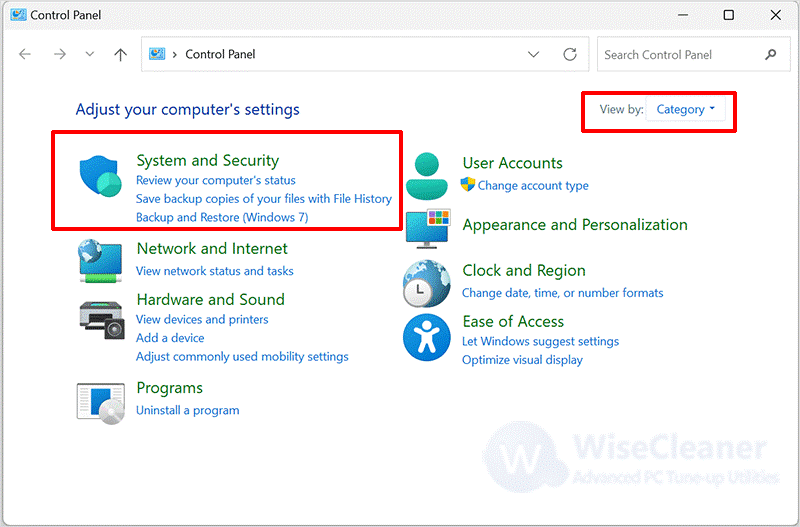
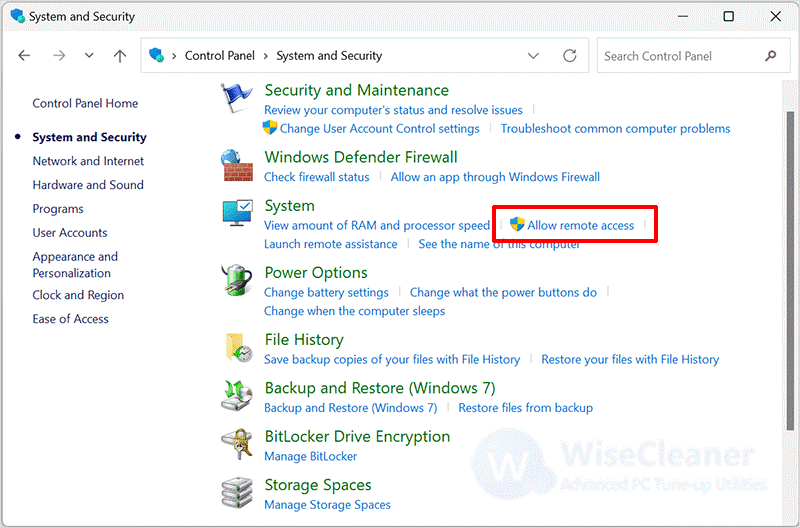
Click on the drop-down menu next to View by and select Category. Then find and click on System and Security in the list.
Then, under the “System” section, click the “Allow remote access” option.
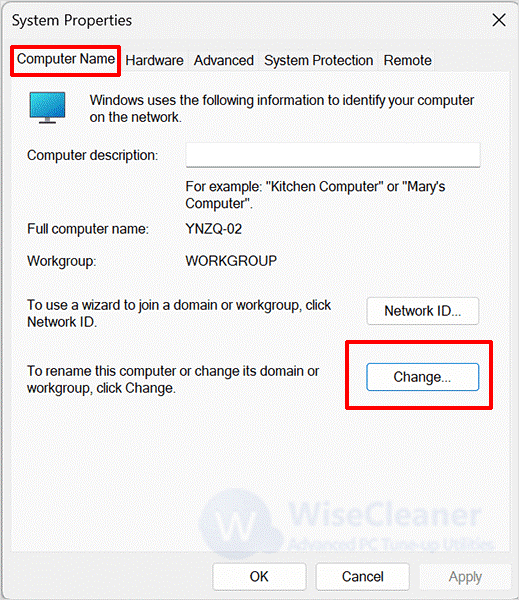
Click on the Computer Name tab, and then select the Change button.
Enter the name of the computer in the text box and click OK.
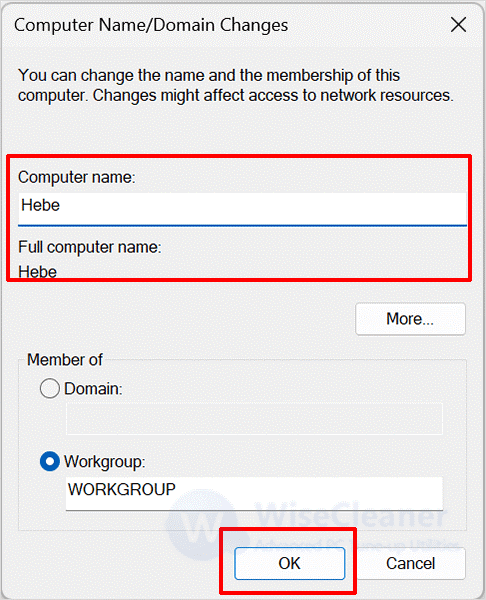
Finally, close all windows and restart your computer for the changes to take effect.
If you are familiar with using command prompts, you can also use Command Prompt to perform tasks. The specific steps are as follows.
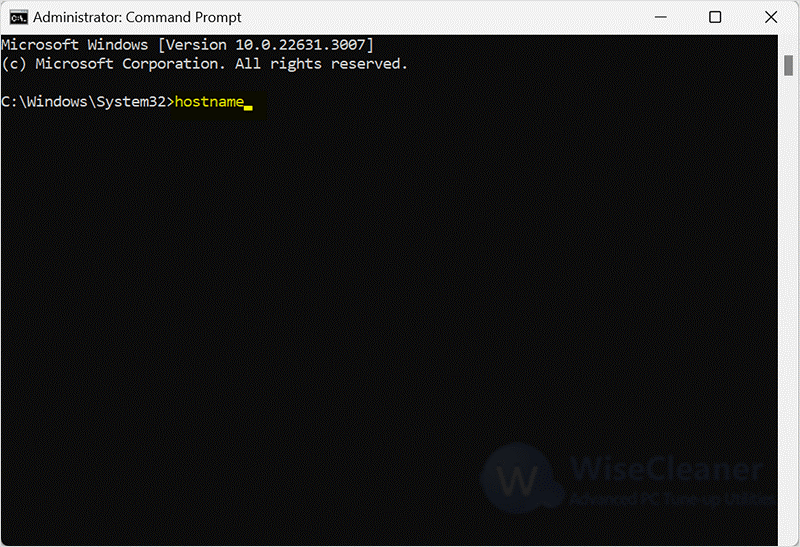
Click on Windows Start and type Command Prompt in the search box. Find the top result and run it as administrator.
Type the following command and press Enter.
Hostname
Next, type the following command and hit Enter.
WMIC computersystem where caption='CURRENT-PC-NAME' rename 'NEWPCNAME'
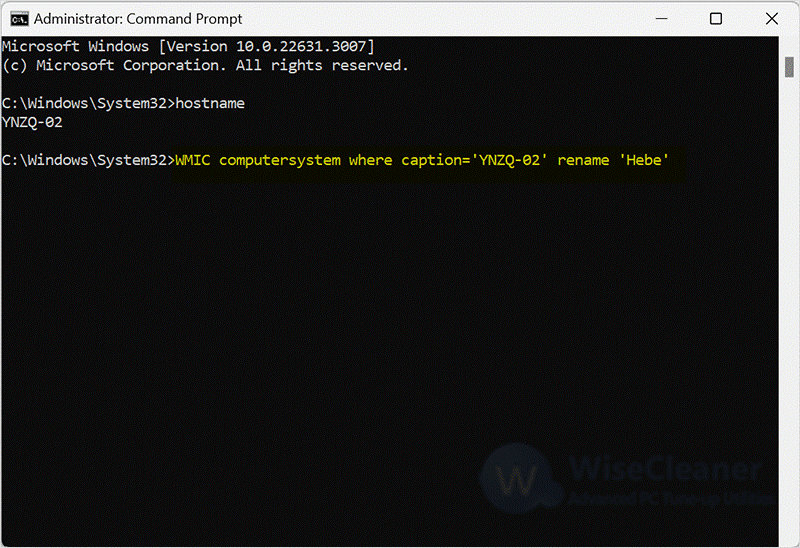
Notice: Please replace CURRENT-PC-NAME with the name of the current computer, and then replace NEWPCNAME with the name you want to set.
Finally, restart your computer to allow the changes to take effect.
In addition to the above three methods, you can also rename the PC through the Nearby sharing option. The specific steps are as follows.
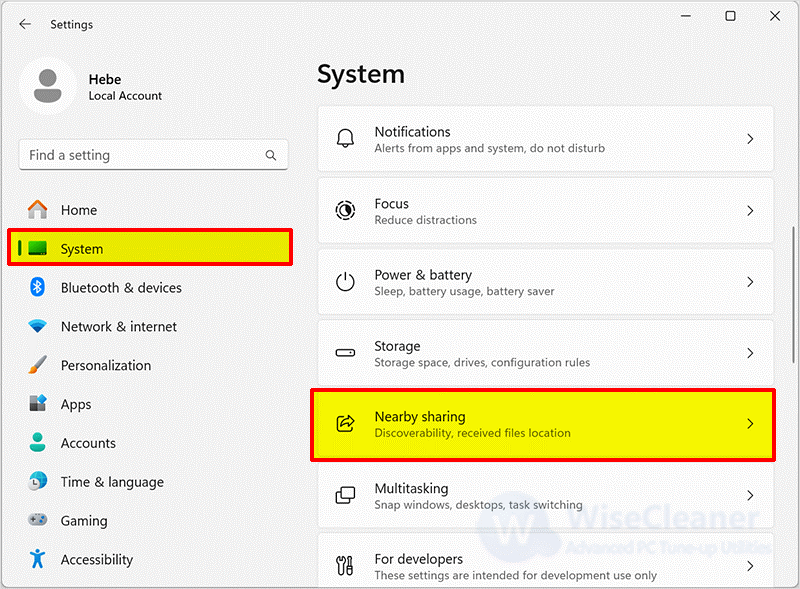
Click on Windows Start and type settings in the search box. Find the matched item and open it.
Select the System in the left column, and click on Nearby sharing in the right pane.
Click the “Rename” button next to the “Your device is discoverable as PC name”.
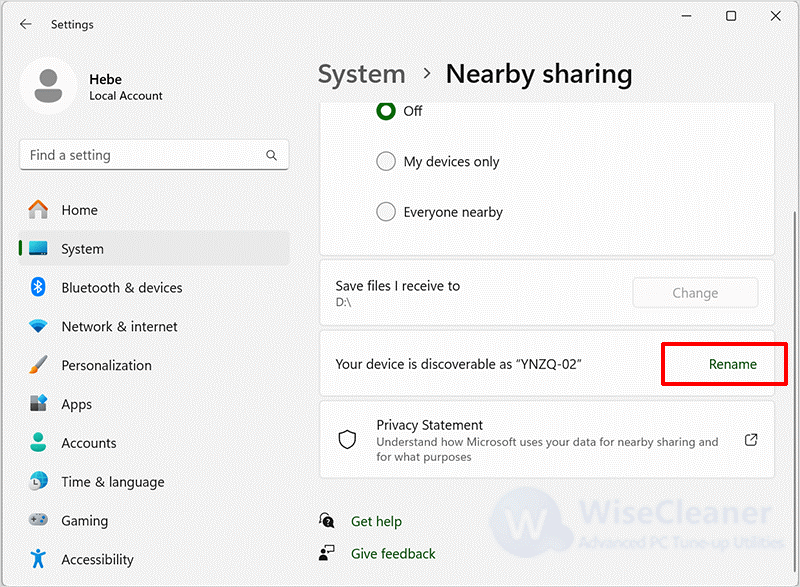
Next, click on the Rename this PC button, enter your customized PC name, and click Next.

Finally, restart your computer to allow the changes to take effect.
In general, renaming a computer improves system identification, and manageability, avoids conflicts, and enhances system security. And if you have other computer-related questions, you can visit WiseCleaner to learn more
wisecleaner uses cookies to improve content and ensure you get the best experience on our website. Continue to browse our website agreeing to our privacy policy.
I Accept


