WiseCleaner Think Tank
Encounter difficult computer problems?
All about maintenance and optimization of your Windows System.
Dec 30, 2022
The Remote Desktop feature in Windows 11 can connect and access computers through remote access tools. Afterward, you can perform simple tasks such as checking downloads, app installations and even copying files from your computer.
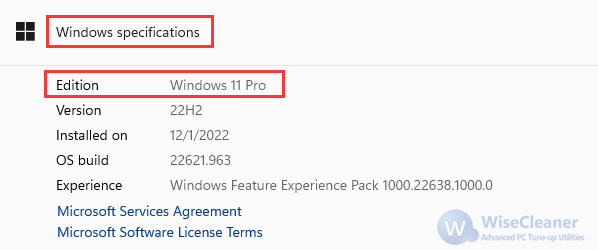
To use the remote desktop feature, first, you need to make sure you have Windows 11 Pro. You can check this through these steps: click Start menu, and then open Settings. Under System, select About, and under Windows Specifications, look for Edition. If it is displayed as Windows 11 pro, it meets the conditions for using a remote desktop.
Here are the steps to enable Remote Desktop:
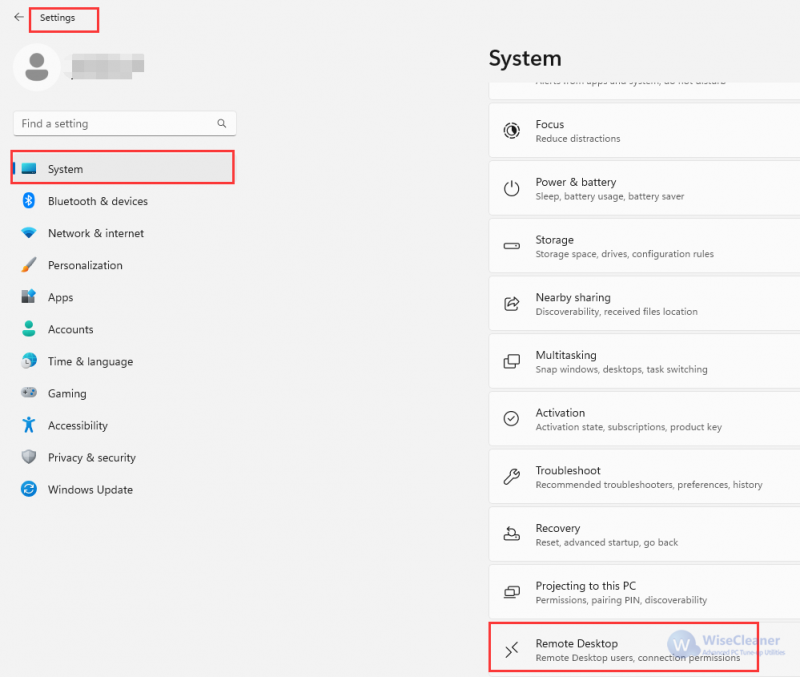
Click the "Start" button and select "Settings". Or, you can press Win + I on the keyboard to open the Settings window quickly.
Select "System" on the sidebar, and click "Remote Desktop" from the right. Then click the "Confirm" button in the blue window that pops up.
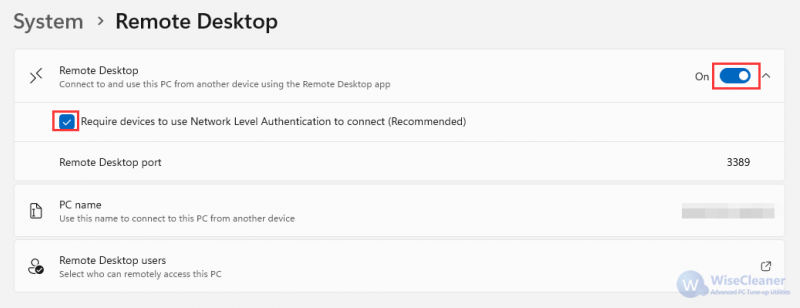
Pull down "Remote Desktop" and select the "Require devices to use Network Level Authentication to connect (recommended)" checkbox. Then click the "Confirm" button in the blue window that pops up.
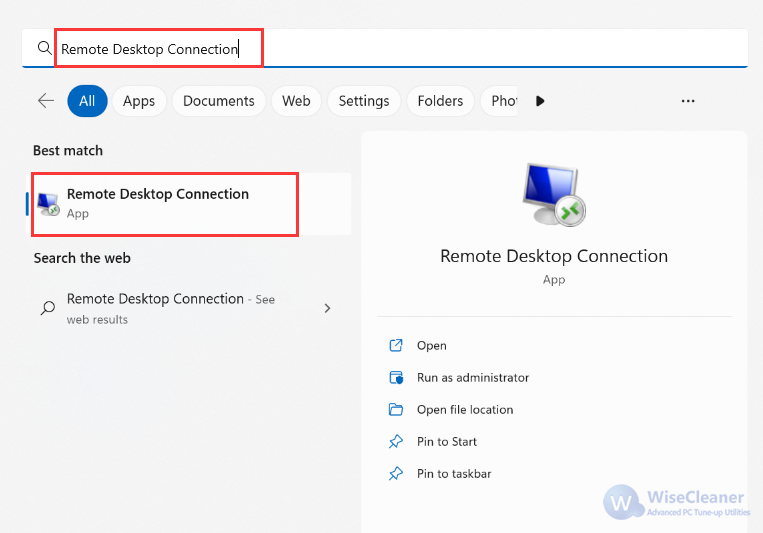
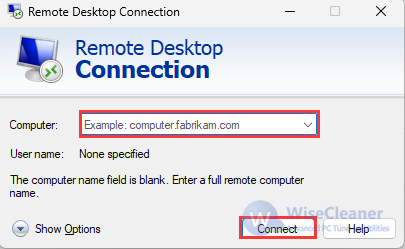
Use the shortcut key "Win+S", enter and select "Remote Desktop connection" in the search box, then enter the PC name (or IP address) in the blank box of the "Computer" column, and click "Connect".
PC name can be viewed in Start menu > Settings > System > Remote Desktop > PC name.

The above is how to Remote Desktop in Windows 11, I hope this will help you. If you have other computer problems, welcome to visit WiseCleaner.
Additional Related Articles
wisecleaner uses cookies to improve content and ensure you get the best experience on our website. Continue to browse our website agreeing to our privacy policy.
I Accept


